
You’re standing outside your flood-damaged home, keys in hand, wanting nothing more than to walk through that door and start cleaning up. But here’s what most people don’t realize: the all-clear from emergency management is just step one. Your house might look fine from the curb while hiding live electrical wires in standing water, a cracked foundation ready to shift, or contaminated surfaces that’ll make your family sick. This guide walks you through the exact safety checks and professional inspections required before reentry, the warning signs that mean get out now, and the timeline that separates salvageable property from total loss.
Critical Safety Criteria Before Home Reentry After Flooding
The biggest thing determining when you can go home? Your local emergency management folks have to give you the all-clear. That official announcement has to happen before you even think about approaching your property. But here’s the thing. Even after you get that go-ahead, you still need several other conditions to line up. Head back too early and you’re risking electrocution, your house collapsing on you, or exposure to water that’s basically a toxic soup.
You’ve got to confirm every single one of these before stepping inside:
-
Official all-clear announcement from emergency management authorities – Don’t guess. Wait for actual confirmation through emergency alerts, news, or direct notification that your specific area is no longer under evacuation orders.
-
Complete floodwater recession from property – Zero standing water around your foundation, in your yard, or touching any part of your home’s exterior.
-
No downed power lines near or touching structures – Check from a distance for any lines on the ground, hanging low, or touching your house, garage, fencing.
-
No visible gas line damage or gas odor – Stand outside and look for broken pipes. Smell for that rotten egg odor that means gas is leaking.
-
Absence of structural collapse warnings or colored inspection tape – Look for posted signs, colored tags, caution tape that means inspectors have marked your building unsafe.
-
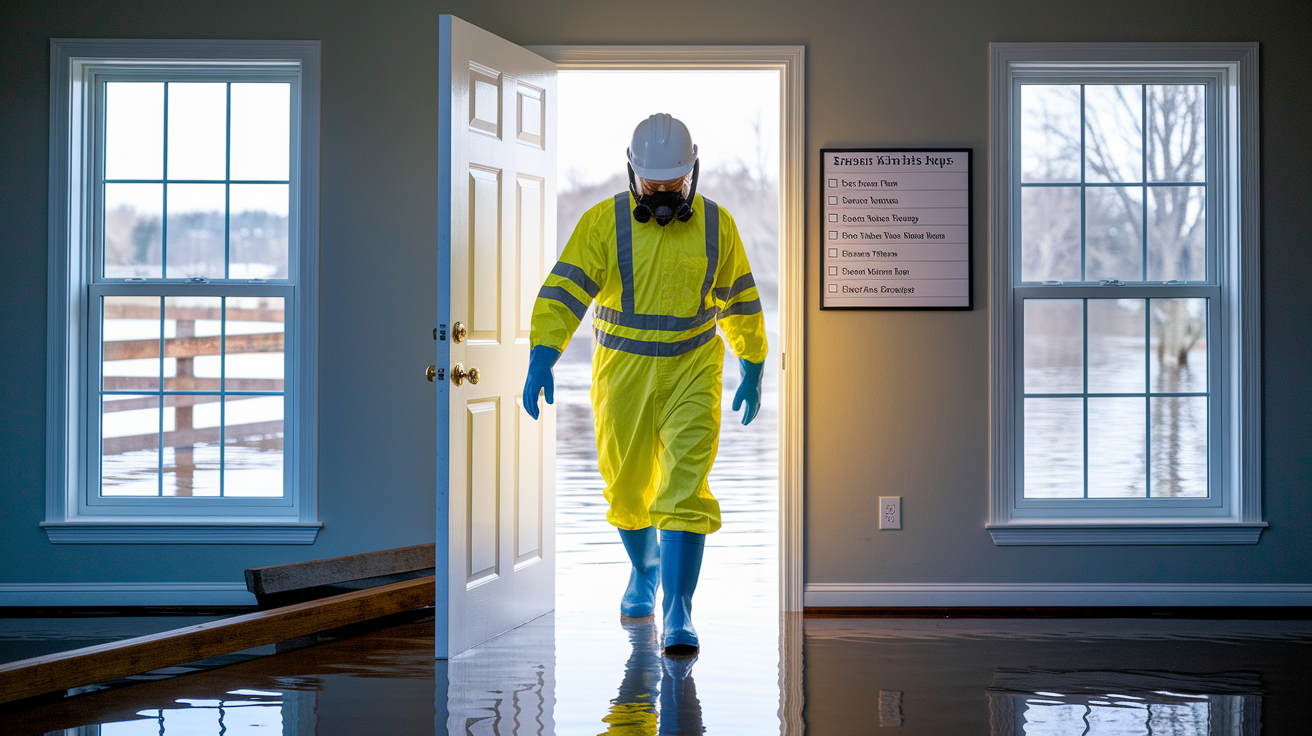
Daylight hours for initial inspection – Don’t go in at night the first time. You need full visibility to spot holes in floors, ceiling damage, wildlife.
-
Professional clearance if major damage visible from exterior – Foundation cracks, roof damage, missing walls? Wait for a building inspector or structural engineer before entering.
You might wait days. You might wait weeks. Depends on how bad the flooding was and how damaged the infrastructure is. I know waiting feels impossible, but people die from electrocution when they step into homes with submerged electrical systems. People get crushed when structures collapse. Keep kids and pets away during your first inspection. Leave them with relatives or friends until you’ve verified the home is actually safe.
Mandatory Professional Inspections Before Flood-Damaged Home Entry
Foundation cracks, walls that lean or bow, sagging rooflines, exposed beams, separation between walls and ceilings. Any of these mean you need professional clearance before going in. Enter a structurally compromised building and you’re gambling with collapse, floor failure, getting trapped under debris. Even if everything looks stable from outside, water weakens load-bearing parts in ways you can’t see without training.
Different pros handle different systems because each requires specialized knowledge and equipment. A structural engineer checks whether your building frame, foundation, and walls can safely hold weight. An electrician tests for short circuits, waterlogged wiring, panel damage. Gas company techs check for leaks and pressure problems. HVAC specialists inspect heating and cooling systems for water damage and contamination. A building inspector coordinates the overall safety assessment and figures out when you need multiple specialists.
| Damage Type | Required Professional | Inspection Focus |
|---|---|---|
| Foundation cracks or shifting | Structural engineer | Load-bearing capacity, settlement patterns, wall stability |
| Electrical system exposure to water | Qualified electrician | Wiring integrity, panel safety, grounding system, appliance circuits |
| Gas line damage or odor | Gas company technician | Leak detection, pressure testing, valve function, safe reconnection |
| HVAC water damage | HVAC specialist | Ductwork contamination, mechanical components, air quality systems |
| Overall building compromise | Building inspector | Code compliance, occupancy safety, coordination of specialist inspections |
Structural Damage Warning Signs That Require Immediate Evacuation
Cosmetic damage looks awful but doesn’t threaten whether your building stays standing. Hairline cracks in paint, water stains, damaged trim. Those are cosmetic. Structural failure means the building’s lost some ability to hold itself up. Could collapse. Cracks running through concrete or masonry, floors that slope or feel soft when you walk on them, walls that lean or bow outward. Water-saturated materials can’t bear the same load because water adds weight while simultaneously weakening wood, drywall, insulation. A ceiling designed to support its own dry weight can’t handle the extra pounds of trapped floodwater.
See any of these during your inspection? Leave immediately and call for professional assessment.
Foundation cracks wider than a quarter inch or cracks forming stair-step patterns in concrete blocks or brick. Sagging or bowing ceilings that hang lower than normal or show visible curves when you look along their length. Sloping or soft floors that feel bouncy or visibly tilt toward one side. Cracked or leaning walls that don’t sit straight or show separation from adjacent walls. Exposed or damaged support beams where you can see structural wood or steel that was hidden behind finished surfaces. Stair-step cracks in masonry that zigzag through mortar joints. Doors and windows that don’t fit their frames anymore because the building shifted or settled unevenly. Separation between walls and ceiling or floor where gaps have opened at the joints.
If you discover these while inside, exit through the safest route without running. Running could trigger collapse. Once outside, mark the entrance to warn others. Contact your local building department or emergency services to report the hazard.
Contamination and Health Hazards from Flood Exposure

Floodwater isn’t just dirty. It’s sewage from overwhelmed treatment plants and backed-up drains. Agricultural chemicals including pesticides and fertilizers. Industrial pollutants from factories and storage facilities. Oil and gasoline from vehicles and tanks. Bacteria from decomposing animals and organic matter. This contamination creates three exposure risks. Skin contact causes rashes and infections. Ingestion leads to gastrointestinal illness and serious waterborne diseases. Inhalation of mist or vapors triggers respiratory problems.
Health consequences? Bacterial infections from E. coli and other sewage-borne pathogens. Hepatitis A from fecal contamination. Tetanus from wounds exposed to contaminated water or debris. Respiratory infections from mold spores and bacteria in the air. Skin infections from prolonged contact with contaminated surfaces.
You need to throw out all food that contacted floodwater. Yes, including unopened packages and canned goods. Contamination can seep through packaging seals. Toss all beverages, prescription medications, over-the-counter drugs, vitamins, supplements exposed to flooding. Discard water-absorbent items that can’t be effectively disinfected. Mattresses and box springs. Upholstered furniture. Carpeting and padding. Cosmetics and toiletries. Stuffed animals and fabric toys. Baby toys including teething items. Assume tap water is unsafe to drink, cook with, or use for brushing teeth unless your water authority explicitly announces testing confirms safety. Use stored bottled water or boil tap water for one full minute. Don’t flush toilets until sewage lines have been inspected and confirmed intact. Broken pipes can back sewage into your home. Professional sanitization matters because household cleaning products can’t eliminate all the pathogens and chemicals in floodwater.
Timeline for Mold Development After Water Damage
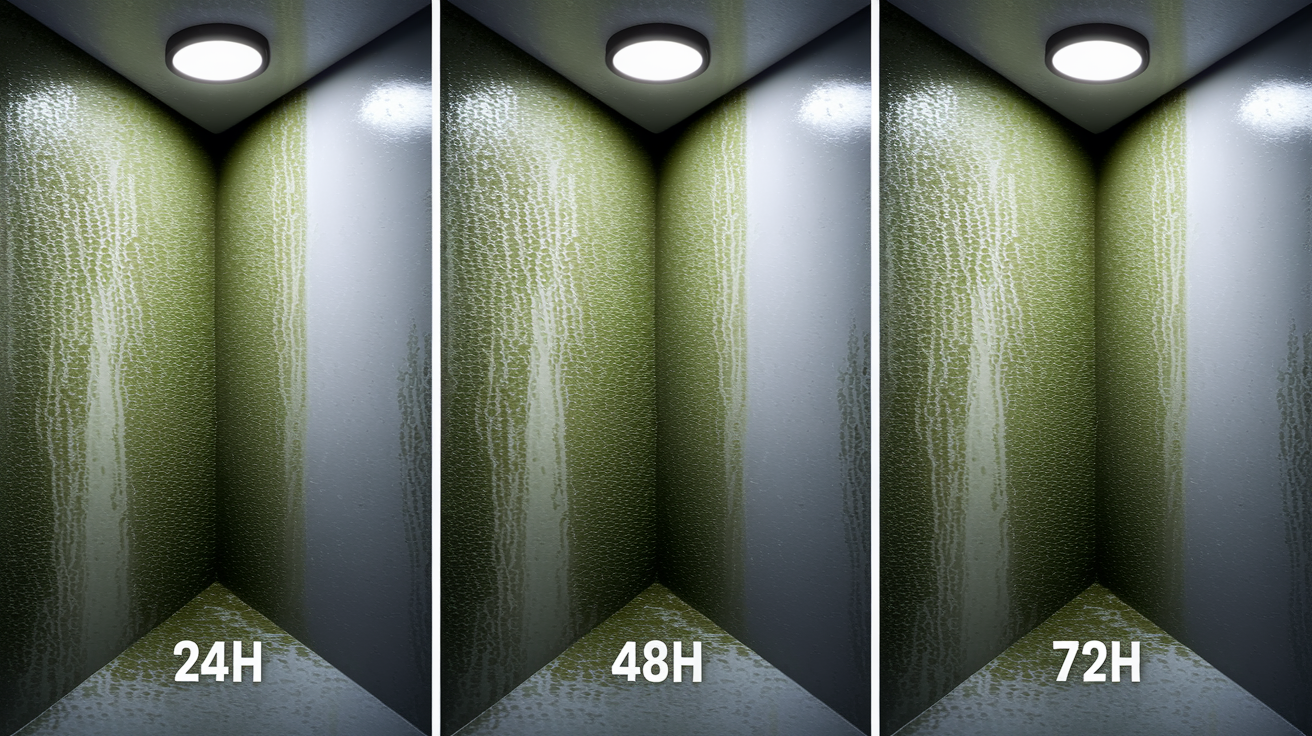
Mold spores start germinating within 24 to 48 hours after materials get wet. During this window, you’ve got to begin drying to prevent colonies from establishing. Once 48 hours pass with materials staying wet, mold growth becomes nearly certain in porous surfaces.
Porous materials develop mold fastest because they absorb and hold moisture. Drywall starts growing mold within 24 hours of saturation. Insulation behind walls becomes a mold reservoir within 48 hours. Ceiling tiles, carpet padding, upholstered furniture, paper products all support rapid colonization. Non-porous surfaces like metal, glass, hard plastic resist mold but can harbor it in dust and debris that settles on them.
High humidity above 60 percent, temperatures between 60 and 80 degrees, poor air circulation. All accelerate mold development. Closed-up homes with no ventilation create ideal conditions for explosive mold growth. Basements and areas with standing water face the highest risk because moisture stays trapped longer.
Health risks from mold exposure during inspection include allergic reactions with sneezing and watery eyes, asthma attacks in sensitive people, respiratory irritation from breathing spores. In severe cases, lung infections from prolonged exposure to high mold concentrations. Materials can be dried and saved if you begin the process within 24 to 48 hours and achieve complete dryness within 72 hours total. After that window closes, porous materials need to be removed. Mold has likely established too deeply for surface cleaning. Proper basement water removal prevents additional structural damage. Follow the gradual pumping rule. Remove only one-third of the water volume per day to prevent outside soil pressure from collapsing basement walls inward and buckling floors upward.
Step-by-Step Safe Reentry Procedure for Flooded Homes
Follow these steps in exact order for maximum safety. Skip ahead or change the sequence and you increase your risk of injury or exposure.
Protective equipment prevents injuries and exposure that standard clothing can’t block. Rubber boots keep your feet dry and protect against puncture wounds from hidden nails or glass. Rubber gloves create a barrier against bacteria and chemicals in floodwater residue. Respirator dust masks filter out mold spores, dried sewage particles, airborne contaminants. Steel-toed shoes protect your feet from falling debris. Safety goggles shield your eyes from splashes and particles when inspecting overhead damage. A hard hat is essential for ceiling inspection because water-saturated materials can collapse without warning.
Complete these steps in order:
-
Confirm official clearance received – Verify through emergency management channels that authorities issued an all-clear for your specific neighborhood or street address.
-
Gather protective equipment – Assemble rubber boots, rubber gloves, respirator mask, hard hat, battery-powered flashlight, camera or phone for documentation before leaving for your property.
-
Notify someone of entry time and expected return – Tell a friend or family member when you’re entering and when you plan to check in. Someone needs to know to call for help if you don’t report back.
-
Put on protective clothing before approaching property – Wear your boots, gloves, respirator before you get close to potential contamination zones.
-
Conduct full exterior inspection – Walk completely around the building looking for foundation cracks, leaning walls, roof damage, downed power lines, broken gas meter or pipes, debris blocking exits.
-
Test for gas odor from safe distance – Stand upwind from the building. Check for the rotten egg smell of natural gas before approaching closer.
-
Open door and windows for ventilation before entering – If safe to do so, open the front door and any accessible windows from outside to begin air circulation and release trapped gas or fumes.
-
Turn off utilities at main shutoffs if not already done – Locate your electrical panel, gas shutoff valve, water main. Turn them to the off position if you can reach them safely.
-
Enter during daylight with battery flashlight only – Step inside only during daytime, using a battery-powered flashlight to see into dark areas. Never candles, matches, lighters that could ignite gas.
-
Photograph all damage room by room for insurance – Take wide shots showing overall room condition, then close-ups of specific damage to walls, floors, ceilings, belongings before touching anything.
-
Tap floors with stick to alert wildlife – Use a long stick or broom handle to tap loudly on floors, into corners, against closed doors to give snakes, rodents, insects time to move away.
-
Assess structural integrity indicators while wearing hard hat – Look up at ceilings for sagging. Check floors for soft spots by stepping carefully. Examine walls for cracks or separation.
-
Use long stick from safe distance if ceiling inspection needed – If a ceiling sags, stand to the side and gently push upward with a long pole to test stability. Never position yourself directly underneath.
-
Exit and report findings to authorities if hazards discovered – If you find gas leaks, major structural damage, other serious hazards, leave immediately and contact emergency services or your local building department.
Don’t rush through this inspection. Be willing to leave immediately if you smell gas, hear hissing, see new cracks forming, or notice any change in structural sounds like creaking or groaning that wasn’t present moments before.
Comprehensive Water Removal and Structural Drying Protocol

Standing water has to be fully removed before you can occupy your home. It keeps damaging building materials, supports mold growth, creates slip and electrical hazards. Basement flooding requires different handling than above-ground water because the soil outside your foundation exerts tremendous pressure inward when saturated.
Rapid basement pumping can cause structural collapse. Your basement walls were designed assuming balanced pressure from both sides. When flooded, water inside pushes outward while waterlogged soil outside pushes inward, creating equilibrium. Pump water out quickly and you remove the interior pressure while exterior soil pressure stays high. This causes walls to bow inward or collapse and floors to buckle upward. The physics of basement water pressure means rushing creates more damage than the flood itself.
Follow these proper water removal and drying procedures:
One-third daily water removal rule for flooded basements – If your basement holds six feet of water, pump down two feet on day one, another two feet on day two, final two feet on day three. This gives surrounding soil time to drain naturally and equalize pressure.
Wait for surrounding soil to dry before pumping – If heavy rain continues or the ground outside stays saturated and spongy, delay pumping even if interior water is present. The risk of wall collapse is too high.
Ventilation strategies – Open all windows and doors when weather permits to create cross-breezes. Position fans to blow air across wet surfaces and out windows. Run dehumidifiers continuously in enclosed spaces to pull moisture from the air.
Moisture meter usage to verify complete dryness – Purchase or rent a moisture meter from a hardware store. Test wood framing, drywall, subflooring. Wait until readings drop below 15 percent moisture content before considering materials dry.
Timeline expectations for different materials – Drywall takes 3 to 5 days to dry completely with good airflow. Wood framing requires 5 to 10 days. Subfloors need 7 to 14 days. Insulation often requires removal because it holds moisture for weeks.
Foundation wall inspection during gradual pumping process – After removing each third of basement water, examine walls for new cracks, bowing, leaning before continuing to pump.
Temporary floor bridging techniques using plywood panels – If a floor section sags but measures less than 3 feet across, lay thick plywood sheets extending 8 to 12 inches beyond the damaged area on each side to distribute weight.
Call restoration professionals instead of attempting DIY drying if water depth exceeded 3 feet anywhere in the home, if sewage backup is present, if mold growth already covers more than 10 square feet, or if you lack access to industrial fans and dehumidifiers. Materials are beyond saving when they stay wet for more than 72 hours despite drying attempts, when musty odors develop indicating established mold colonies, or when they show warping, delamination, disintegration.
The basement stays off-limits even after water removal until moisture meter readings confirm all materials dried below 15 percent moisture content. Safe occupation requires complete dryness to prevent mold-related health problems and ensure structural materials have regained full strength.
Utility System Restoration and Safety Testing After Flooding
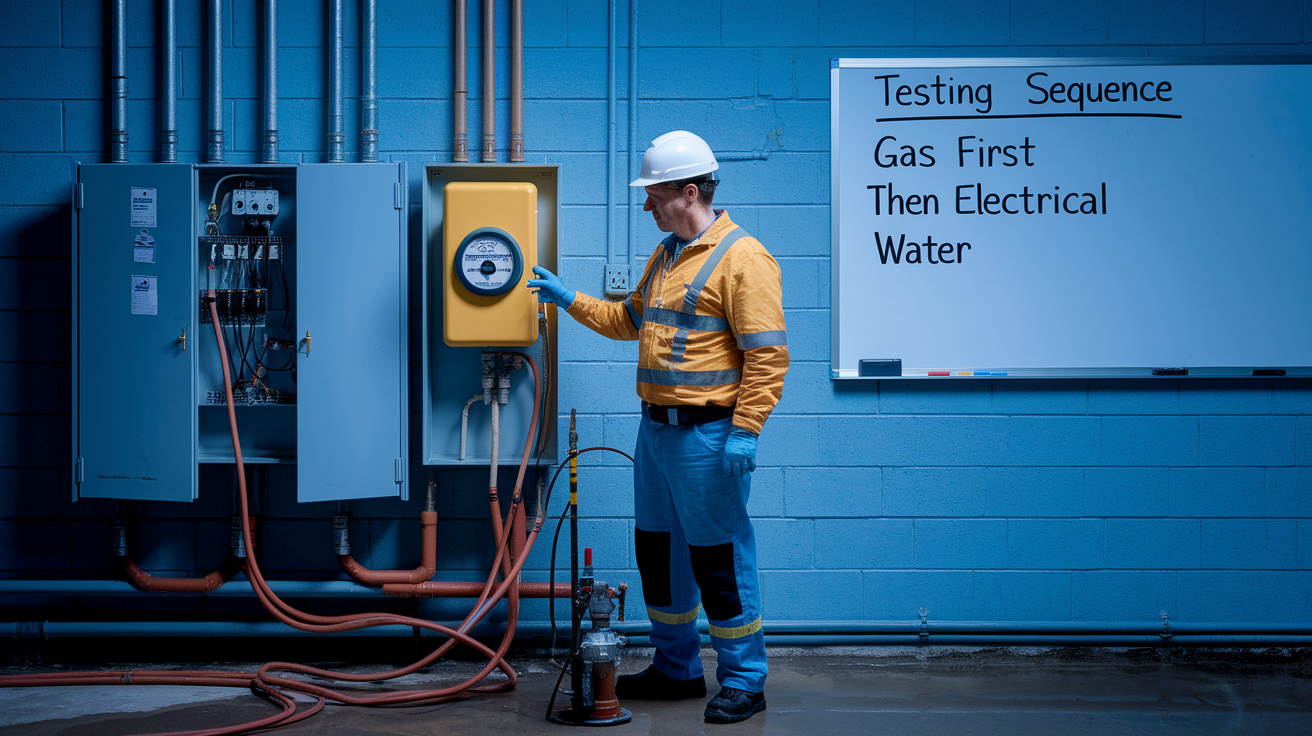
Utilities can’t be restored simultaneously because each system presents distinct hazards requiring sequential evaluation. The safety-based restoration sequence begins with gas systems because leaks create explosion risk, then electrical systems because water and electricity cause electrocution, then water supply because contamination affects health, followed by sewage systems, finally HVAC equipment.
| Utility System | Professional Required? | Testing Before Use | Typical Timeline |
|---|---|---|---|
| Electrical system | Yes, Licensed electrician | Insulation resistance test, panel inspection, ground fault testing | 1 to 3 days after water removal |
| Natural gas | Yes, Gas company technician | Pressure test, leak detection, valve inspection | Same day if reported immediately |
| Propane | Yes, Propane supplier | Tank inspection, line pressure test, regulator check | 1 to 2 days after scheduling |
| Water supply | Sometimes, Well systems require testing lab | Bacterial testing, chemical analysis for wells | 3 to 5 days for test results |
| Sewage/septic | Yes, Licensed septic contractor | Tank pumping, drain field evaluation, pipe camera inspection | 3 to 7 days depending on contractor availability |
| HVAC system | Yes, HVAC specialist | Blower motor test, ductwork inspection, refrigerant check | 1 to 2 days after power restoration |
Before approaching your home, conduct exterior electrical hazard assessment by looking for downed power lines lying on the ground, hanging from poles, or touching your roof, fence, trees. Stay at least 35 feet away from any downed line. Electricity can arc through the air and travel through wet ground. Call 911 immediately if lines are down near your property. Proper circuit breaker shutdown requires opening the main breaker at the top of your electrical panel before individual circuit breakers, creating complete disconnect from the grid. If standing water remains in your basement or near your electrical panel, don’t attempt to shut off power yourself. Call your utility company to disconnect service at the meter. Use battery-powered flashlights only during your inspection. Never light candles, oil lamps, use matches or lighters because natural gas may have accumulated inside. Appliances that were submerged or splashed with floodwater require professional inspection before use. Water inside motors, controls, or insulation creates short circuit and fire risks.
Gas hazard identification starts with a smell test from a safe distance upwind of your home. Natural gas smells like rotten eggs because of an added chemical called mercaptan. Listen for hissing or whistling sounds near the gas meter or pipes running along exterior walls. If you detect gas odor or sounds, follow this evacuation protocol. Don’t enter the building. Don’t touch light switches or use phones while standing near the structure. Leave the area immediately on foot without starting vehicles. If you can open a window quickly while holding your breath, do so to ventilate, then exit. Call the gas company emergency number from a neighbor’s phone or from down the street, at least 100 feet from your home. Call the fire department if the gas smell is strong or you see or hear gas escaping. Only gas company technicians should restore natural gas service after shutoff. They have the tools and training to pressure test the system and verify safe operation. Propane systems require similar professional attention. Turn off all propane tank valves by rotating them clockwise until they stop, then contact your propane supplier to schedule a system inspection before reconnecting service. Carbon monoxide risks increase during recovery when people run generators indoors or use camping stoves for heat. Never operate combustion engines or open-flame devices inside your home, garage, or basement.
Water testing requirements differ for wells and municipal systems. If you have well water, collect samples in sterile bottles from your local health department and send them to a certified lab for bacterial testing before drinking or cooking. Municipal water customers should follow announcements from their water utility about boil-water orders or all-clear notifications. Septic system damage requires immediate attention because continued sewage backing up into your home creates severe health hazards. Have a licensed septic contractor pump your tank, inspect the drain field for collapse or saturation, run a camera through pipes to identify cracks or root intrusion. Until repairs are complete, use portable toilets or stay elsewhere.
Debris Removal and Sanitization During Flood Recovery
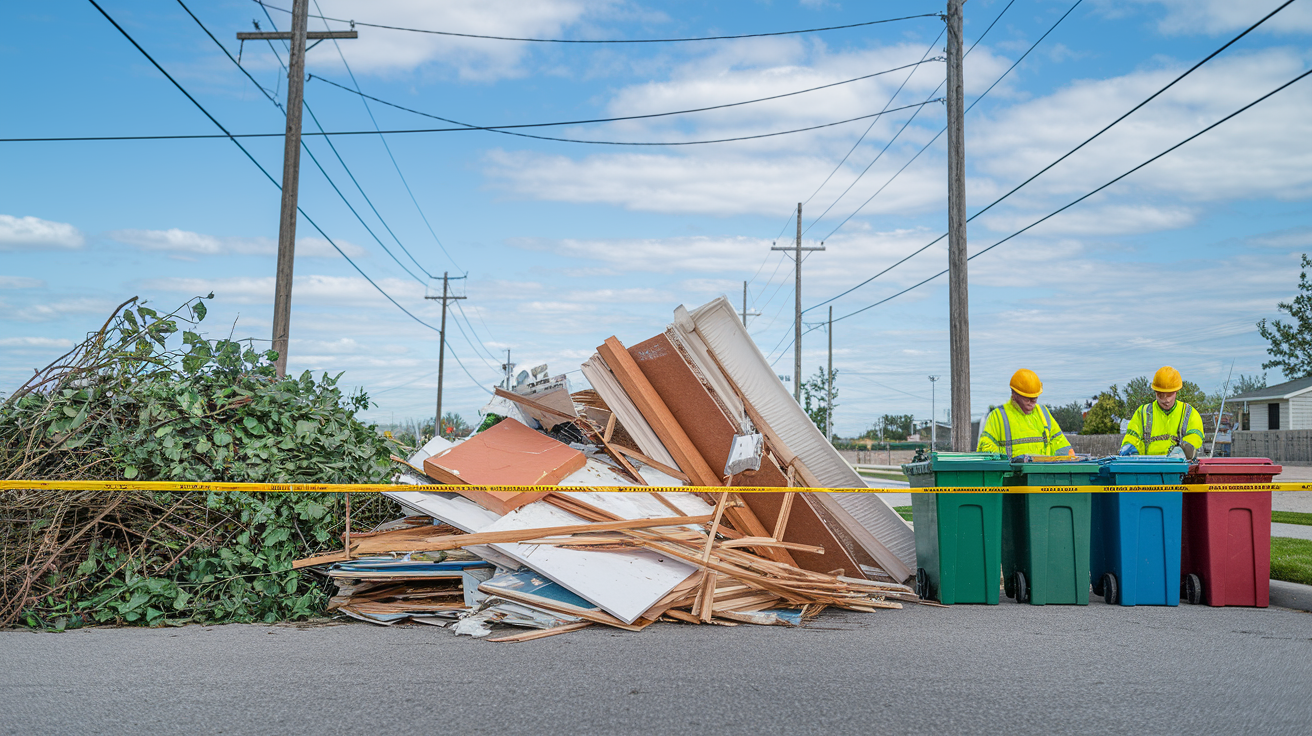
Separate all debris into three categories as you clean. Yard debris including tree limbs, branches, leaves, landscaping materials. Building debris including drywall, insulation, flooring, lumber, damaged fixtures. Regular garbage like ruined food, wet cardboard, contaminated household items. This separation makes municipal pickup more efficient and may be required by your local waste management department.
Physical hazards in flood debris include broken glass from windows and mirrors, nails protruding from lumber and trim, sharp metal edges from damaged gutters and flashing, contaminated needles or medical waste washed from other properties, rodents, snakes, insects hiding in piles. Never handle debris alone. Back injuries from lifting, puncture wounds from hidden sharps, falls from shifting piles all become more dangerous when no one’s present to call for help.
Follow these cleanup safety rules:
Size and weight limits for curbside debris – Cut tree limbs into 4-foot or shorter sections for easier handling and to meet municipal collection requirements. Bundle small branches with twine in bundles weighing 50 pounds or less so workers can lift them safely.
Placement rules – Place debris piles at least 5 feet away from fire hydrants so emergency access stays clear. 3 feet from trees and mailboxes to prevent damage. 10 feet from power lines or other utilities.
Buddy system for heavy lifting – Work with a partner for all debris removal. Use proper lifting technique with legs rather than back. Never attempt to move heavy items like appliances or furniture alone.
Child and pet exclusion from work areas – Keep children and pets completely away from debris piles that contain broken glass, nails, sharp metal, chemical containers, rodent droppings, insects.
Identifying and reporting hazards – Don’t touch downed trees that may have power lines tangled in branches. Leave damaged propane tanks or gas cans for professionals. Report any strong chemical odors to your fire department’s non-emergency line.
Proper disposal separation – Keep the three debris categories in separate piles at the curb because some municipalities collect them on different days or route them to different facilities.
Sanitization after debris removal requires scrubbing all hard surfaces with detergent and water, then applying disinfectant solution mixed according to label directions. Professional cleaning services become necessary when sewage contamination covers large areas, when mold growth exceeds what you can physically reach and clean, or when you have health conditions that make exposure risky. Disinfect salvageable items by washing in hot water with detergent, soaking in bleach solution (1 cup bleach per gallon of water for 10 minutes), then rinsing and air drying completely before returning them to storage or use.
Insurance Documentation Requirements Before Beginning Flood Cleanup

You’ve got to balance documentation needs with emergency mitigation by photographing damage thoroughly before cleanup while still making emergency repairs that prevent additional damage. Insurance adjusters understand you can’t leave broken windows open to rain or keep standing water in your home while waiting days for inspection.
Complete these documentation steps before any cleanup:
-
Room-by-room photographic documentation from multiple angles – Photograph each room from doorway showing overall conditions, then from each corner showing different walls and ceiling areas, creating a complete visual record.
-
Video walkthroughs showing extent of damage – Record a continuous walk through your home while narrating what you see. Date-stamp the video with your phone’s settings to prove timing.
-
Close-ups of specific damaged items and systems – Zoom in on water lines on walls showing flood height. Document serial numbers and model numbers on damaged appliances. Photograph valuable items that were ruined.
-
Exterior damage documentation – Walk around your home’s perimeter photographing foundation cracks, siding damage, roof problems, landscaping destruction.
-
Written inventory of damaged belongings – List each ruined item with purchase date if known, estimated replacement cost, whether you have receipts. Create a spreadsheet or detailed notes.
-
Receipt collection for emergency repairs and temporary housing – Save every receipt for tarps, plywood, pumps, generators, hotel rooms, restaurant meals, any other flood-related expenses.
Contact your insurance company within 24 to 48 hours of returning home to report the claim and ask about their documentation requirements. Allowable emergency repairs include covering broken windows with plywood or tarps, pumping out standing water, removing wet insulation and drywall to prevent mold, tarping damaged roofs. Don’t make permanent repairs, replace major systems, or throw away damaged items until after the adjuster has inspected and photographed, unless they’re creating an immediate health or safety hazard. Keep detailed records of all recovery expenses including receipts, contractor estimates, rental equipment fees, mileage for trips to purchase supplies or meet with adjusters.
Wildlife and Pest Hazards in Flood-Damaged Structures
Flooding drives wildlife into structures because their normal ground-level habitats become submerged. Animals seek dry elevated spaces exactly when you want to reenter your home. Snakes often enter through foundation cracks or sewer pipes seeking refuge from rising water. Rodents including mice and rats climb into attics, wall voids, upper floors. Insects like fire ants form floating colonies that drift until they find dry surfaces to inhabit.
Before entering any room, use the floor and wall tapping technique by striking surfaces firmly with a long stick or broom handle. The noise and vibration alert wildlife to your presence. Gives snakes time to retreat into hiding spots and rodents a chance to move away from your path. Tap along baseboards, into corners, against closed closet doors, on floors before stepping into each space.
Conduct visual inspection before entering rooms by looking from doorways for signs of wildlife including droppings on floors, nests made of shredded insulation or paper, snake skins left behind after shedding, movement in corners or under furniture. If you encounter wildlife during inspection, back away slowly without making sudden movements. Leave the room and close the door. Contact wildlife removal professionals to safely trap and remove animals. Most nuisance wildlife contractors offer emergency flood-related services. Health risks from pest contamination include hantavirus from breathing dust contaminated with rodent droppings, salmonella from surfaces touched by rodents, bite wounds from startled animals, allergic reactions to insect stings. When professional wildlife removal becomes necessary, call immediately if you see multiple animals, if you encounter venomous snakes like cottonmouths or copperheads common in flood zones, if rodent infestation appears extensive with droppings throughout the home, or if you discover animal carcasses that create biohazard exposure.
Final Words
Knowing when is it safe to reenter home after flood starts with getting official clearance from local authorities, then confirming every critical condition is met. Floodwater must be gone, utilities must be safe, and visible damage must be assessed by professionals before you step inside.
Your home might look the same from the outside, but contamination, hidden structural damage, and utility hazards can turn reentry deadly if you rush it.
Wait for the all-clear. Follow the steps in order. Wear the right gear. Take your time.
You’ll get back inside when it’s actually safe, not just when you’re tired of waiting. That patience protects your family from preventable tragedy and sets up a safer, faster recovery.
FAQ
How long does it take for mold to set in after a flood?
Mold sets in 24 to 48 hours after flooding begins. Mold spores start growing as soon as porous materials like drywall, carpet, and insulation stay wet for a full day. You need to start drying within that window to prevent widespread mold contamination.
How long does it take to dry a room after a flood?
A flooded room takes one to four weeks to dry completely, depending on materials, ventilation, and humidity. Concrete and drywall dry slower than hard surfaces. Use fans, dehumidifiers, and open windows to speed the process, and check with a moisture meter before calling it done.
What should you not do after a flood?
After a flood, do not enter your home until authorities give clearance, never use candles or open flames for light, and do not turn on power if standing water remains. Avoid flushing toilets before sewage lines are checked, and never pump basement water faster than one third per day to prevent wall collapse.
What is the return period for flood risk?
A flood return period describes how often a flood of a certain size is statistically expected to occur. A 100 year flood has a 1 percent chance of happening in any given year. This does not mean floods happen exactly every 100 years, just that the annual probability stays consistent.