
You’ve got maybe 30 seconds to grab what matters before you need to be out that door. Most people freeze, scan the room, and waste precious time choosing between stuff that won’t matter if they don’t make it out safely. The truth is, what you take during an apartment evacuation comes down to a simple priority list you memorize now, before panic sets in. This guide walks you through exactly what to grab first, what can wait, and what you need to leave behind so you can move fast when seconds count.
Priority Items for Immediate Apartment Evacuation
When you’ve got seconds to get out, a pre-planned list beats panicked guessing every time. Knowing exactly what to grab, and in what order, keeps you moving instead of freezing up while things get worse. The difference between a clean exit and a dangerous delay? Usually just knowing what matters most.
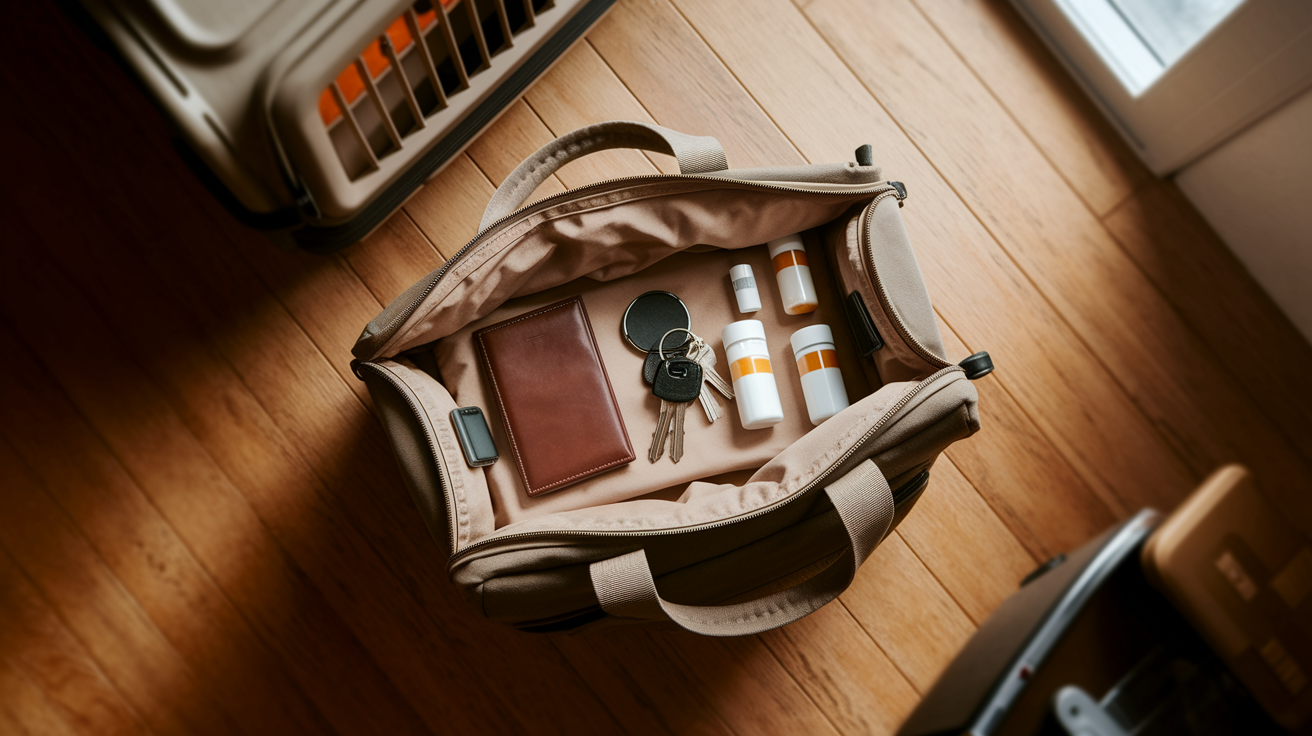
First 10 seconds:
- Wallet with ID and credit cards
- Keys for home and vehicle
- Mobile phone
- Prescription medications in original bottles
- Pets secured in carrier or on leash
- Grab pre-packed go bag if it’s right there
Next 20 seconds:
- Critical documents folder with government ID, passport, birth certificates, insurance papers, and apartment lease
- Medication list with dosages and prescribing doctors
- Eyeglasses or hearing aids with batteries
- Phone charger and portable battery
- Emergency contacts list printed on paper
- Small cash reserve
- Laptop or external hard drive with backed up data
If time permits, under 60 seconds total:
- Family photos or irreplaceable sentimental items
- Pet supplies including 3 day food supply and vaccination records
- Change of clothes and sturdy shoes
- Battery powered or hand crank radio
- Jewelry or small portable valuables
- Water bottles
Your safety comes first. Everything else can be replaced. And don’t use the elevator, no matter how many floors you’re up. Smoke and heat turn elevator shafts into death traps during fires. Know your escape route before the alarm goes off so you’re not figuring out which way to run when the hallway fills with smoke.
Communication tools matter. Charged phones and battery powered radios keep you connected to emergency updates and help you coordinate with family at your meetup spot. If power dies or cell towers overload, a hand crank radio still pulls in broadcast instructions when everything else goes dark.
Essential Personal Belongings and Portable Valuables

Deciding what to take during an emergency hurts, especially when every item holds a memory or represents money you worked hard for. Quick evacuation means accepting that most of your stuff stays behind. That reality sits heavy even as you move toward safety.
| Item Category | Priority Level | Reason |
|---|---|---|
| Laptop/external hard drive | High | Contains work files and backed up photos |
| Family photos/albums | High | Irreplaceable memories and identification purposes |
| Jewelry | Medium | Valuable and holds sentimental meaning |
| Phone charger and portable battery | High | Maintains communication with emergency contacts |
| Small cash reserve and credit cards | High | Covers immediate needs when systems fail |
| Sentimental items that fit in pockets | Medium | Provides emotional comfort during crisis |
| Clothing essentials | Low | Only critical in severe weather conditions |
The 60 second rule means if you can’t locate and grab something in that timeframe, leave it. Searching through closets or digging through storage bins eats up time while danger gets worse. Items small enough to fit in pockets, like heirloom jewelry or a thumb drive with photos, matter more than bulky household stuff that slows you down or requires both hands to carry.
No possession is worth your life during a building evacuation. Insurance covers replaceable items, but no policy restores lost time when fire spreads through walls or floodwater rises past your doorframe. A properly organized evacuation bag prepared before things go wrong means your most important stuff already sits ready near the door. No panic driven decisions about what deserves rescue and what gets left behind.
Pet Evacuation Priorities and Procedures
Your pets are family. Their needs rank right alongside human safety in your mental checklist. The panic a loose cat or frightened dog experiences during emergency chaos can turn a manageable situation dangerous if they bolt or hide.
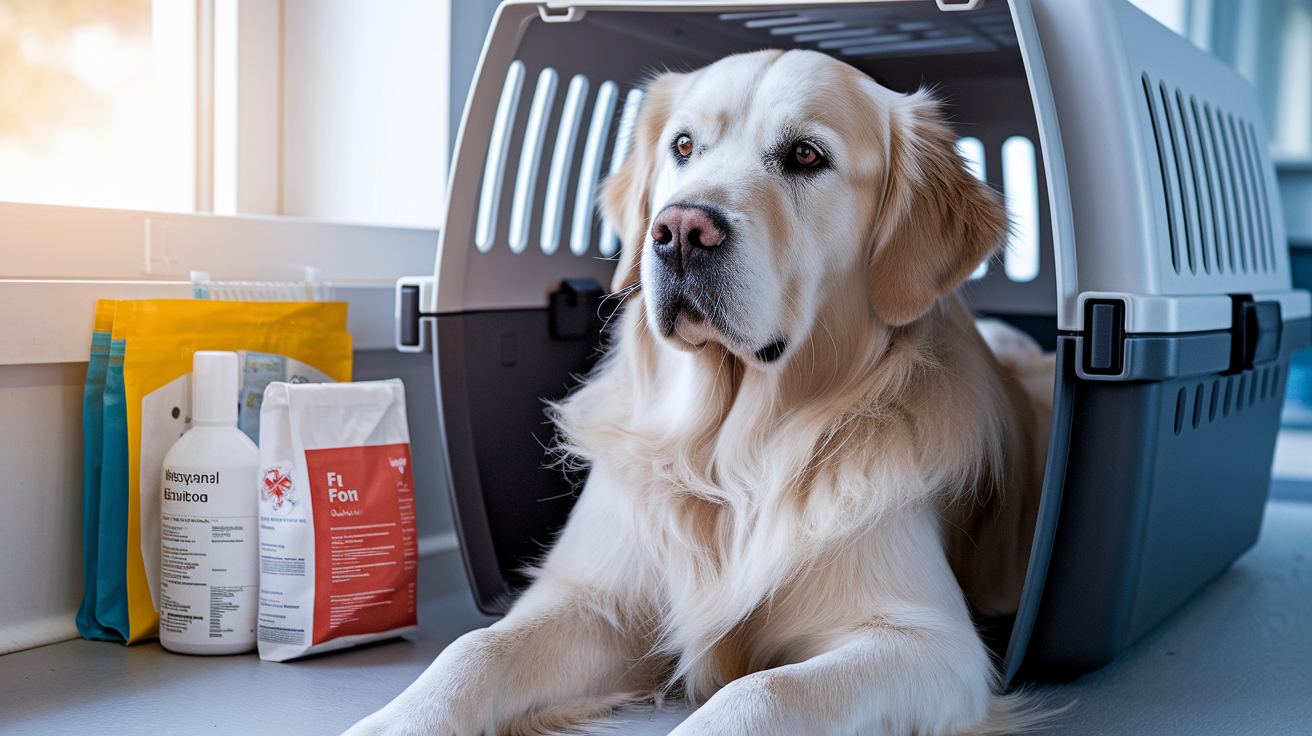
- Immediately secure pet in carrier or on leash before grabbing anything else
- Grab pet food stored near carrier in pre-measured 3 day supply bags
- Take vaccination records and medication kept in waterproof folder
- Bring recent pet photos for identification purposes if you become separated
- Include water bottles designated for pets in your evacuation supplies
- Have collar with ID tags already attached to your pet at all times
- Know pet friendly shelter locations in your area before disaster strikes
Pet carriers should live somewhere accessible near emergency exits, not buried in bedroom closets under boxes of seasonal clothes. Keeping carriers in working condition with functional latches and comfortable bedding means stressed pets enter familiar spaces instead of strange containers that smell like storage. Store a small bag of food, collapsible water bowl, and basic supplies attached to or inside the carrier so everything moves together when you grab the handle and run.
Practice drills with pets familiarize them with carriers and reduce panic when actual emergencies hit. Cats that only see carriers during vet visits will hide when danger strikes, but monthly five minute carrier sessions with treats inside teach them the space means safety, not scary car rides.
What to Leave Behind During Evacuation Time

Knowing what NOT to grab is just as important as knowing priorities during life threatening situations. The temptation to rescue favorite belongings or grab one more thing before leaving has trapped people in buildings that collapse or burn around them while they searched for items that meant nothing compared to their lives.
- Bulky electronics like TVs, gaming consoles, and desktop computers
- Full wardrobes (take only 2 changes of clothes maximum)
- Collections and hobby items including books, records, or memorabilia
- Furniture and large household items regardless of cost or sentiment
- Toiletries beyond basics like medications and eyeglasses
- Books and non-essential papers that can be replaced or aren’t legally critical
- Kitchen appliances and dishware
- Decorative items including artwork, plants, and seasonal decorations
Common mistakes during apartment fires include trying to pack too much or searching for non-critical items while the smoke alarm screams from the hallway. Someone who stops to grab their favorite jacket or hunts through drawers for a specific photo album wastes seconds that disappear faster than they realize. Smoke fills rooms in minutes, and the difference between clean air and suffocating haze often measures in the time spent choosing between two shirts or looking for matching shoes.
Mandatory evacuation means immediate departure with no time for sentimental decisions, but voluntary evacuation still requires speed and focus on critical items only. The word “voluntary” tricks people into thinking they have hours to pack carefully, when conditions can shift to life threatening in moments. Apartment fires spread rapidly through shared walls and ventilation systems. Seconds count more than possessions when flames find fuel or structural supports weaken.
Apartment-Specific Evacuation Procedures

Building evacuation in apartment complexes versus single family homes presents unique challenges. Shared stairwells, neighbors who might need help, and multiple floors between you and ground level safety. The vertical nature of apartment living means escape route options narrow compared to houses with windows and doors on the same level as outside ground.
- Feel door and doorknob for heat before opening to check for fire in hallway
- Take pre-packed go bag if it sits immediately accessible by the door
- Alert neighbors by knocking quickly if safe to do so without delaying your exit
- Use stairs and never use elevator regardless of how many floors you need to descend
- Stay low if smoke fills stairwell routes, breathing cleaner air near the floor
- Follow lit emergency exit signs even if you think you know a faster route
- Don’t return for forgotten items once you exit, even if the building looks safe
- Proceed immediately to designated assembly point outside where others can account for you
Knowing multiple escape routes matters because primary exits may be blocked during apartment fires by flames, smoke, or structural damage. Most apartments have at least two stairwells, and mapping both routes before emergencies strike means you can pivot to the backup path if your first choice becomes impassable. Walking both routes quarterly, including timing how long descent takes, builds muscle memory that kicks in when panic tries to freeze your decision making.
| Do | Don’t |
|---|---|
| Close door behind you to slow fire spread | Prop doors open or leave them standing wide |
| Stay low and cover mouth if smoke present | Run upright through smoke breathing normally |
| Use stairs for all evacuations | Use elevator even if fire seems far away |
| Account for all household members outside | Assume everyone made it out safely |
Practice evacuation drills regularly with family members and understand your building’s fire safety protocols including smoke alarm response procedures. This turns abstract emergency preparedness into concrete actions your body remembers under stress. Know where emergency exits live on your floor, which stairwell sits closest to your door, and where the building’s designated assembly area sits outside. For information on maintaining ongoing fire safety practices in your apartment, see our guide on Apartment Fire Safety Tips.
Building a Ready-to-Go Evacuation Bag
A pre-assembled go bag eliminates decision making during high stress evacuation situations when thinking clearly becomes harder and every second spent choosing what to pack increases danger. The bag sits ready, already containing what you need to survive 72 hours away from home. Grabbing one handle on your way out the door means you leave equipped instead of empty handed.
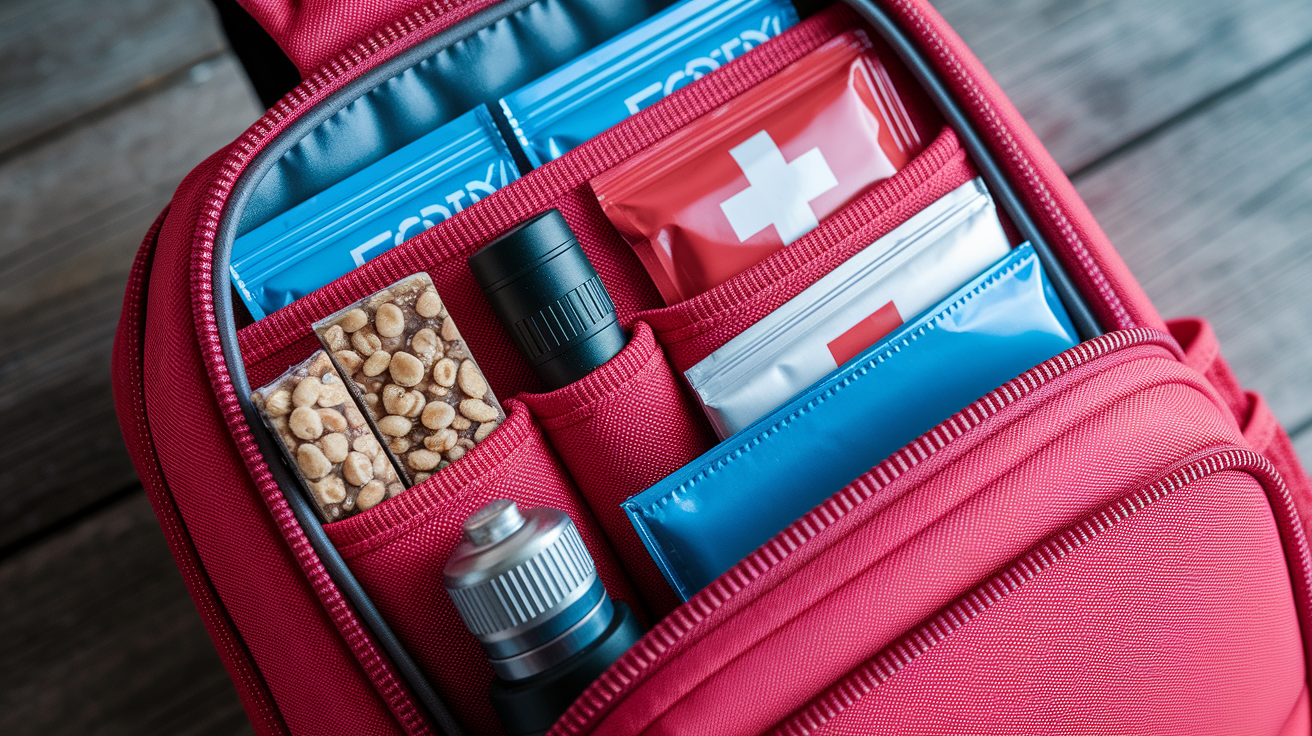
Essential Go Bag Contents
- Water stored as 1 gallon per person for 3 days in collapsible pouches that pack flat
- Non-perishable food like granola bars, freeze dried meals, and nut butter packets
- LED flashlight with extra batteries stored separately to prevent corrosion
- Portable phone charger with charging cables for your specific devices
- Multi-tool with knife, can opener, and basic repair functions
- Change of clothes including sturdy shoes, not flip-flops or slides
- Emergency blankets that fold small but provide warmth and weather protection
- Battery powered radio for receiving emergency notifications when power fails
- First aid supplies including bandages, pain relievers, and any prescription medications
- Waterproof bag or folder for important documents and copies of ID
Go Bag Storage and Maintenance
Store the evacuation backpack in a durable container or bag near apartment emergency exits where any household member can grab it in darkness or smoke. The location needs to be consistent and known to everyone, not moved around based on cleaning schedules or seasonal storage shuffling. A bright colored backpack or one with reflective strips makes it easier to spot in low light conditions when panic narrows visual focus.
Check and refresh supplies every six months by replacing expired food, updating documents, and testing batteries in flashlights and radios. Set phone reminders for January and July so the task doesn’t slip away in the rush of daily life. Rotate out clothing if seasons change or family members grow, and verify that shoes still fit and aren’t worn to the point they’d fail during actual use. For detailed guidance on selecting appropriate emergency supplies for your go bag, review our comprehensive Emergency Kit Planning Guide.
Emergency Preparedness Checklist for Apartment Dwellers

Emergency preparedness begins long before evacuation orders arrive on your phone or the smoke detector starts screaming. The work you do during calm moments when danger feels distant determines how smoothly you move when crisis hits and clear thinking becomes harder.
| Preparation Task | Frequency | Priority Level |
|---|---|---|
| Assemble and check go bag contents and expiration dates | Every 6 months | High |
| Identify and practice escape route with full household | Quarterly | High |
| Establish family meetup location everyone can reach | Once/update as needed | High |
| Photograph belongings for insurance documentation | Annually | Medium |
| Store important documents in accessible waterproof location | Once/update as needed | High |
| Exchange emergency contacts with neighbors for mutual aid | Once | Medium |
| Download emergency notification apps for local alerts | Once | Medium |
| Conduct evacuation drill with household members and pets | Every 6 months | High |
| Review apartment lease for building emergency procedures | Annually | Low |
Regular disaster preparedness activities reduce panic and improve evacuation time during actual emergencies by transforming abstract plans into practiced routines. The first time you test your escape route shouldn’t happen when the building fills with smoke or water rises past the first floor. Walking the path with family members or roommates, timing how long descent takes, and identifying alternate routes if the primary stairwell becomes blocked builds confidence that kicks in when fear tries to freeze you in place.
Renters insurance documentation should live in your evacuation checklist review process, with policy numbers, coverage details, and claims contact information stored both in your go bag and digitally in cloud storage you can access from any device. Photographing belongings annually creates visual records that speed insurance claims if you lose everything, because describing possessions from memory while dealing with displacement stress makes an already hard situation harder.
Final Words
Speed and clarity matter when it matters most.
Knowing what to grab during apartment evacuation before you need to act turns chaos into seconds of focused movement. Your pre-packed go bag, practiced escape route, and mental checklist become the difference between safe departure and dangerous delay.
Start today by putting critical items in one accessible spot near your door.
Walk your escape route once this week. Show your family where the go bag lives and what stays behind.
When the moment comes, you’ll move fast and smart because you already made the hard decisions during calm moments.
FAQ
What should you grab when evacuating an apartment?
When evacuating an apartment, you should grab your wallet with ID, keys, mobile phone, prescription medications, pets, and pre-packed go bag within the first 10 seconds. If you have additional time under 60 seconds total, add critical documents, phone charger, emergency contacts list, small cash reserve, and medication list with dosages before leaving through the stairs.
What are the 5 P’s of evacuation?
The 5 P’s of evacuation are People and Pets (secure family members and animals first), Prescriptions (grab medications and medical equipment), Papers (important documents like ID, insurance, lease), Personal needs (phone, charger, eyeglasses, cash), and Priceless items (irreplaceable photos or small sentimental belongings). Personal safety always comes before possessions during building evacuation.
What would you grab if told to evacuate your apartment immediately?
If told to evacuate your apartment immediately, you would grab your wallet, keys, phone, prescription medications in original bottles, and pets secured in carriers within 10 seconds. Never use elevator during building evacuation. If you have a pre-packed go bag stored near emergency exits, grab it on your way to the stairwell and proceed to your designated meeting point outside.
What are the 10 essential survival kit items for apartment evacuation?
The 10 essential survival kit items for apartment evacuation are water (1 gallon per person for 3 days), non-perishable food like granola bars, LED flashlight with extra batteries, portable phone charger, multi-tool, change of clothes and sturdy shoes, emergency blanket, battery-powered radio, first aid supplies, and waterproof bag containing copies of important documents like ID and insurance papers.
How long does it take to evacuate an apartment safely?
Evacuating an apartment safely takes under 60 seconds total when you follow a time-based priority system. Grab critical items like wallet, keys, phone, medications, and pets in the first 10 seconds. Use the next 20 seconds for documents, charger, and emergency contacts. Only if time permits and no immediate danger like smoke alarm sounding, grab additional items before exiting through stairwell.
Should you take pets during apartment evacuation?
You should take pets during apartment evacuation by immediately securing them in carriers or on leashes within your first 10 seconds. Also grab pet food for 3 days, vaccination records, medication, water bottles, and recent pet photos for identification. Store pet carriers in accessible locations near emergency exits so you can evacuate quickly without searching during life-threatening situations.
What documents are most important during evacuation?
The most important documents during evacuation are government-issued ID, passport, birth certificates, insurance papers including renters policy, apartment lease, prescription medication list with dosages and prescribing doctors, and emergency contacts printed on paper. Store copies in a waterproof bag inside your go bag and keep originals in an easily accessible folder near emergency exits for quick evacuation.
How do you prepare a go bag for apartment evacuation?
You prepare a go bag for apartment evacuation by packing water, non-perishable food, flashlight, batteries, phone charger, clothing, first aid supplies, and copies of important documents in a durable backpack. Store it in an easily accessible location near emergency exits. Check and refresh supplies every six months by replacing expired food, updating documents, and testing batteries.
What should you never do during building evacuation?
During building evacuation, you should never use elevator since power failures can trap you between floors. Never return for forgotten items once you’ve left. Never waste time searching for non-critical belongings like full wardrobes, bulky electronics, or collections. Never open doors without feeling for heat first. Always use stairs and proceed directly to your designated assembly point outside.
How often should you practice apartment evacuation procedures?
You should practice apartment evacuation procedures every six months with all household members including evacuation drill with pets. Practice multiple escape routes quarterly since primary exits may be blocked during apartment fire. Review your building’s emergency exits, stairwell locations, and designated meeting point regularly so everyone knows evacuation priorities without panic during actual emergency scenarios.