
You’ve probably been told elevating furniture in an apartment voids your lease or wrecks the floors. That’s not true if you do it right. Raising beds, dressers, and storage off the ground protects belongings from leaks and floods, stops mold before it starts, and creates usable space underneath without drilling, gluing, or leaving marks. This guide walks through commercial risers, DIY options, and platform systems that keep your security deposit safe while giving you the height and storage you actually need.
Elevation Methods Overview: Commercial and DIY Solutions
If you’re in an apartment, you’re probably looking at elevation for one of these reasons: keeping stuff safe from floods or leaks, stopping moisture and mold before they start, creating storage space you didn’t have before, or just getting better airflow to cut down on humidity and bugs.
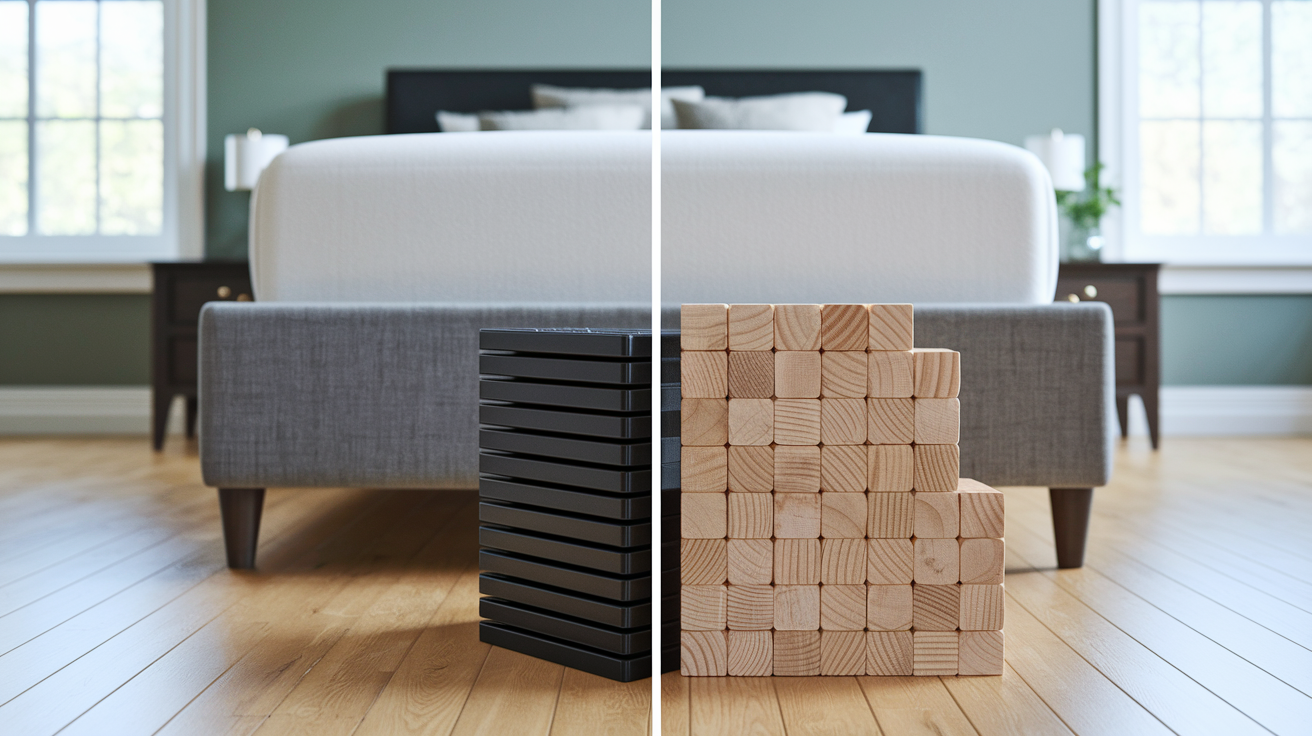
You’ve got two paths here. Commercial products or DIY builds. Store bought risers come with tested weight limits and they look finished. DIY options like wood blocks or cinder blocks cost way less and work just as well if you set them up right. Both keep your security deposit safe because nothing’s permanent. Your call depends on budget, how heavy your stuff is, and whether anyone’s actually going to see the risers.
Commercial Furniture Risers and Elevation Products
Plastic risers are what most people buy. Sets of four run about $15 to $30. They either snap onto legs or sit underneath them, adding 3 to 5 inches. Most handle 800 to 1,200 pounds total, which covers beds, dressers, nightstands. Wood risers cost more, around $40 to $60, but they support heavier loads (up to 2,000 pounds) and come in finishes like oak or walnut if that matters for your space. Metal risers exist for really heavy stuff like loaded bookcases.
Adjustable leg extensions screw into furniture legs you can remove. You twist them to get anywhere from 2 to 8 inches of height. They’re $20 to $35 per set and they don’t look bulky because they just extend what’s already there.
Then you’ve got specialty products. Desk risers with monitor stands built in. Appliance risers for washers and fridges. Bed risers with power outlets. These solve specific problems. Desk risers add 4 to 6 inches and fix your screen height at the same time. Appliance risers give you the 2 to 4 inches you need for hoses and to stop vibration.
Budget-Friendly DIY Elevation Methods
Wood blocks are simple. Buy 4×4 posts at a hardware store, cut them to the same height, sand the edges so they won’t scratch your floor. Stick furniture pads on the bottom. You can paint them or leave them raw if they’re going somewhere nobody sees. This costs maybe $2 to $10 per furniture piece depending on lumber prices.
Cinder blocks work for garages or storage areas where looks don’t count. They’re $2 to $3 each and give you about 8 inches. Stack two for 16 inches, but only under really heavy things that won’t shift, like metal shelving. They’re too tall and rough looking for bedrooms. They’ll also wreck your floor without padding underneath.
PVC pipe works for lighter stuff. A 10 foot section of 3 inch diameter pipe costs around $8. Cut it into equal pieces, cap the ends with PVC caps (about $1 each), and you’ve got risers that add 3 to 4 inches. Don’t use these under anything over 200 pounds because the hollow pipe can crack.
Go DIY when you’re elevating light furniture, need custom heights stores don’t sell, or you’re doing multiple pieces and can’t afford commercial risers for everything. Buy commercial when you’re elevating expensive furniture, dealing with weight over 500 pounds, or the risers are going somewhere visible.
Platform and Wheeled Elevation Systems
Platforms create one elevated surface instead of individual leg risers. Build one with ¾ inch plywood and 2×4 framing underneath. This spreads weight better than leg risers and works for furniture without legs, like platform beds or storage cabinets sitting flat on the floor. Platforms add 4 to 12 inches depending on how you build the frame. Materials cost $25 to $60 for a bed sized platform.
Wheeled platforms combine height with mobility. Heavy duty casters handle 200 to 400 pounds each. Put them at corners and middle points. These work for things you move sometimes, like tool chests or under desk filing cabinets. Wheels add 2 to 4 inches while letting you roll the item away from walls for cleaning. Ready made rolling platforms cost $35 to $80.
Stackable containers elevate smaller items while organizing them. Hard plastic bins stack securely in matching sets for closets or pantries. Wire baskets stack with better visibility and airflow for food or linens. Stacking lifts items 6 to 18 inches off floors depending on how many you use. A set of four to six containers runs $15 to $50.
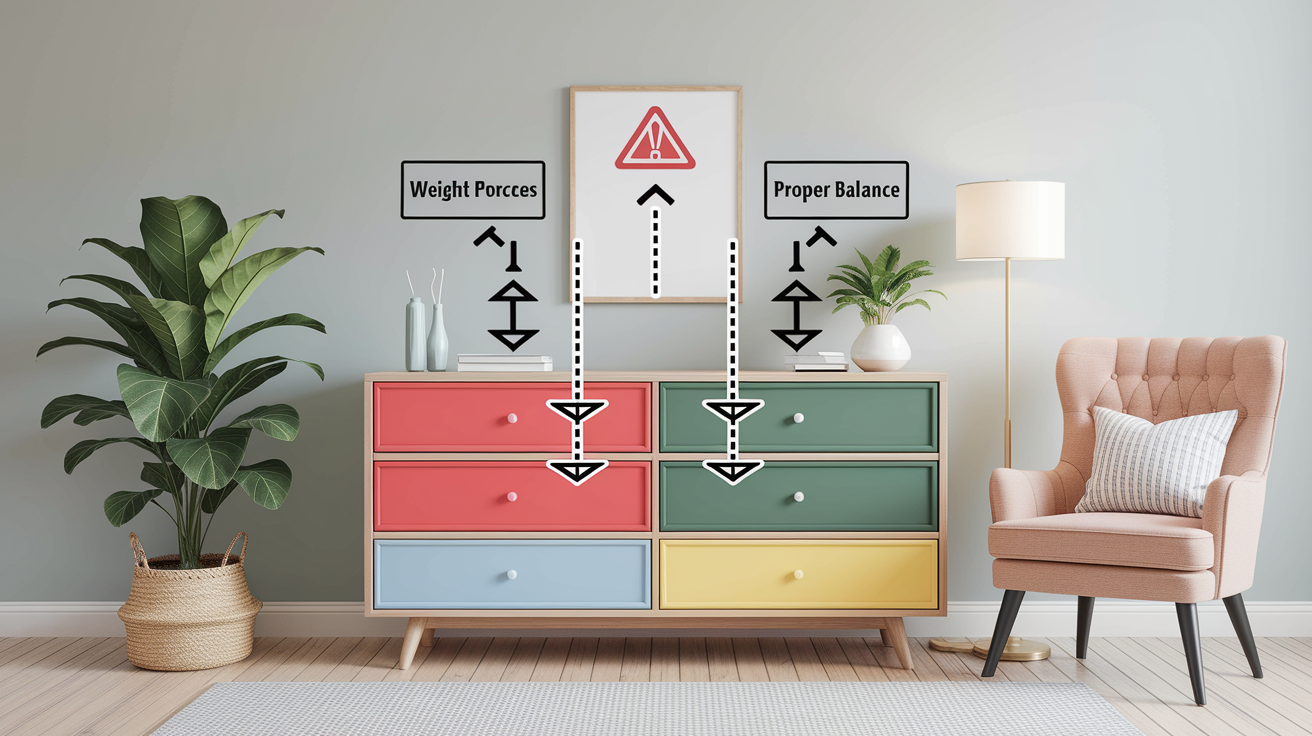
Safety and Stability Requirements
Before you elevate anything, check these things:
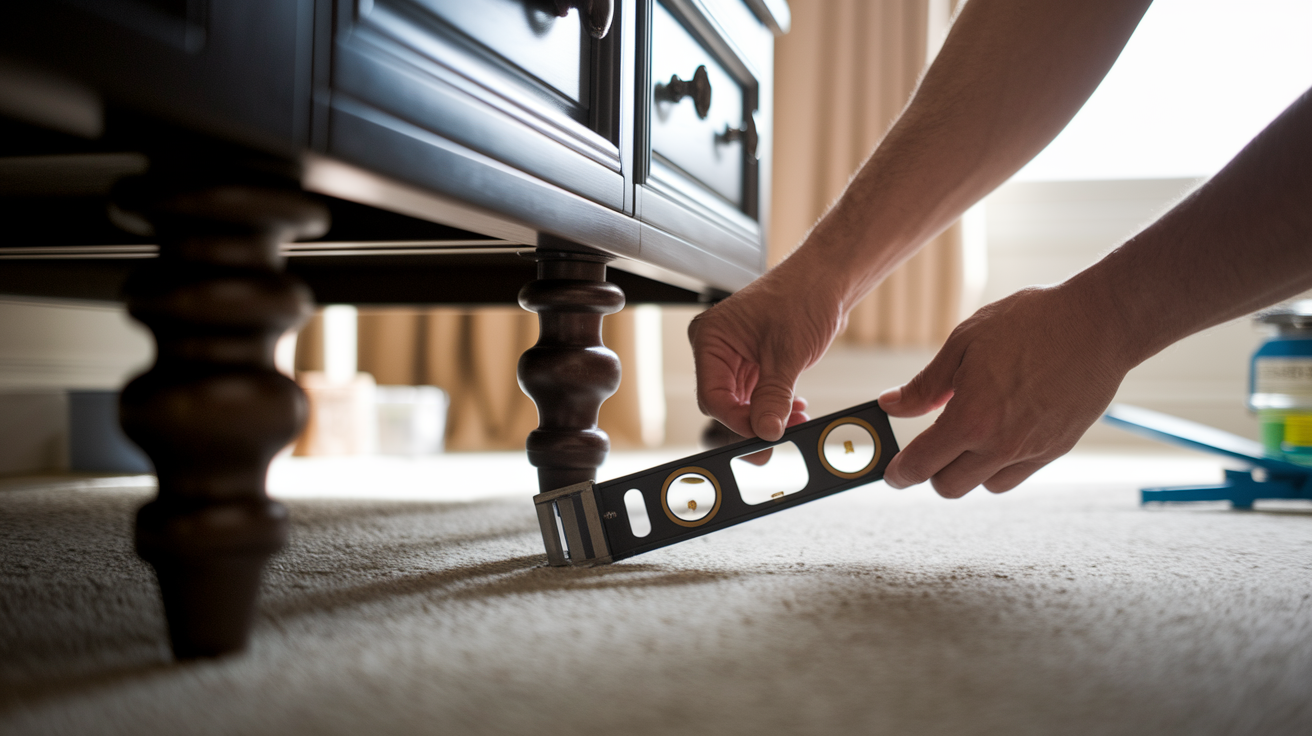
Measure your furniture’s length, width, and weight. Risers have to match leg spacing and diameter or they won’t work. Check weight limits on commercial risers and make sure they’re at least 20 percent higher than your furniture’s loaded weight. Test things by putting furniture on risers empty first, then load it gradually and watch for wobbling. Add anti slip pads underneath everything so nothing slides on tile or hardwood. Use a level to verify all risers sit at the same height. Even a ¼ inch difference causes problems. Check stability after 24 hours by pushing the furniture gently from different directions. Use wall anchors on tall elevated storage over 5 feet to prevent tipping, especially if you have kids or pets.
| Elevation Method | Approximate Cost | Weight Capacity | Installation Type | Best For |
|---|---|---|---|---|
| Commercial plastic risers | $15-30 per set | 800-1,200 lbs | Snap-on or sit-under | Standard beds, dressers |
| Premium wood risers | $40-60 per set | 1,500-2,000 lbs | Sit-under | Heavy furniture, visible areas |
| Adjustable leg extensions | $20-35 per set | 600-1,000 lbs | Screw-in | Furniture with removable legs |
| DIY wooden blocks | $2-10 per piece | Varies by size | Sit-under with pads | Custom heights, hidden areas |
| Cinder blocks | $2-3 each | Very high | Sit-under | Garage storage, heavy shelving |
| PVC pipe sections | $1-2 per riser | Under 200 lbs | Sit-under with caps | Lightweight furniture, plants |
| Wheeled platforms | $35-80 ready-made | 800-1,600 lbs | Furniture sits on top | Mobile storage, tool chests |
| Platform risers | $25-60 materials | 1,000-2,000 lbs | Build under furniture | Furniture without legs, beds |
Renter friendly methods don’t drill walls, damage floors, or make permanent changes. Stick with furniture pads, removable adhesive strips, or simple placement. Before you elevate anything, take photos of the floor underneath so you can prove it wasn’t damaged during your lease. Felt pads protect hardwood and laminate when furniture shifts a bit. Command Strips and removable hooks let you secure things to walls without holes that violate your lease.
Always verify your elevation method can handle the actual loaded weight, not just the empty furniture frame. A dresser weighs maybe 100 pounds empty but 300 pounds full of clothes. Test stability by pushing from different directions after setup. If it rocks or feels unstable, add more support or choose something different.
Measuring and Planning Your Apartment Elevation Project
Accurate measurements prevent furniture hitting ceiling fixtures after you elevate it, unstable setups from mismatched riser sizes, and blocked pathways that make rooms hard to move through.
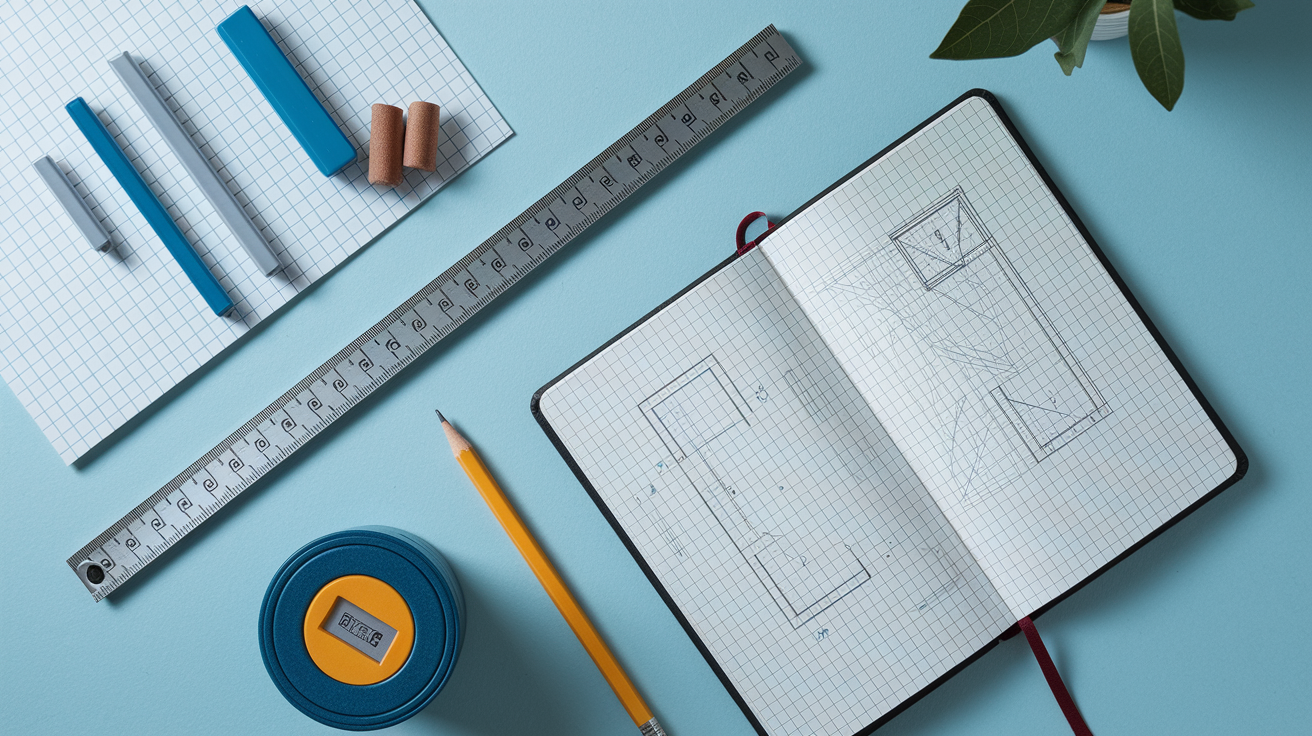
Measure your furniture’s current height from floor to top, then add your planned elevation to make sure the total won’t hit ceiling fans, lights, or hanging stuff. Standard apartment ceilings are 8 to 9 feet, which leaves plenty of room for typical 3 to 8 inch elevation. But measure anyway, especially for tall dressers or shelving. Measure leg spacing by checking distance between front legs, back legs, and diagonal corners because risers have to match these points exactly. Check leg diameter or base width so you buy risers with cups or platforms that actually fit.
Write down the floor space around each piece you’re elevating. You need at least 24 inches for comfortable walking space. Bedroom furniture elevated more than 6 inches can feel bulky in tight rooms. Draw a quick sketch showing furniture placement and note where elevation might create tight spots or block closets, outlets, or windows.
| Measurement Type | Recommended Clearance | Purpose |
|---|---|---|
| Ceiling clearance | Minimum 12 inches | Prevents furniture from hitting lights or fans after elevation |
| Under-furniture clearance | 6-12 inches | Creates usable storage space while maintaining stability |
| Walkway space | Minimum 24 inches | Allows comfortable movement around elevated furniture |
| Door swing clearance | Minimum 6 inches | Ensures doors open fully without hitting elevated items |
Write everything in a notebook or phone before shopping. Furniture dimensions, desired elevation height, current ceiling clearance, floor space limits. This stops you from buying wrong sized products or building supports that don’t fit your layout.
Vertical Storage Solutions to Maximize Apartment Space

Vertical storage complements floor elevation by moving things up walls instead of just off floors. You double storage capacity without using more floor area.
Wall mounted shelving and floating shelves attach to walls using brackets anchored into studs or heavy duty wall anchors. Floating shelves create clean storage for books, plants, decorative items at whatever height you want. Install them above desks, sofas, or beds to use wall space that would sit empty otherwise. Adjustable track systems let you move shelf heights as your needs change, which helps for renters who reorganize a lot.
Tall bookcases from floor to ceiling maximize vertical space in living rooms, bedrooms, home offices. Choose narrow ones, 12 to 18 inches deep, so they don’t eat up floor space while still holding books, bins, and folded items. Put these in corners or along walls to keep traffic paths clear. Secure tall bookcases to walls using furniture straps or L brackets to prevent tipping, especially in earthquake zones or homes with children.
Vertical storage that works in apartments:
Floating shelves for books, plants, photos, everyday items at eye level or higher. Tall bookcases reaching ceiling height to maximize storage in minimal floor space. Wall mounted grid panels and pegboards in kitchens, craft rooms, or garages for hanging tools, utensils, supplies. Over door organizers and hooks for coats, bags, shoes, cleaning supplies without drilling walls. Ladder shelves leaning against walls with tiered platforms that need no installation. Track shelving with adjustable brackets letting you customize spacing for different item sizes.
Install vertical storage using Command Strips for lightweight items under 5 pounds, removable adhesive hooks rated to 15 pounds for moderate items, or wall anchors into studs for heavy shelving supporting 50 pounds or more per bracket. Landlord friendly installation avoids permanent holes by using damage free mounting hardware that removes cleanly when you move.
Under-Bed Storage Created Through Elevation
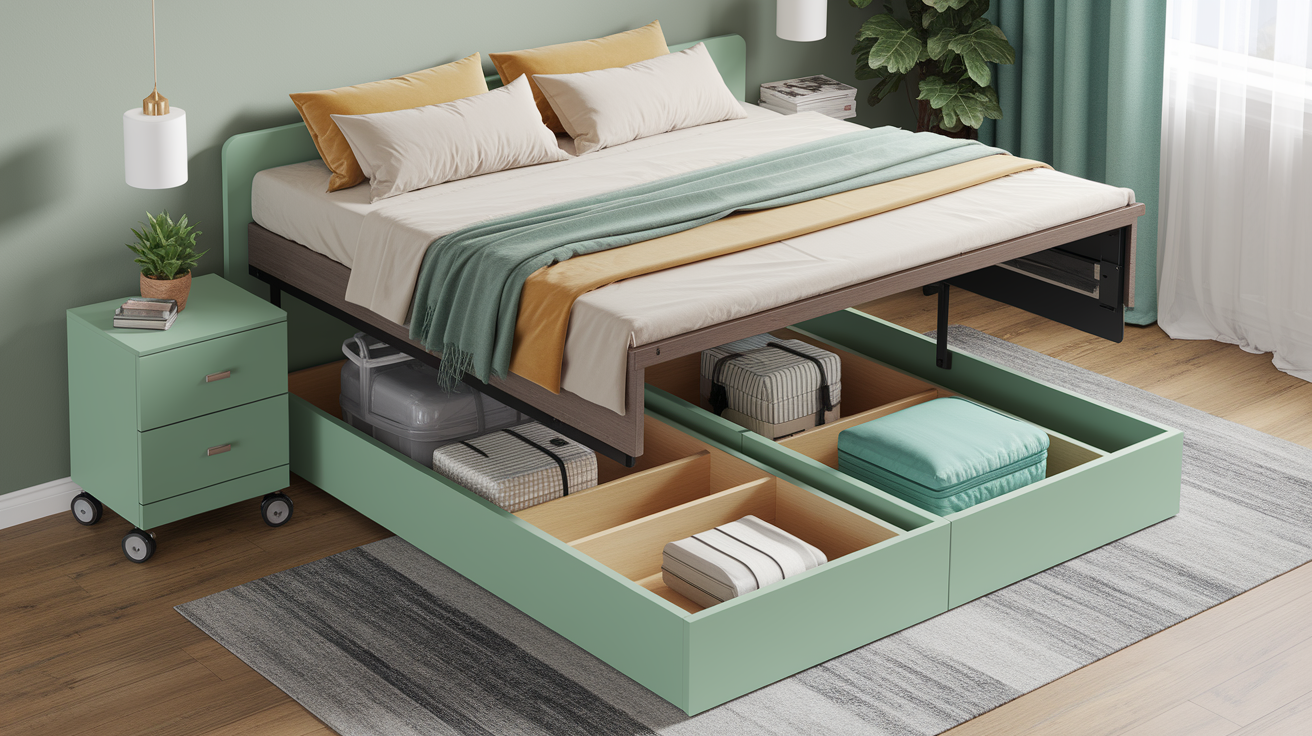
The space under beds is premium storage real estate in small apartments. You’re looking at 10 to 15 square feet of floor that would otherwise sit empty.
Bed risers lift frames 3 to 8 inches higher, turning unusable low clearance into accessible storage. Three inch risers create just enough height for flat boxes holding shoes and accessories. Six to 8 inch risers fit rolling bins for seasonal clothes and extra linens. Risers above 9 inches allow large drawer systems or wheeled carts that slide under for bulky comforters, luggage, or out of season gear.
Pick containers based on the clearance you create and what you’re storing. Rolling bins with wheels pull out easily without moving the bed. Vacuum bags compress bulky winter coats and bedding into flat packages that maximize limited height. Shallow plastic drawers organize smaller items like craft supplies or accessories into sections. Use clear containers so you can see what’s inside without pulling everything out. Or label opaque bins with lists taped to visible ends.
| Bed Height Addition | Storage Container Type | Typical Items Stored |
|---|---|---|
| 3-5 inches | Flat storage boxes | Shoes, accessories, small electronics |
| 6-8 inches | Rolling bins | Seasonal clothes, extra linens, folded blankets |
| 9+ inches | Large drawer systems | Bulky bedding, luggage, winter coats |
Bed frames with built in storage offer alternatives to adding separate risers. Platform beds with integrated drawers pull out from the sides for organized storage without separate containers. Storage beds with hydraulic lifts raise the entire mattress platform to reveal a large compartment underneath, perfect for things you access less often. These cost more initially but eliminate separate risers and containers while creating a finished, intentional look.
Elevating Kitchen and Bathroom Belongings

Kitchens and bathrooms are tricky because floor space is super limited and moisture creates extra concerns for items sitting on floors.
Stackable containers and tiered organizers multiply usable space inside cabinets and on counters by creating vertical layers. Wire stackable bins allow air circulation for produce while keeping potatoes and onions off cabinet floors where moisture builds up. Tiered corner shelves fit into wasted corner spaces, elevating spices, toiletries, or small appliances at increasing heights. Clear stackable bins in pantries let you see what’s inside while lifting dry goods off lower shelves where spills and pests are more common.
Over toilet shelving uses vertical space without eating floor area in tight bathrooms. These freestanding units fit around toilets and extend up to hold towels, toilet paper, and toiletries on multiple shelves. Slim rolling carts on wheels squeeze between sinks and toilets, elevating bathroom supplies on two or three tiers while staying mobile for cleaning. Choose rust resistant metal or plastic for humid bathroom environments.
Elevation tactics for kitchens and bathrooms:
Cabinet risers create doubled shelf space by adding a second tier inside cabinets for plates, canned goods, or cleaning supplies. Stackable clear bins organize pantry items like snacks, baking supplies, and produce while improving visibility and airflow. Tiered corner shelves maximize awkward corner spaces for spices, oils, toiletries, or small appliances. Over sink cutting board platforms create temporary elevated work surfaces that sit across sink basins when needed. Wheeled utility carts hold frequently used items on multiple tiers and roll aside when you need floor space.
Keeping bathroom items elevated prevents moisture damage from floor level humidity and water spills. Towels, toilet paper, and toiletries on elevated shelving or carts stay drier than items on bathroom floors. The airflow around elevated storage reduces mold and mildew on stored items and prevents that musty smell from ground level bathroom storage.
Multi-Functional Furniture for Elevated Storage
Furniture pieces with built in storage compartments eliminate the need to add separate elevation systems while maximizing function in every piece.
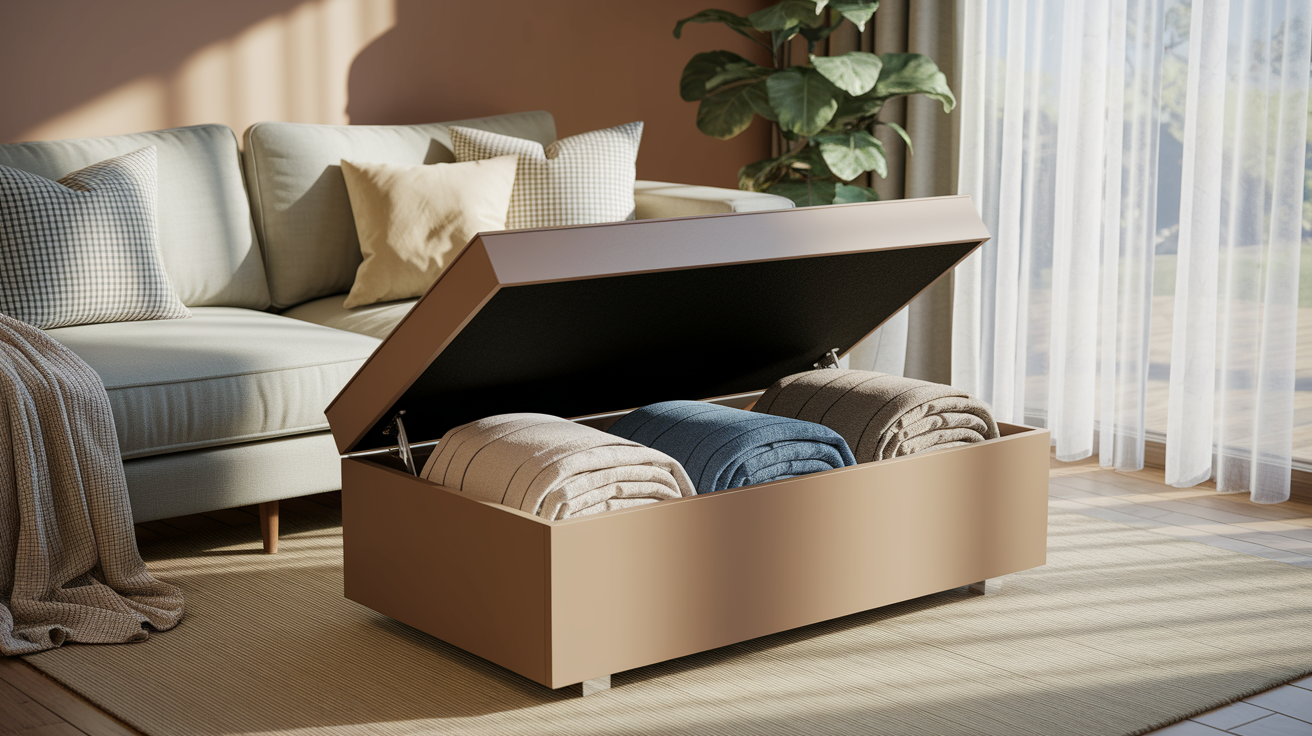
Ottomans with hidden storage lift open to reveal interior compartments for throw blankets, board games, or seasonal items. These work as footrests, extra seating, or coffee table substitutes while hiding clutter inside. Coffee tables with lift top mechanisms raise to desk height while exposing storage underneath for remotes, magazines, or laptop accessories. Both keep items elevated off floors inside furniture you already need.
Storage benches work in entryways, at bed ends, or under windows to provide seating while storing shoes, linens, or seasonal accessories inside flip up seats. Beds with built in drawer systems in the base eliminate separate dressers while keeping clothing elevated and organized in multiple drawers. Sofa beds with under cushion storage hide bedding for overnight guests inside the sofa frame.
Multi functional furniture that elevates storage:
Ottomans that lift open revealing interior compartments for blankets, games, or accessories. Coffee tables with lower shelves, drawers, or lift tops exposing hidden storage. Benches with flip up seats containing storage for shoes, linens, or seasonal items. Sofas with under cushion compartments hiding pillows, bedding, or rarely used items. Nightstands with multiple drawer tiers providing elevated bedside storage in compact footprints.
Pick furniture sized right for your apartment so multi functional pieces don’t overwhelm small rooms. Measure doorways and hallways before buying to confirm delivery access. Choose styles matching your existing stuff so functional storage pieces blend in rather than looking like afterthoughts.
Weight Capacity and Safety Considerations for Elevated Items
Safety comes before storage convenience when elevating heavy furniture and loaded storage systems.
Check manufacturer weight specs before buying any commercial riser, bracket, or elevation system. Packaging and online listings state maximum weight capacities, usually 800 to 2,000 pounds per set depending on materials and construction. Calculate your furniture’s loaded weight by adding frame weight plus everything stored inside or on top. Dressers holding a full wardrobe can weigh 400 pounds even though the empty frame weighs only 120 pounds. Choose risers rated for at least 20 percent more than your calculated weight to build in a safety buffer.
Weight distribution matters as much as total capacity. Four risers supporting a bed must each handle one quarter of total weight, but uneven distribution from a sagging mattress or storage loaded heavily on one side can overload individual risers. Test stability before committing by placing furniture on risers empty first, then load gradually while checking that all support points stay level and stable. Rock the furniture gently from different directions to reveal any wobbling or shifting that shows improper weight distribution.
Safety practices for elevated furniture:
Always verify manufacturer weight limits before purchase and confirm they exceed your total loaded furniture weight by 20 percent minimum. Distribute weight evenly across all risers or support points by centering furniture carefully and balancing stored items. Use anti slip pads on smooth floors including tile, laminate, and hardwood to prevent furniture from sliding when bumped. Test stability before loading completely by applying firm pressure from different angles to check for rocking or shifting. Secure tall elevated furniture to walls when possible using earthquake straps or L brackets anchored into studs. Avoid stacking elevation methods like placing risers on platforms, which compounds instability and voids weight capacity ratings.
In earthquake prone regions, secure any furniture elevated above 4 feet to wall studs using flexible furniture straps that allow slight movement without toppling. Elevated bookcases, wardrobes, and tall storage units become tipping hazards during seismic events. Attach anti tip brackets to both furniture back and wall studs, or use adjustable straps rated for the item’s weight.
Flood Protection Through Strategic Apartment Elevation

Ground floor and basement apartments face higher flood risks from plumbing failures, heavy rainfall, and water intrusion that can destroy belongings sitting on floors.
Elevate items at least 6 inches in low risk apartments with no flood history, 8 to 10 inches in areas with occasional heavy rain or aging plumbing, and 12 inches or more in flood prone regions or basement units. These heights protect against common water intrusion. A toilet overflow typically spreads 2 to 4 inches of standing water. Washing machine hose failures create 3 to 6 inches before auto shutoff valves activate. Minor weather flooding produces 6 to 10 inches before receding.
Protect electronics, important documents, and sentimental items by elevating them higher than everyday furniture. Place electronics on elevated shelves or furniture platforms at least 12 inches off floors. Store paper documents in waterproof containers on elevated closet shelves or top dresser drawers. Keep photo albums, yearbooks, and irreplaceable keepsakes in sealed bins on high shelves rather than under beds where even elevated storage might flood during severe events.
Flood related benefits of elevating belongings:
Protection from toilet overflows, washing machine leaks, and water heater failures that spread water across floors. Moisture barrier preventing mold growth on stored items in humid basements or bathrooms. Easier water cleanup after flooding because elevated furniture allows mopping and drying underneath without moving heavy items first. Improved airflow circulation reducing humidity damage to fabrics, leather, and paper goods. Pest deterrence by eliminating floor level hiding spots where insects and rodents nest in undisturbed areas.
Combine elevation with waterproof storage for maximum protection. Seal important documents in zip top bags before placing them in elevated storage bins. Use airtight plastic containers rather than cardboard boxes for items elevated in flood risk areas, because cardboard wicks water upward through capillary action even when elevated several inches. Clear plastic bins let you verify contents without opening them while providing water resistance if shallow flooding occurs.
Aesthetic Apartment Elevation That Matches Your Style
Practical elevation doesn’t mean sacrificing visual appeal or accepting industrial looking risers in your bedroom and living spaces.
Decorative furniture risers come in materials and finishes matching different interior design styles. Wooden risers stained in espresso, walnut, or natural oak blend with traditional and farmhouse furniture. Brushed metal risers suit industrial or modern aesthetics. Clear acrylic risers create an invisible floating effect for minimalist spaces where you want elevation benefits without visible hardware.
Hide utilitarian elevation methods in visible rooms using simple decorative tricks. Add a bed skirt that drapes to the floor, hiding basic plastic risers while creating a finished look. Place decorative storage boxes or woven baskets on elevated platforms to work as both functional storage and attractive displays. Paint DIY wooden blocks to match furniture finishes or room wall colors so they blend rather than stand out. Use fabric wrapped cinder blocks in craft rooms or studios where industrial materials work with creative themes.
Aesthetic tips for attractive elevation:
Choose commercial risers in wood, metal, or acrylic finishes matching existing furniture tones and room style. Use decorative storage boxes, woven baskets, or fabric bins on elevated platforms to blend function with display. Add bed skirts that drape to floors, concealing basic risers and under bed storage containers. Select clear acrylic risers for modern minimalist spaces where visible hardware should disappear. Coordinate elevation accessories like bins, platforms, and risers with overall room color schemes using matching or complementary colors.
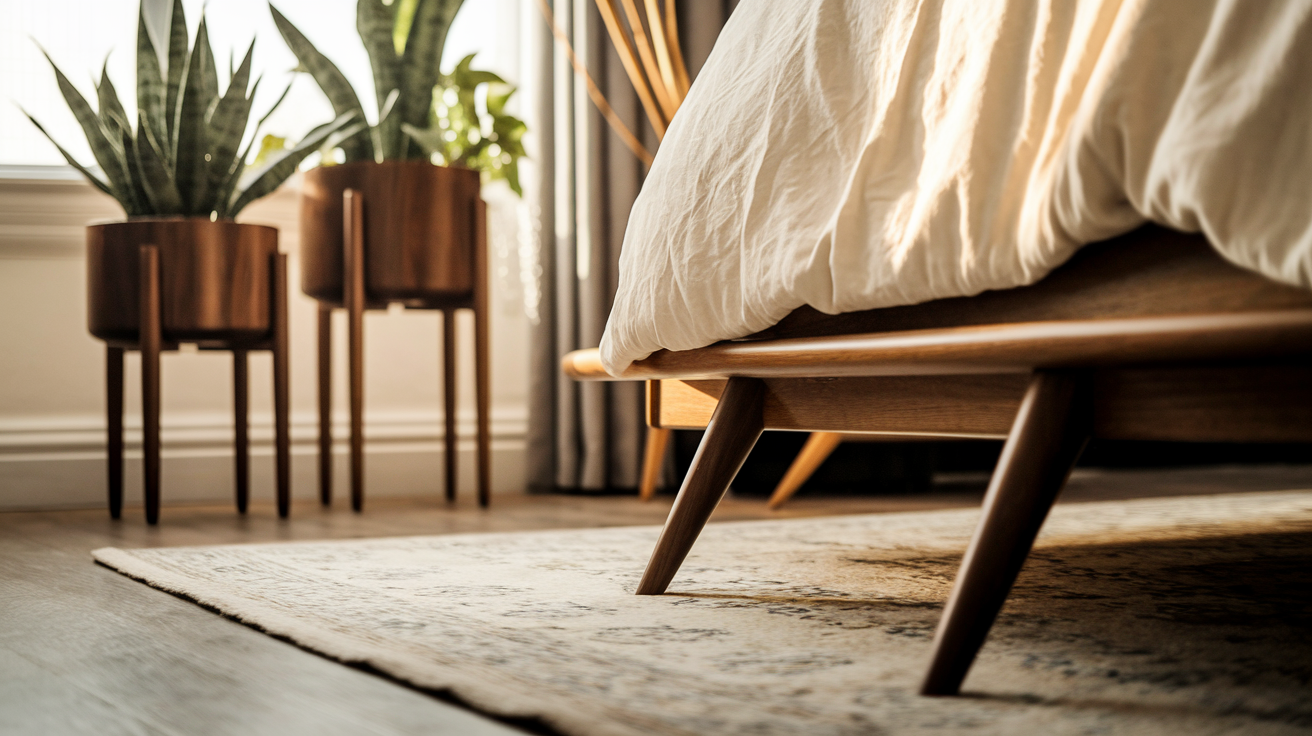
Use intentional elevation to create design features rather than hiding them. Elevate potted plants on decorative risers or tiered plant stands to create vertical garden displays at varying heights. Place collectibles, art books, or decorative objects on elevated platforms or acrylic risers to showcase them as focal points. Build or buy elevated platform displays for special items like sculptures, trophy collections, or family photos.
Maintenance and Adjustments for Elevated Apartment Belongings
Elevation isn’t setup and forget because weight shifts, materials degrade, and storage contents change over time.
Do quarterly stability checks on all elevated furniture by applying firm pressure from multiple angles to test for new wobbling, shifting, or settling that wasn’t there initially. Materials compress slightly under constant weight, and repeated use can loosen connections between risers and furniture legs.
Monitor weight distribution whenever you reorganize storage or add new items to elevated furniture. A dresser balanced properly when first elevated can become front heavy if you later fill top drawers with heavy items while leaving bottom drawers empty. Adjust riser placement or redistribute contents to maintain even weight across all support points. Watch for material degradation in DIY wooden blocks that might develop cracks, or plastic risers that show stress marks or compression after supporting heavy loads for long periods.
Maintenance tasks for safe elevated storage:
Check risers monthly for visible cracks, stress marks, compression, or material degradation. Verify support points haven’t shifted by measuring distances between risers and furniture edges. Tighten adjustable leg extensions quarterly because vibration and weight can loosen threaded connections over time. Clean underneath elevated furniture to prevent dust buildup, pest activity, and moisture accumulation. Reassess weight loads when adding new storage items, replacing furniture contents, or reorganizing to verify capacity ratings still apply.
Make seasonal adjustments when swapping stored seasonal clothing, bedding, or holiday decorations that alter furniture weight significantly. Spring cleaning that moves heavy winter coats out of under bed storage and replaces them with lightweight summer clothes changes weight distribution. Verify stability after any major storage reorganization by testing furniture from different angles before leaving it unattended.
Final Words
You’ve got a solid plan now for how to elevate belongings in apartment spaces without risking your security deposit or your safety.
Pick the method that fits your budget, test the weight limits before you load everything on, and remember that even simple wooden blocks can protect your stuff when water shows up.
Start with your bed or one heavy piece of furniture. Get it stable. Then move to the next item.
The work you do now keeps your belongings dry when a pipe bursts at 2 a.m. or floodwater creeps under the door.
FAQ
How can apartment dwellers increase storage space?
Apartment dwellers can increase storage space by using vertical wall-mounted shelving, elevating furniture with risers to create under-bed storage, installing floating shelves to ceiling height, choosing multi-functional furniture with built-in compartments, and utilizing over-door organizers. These methods maximize space without permanent modifications.
Can someone afford an apartment making $3,000 a month?
Someone making $3,000 a month can afford an apartment by following the 30% rent rule, which means spending around $900 monthly on rent. This budget works for studios or shared apartments in many areas. Consider utilities, renter’s insurance, and emergency savings when calculating total housing costs.
How can renters hang items in an apartment without damage?
Renters can hang items in an apartment without damage by using Command Strips for lightweight frames and decorations, adhesive hooks rated for specific weights, removable wall-mounted grid panels, tension rods in doorways, and over-door hooks. These damage-free methods protect security deposits and comply with most lease agreements.
How can residents make a small apartment feel less cluttered?
Residents can make a small apartment feel less cluttered by elevating furniture to create under-storage, using vertical wall space with shelves reaching ceiling height, choosing clear or matching storage containers, limiting visible items on surfaces, and selecting multi-functional furniture that hides belongings inside compartments.
What are the best commercial furniture risers for apartments?
The best commercial furniture risers for apartments include plastic bed risers adding 3-8 inches of height with 800-2,000 pound capacity, adjustable leg extensions that screw onto existing furniture legs, premium wooden risers matching furniture finishes, and wheeled platforms providing both elevation and mobility for around $15-60 per set.
How do DIY elevation methods compare to commercial products?
DIY elevation methods like wooden blocks, cinder blocks, and PVC pipe sections cost $2-10 per furniture piece compared to commercial risers at $15-60 per set. DIY options work well for budget-conscious renters but require careful measurement, sanding, stability testing, and anti-slip pads to match commercial product safety.
What safety precautions apply when elevating apartment furniture?
Safety precautions when elevating apartment furniture include verifying manufacturer weight limits match your furniture load, distributing weight evenly across all support points, using anti-slip pads on tile and hardwood floors, testing stability before full loading, and securing tall elevated items to wall studs when possible.
How much clearance should elevated furniture maintain?
Elevated furniture should maintain minimum 12 inches clearance to ceiling fixtures, 6-12 inches ground clearance for flood protection and storage access, 24 inches for walkway space around furniture, and 6 inches from door swing areas. Proper clearance prevents instability and maintains apartment functionality.
What storage containers work best under elevated beds?
Storage containers working best under elevated beds include rolling bins with wheels for 6-8 inch clearances holding seasonal clothes, flat boxes for 3-5 inch clearances storing shoes and accessories, and large drawers for 9+ inch clearances fitting bulky bedding and luggage. Clear containers or vacuum bags maximize visibility and space.
How does furniture elevation protect against apartment flooding?
Furniture elevation protects against apartment flooding by raising belongings 6-12 inches off floors, creating clearance above water from plumbing leaks and toilet overflows, allowing faster cleanup after flooding events, preventing mold growth through improved airflow, and protecting electronics and documents from ground-level water damage.
What multi-functional furniture provides built-in elevation?
Multi-functional furniture providing built-in elevation includes ottomans with lift-top storage compartments, coffee tables with lower shelves or drawers, storage benches with flip-up seats at entryways, beds with drawer systems underneath, and sofas with under-cushion storage. These pieces eliminate need for separate risers.
How often should elevated furniture stability be checked?
Elevated furniture stability should be checked monthly for cracks or wear in risers, quarterly for shifted support points and loose adjustable extensions, when adding new storage items that change weight distribution, and after 24 hours of initial loaded use. Regular checks prevent tipping and elevation failures.