
You’ll hear “just dry it out” like it’s simple, but most people underestimate how long real drying takes and what happens if you quit too soon. Floodwater doesn’t just sit on surfaces. It soaks deep into drywall, subfloors, insulation, and framing lumber where fans can’t reach it. If you stop ventilation when things look dry, hidden moisture feeds mold that spreads inside walls for weeks before you smell it or see damage. This section walks through realistic drying timelines, humidity targets that actually prevent mold, and how to know when it’s safe to close the windows and turn off the fans.
Critical First Steps for Post-Flood House Ventilation
Water sitting in your home multiplies damage with every passing hour. The faster you start moving air through those soaked spaces, the better your odds of saving floors, walls, and belongings.
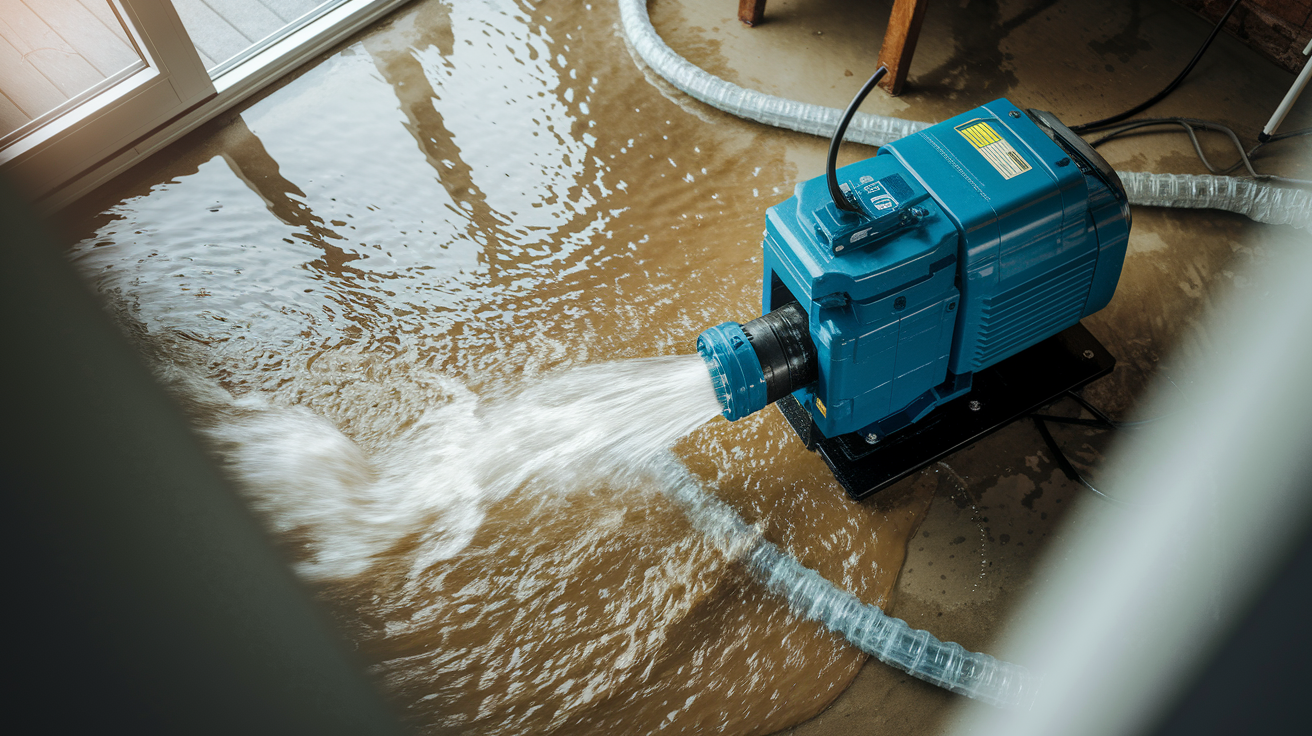
Before you open a single window or plug in a fan, clear the standing water. Use a wet/dry vacuum for shallow pools covering a room or two. For deeper water or whole floor flooding, rent a submersible pump or sump pump that can handle larger volumes. Leaving water on the floor while trying to ventilate wastes time and keeps humidity high, which feeds mold growth.
Once the water’s gone, open every window you can reach in the affected areas. Create cross ventilation by opening windows on opposite sides of rooms or the house. If weather permits, prop doors open too. This natural airflow costs nothing and starts pulling moisture out right away. Then position portable fans around the wet zones. Point them across damp floors, up toward wet walls, and out through open windows. The goal is to keep air moving constantly over every wet surface and push that humid air outside, not just shuffle it around the same room.
Keep every power cord completely dry. Run cords along dry pathways, tape them to walls above water lines, or string them overhead. A wet electrical cord near standing water or damp floors can electrocute you or start a fire. If you’re not sure the area is dry enough for electrical equipment, wait or use battery powered fans until you’re certain it’s safe.
Safety Precautions When Ventilating Contaminated Flood Water Areas
Flood ventilation isn’t just about moving air. You’re working in spaces filled with bacteria, chemicals, and electrical hazards that can hurt you fast if you skip safety steps.
Before you do anything else, follow these precautions:
• Turn off electricity at the main breaker before entering any flood affected area to eliminate electrocution risk from outlets, switches, or submerged wiring.
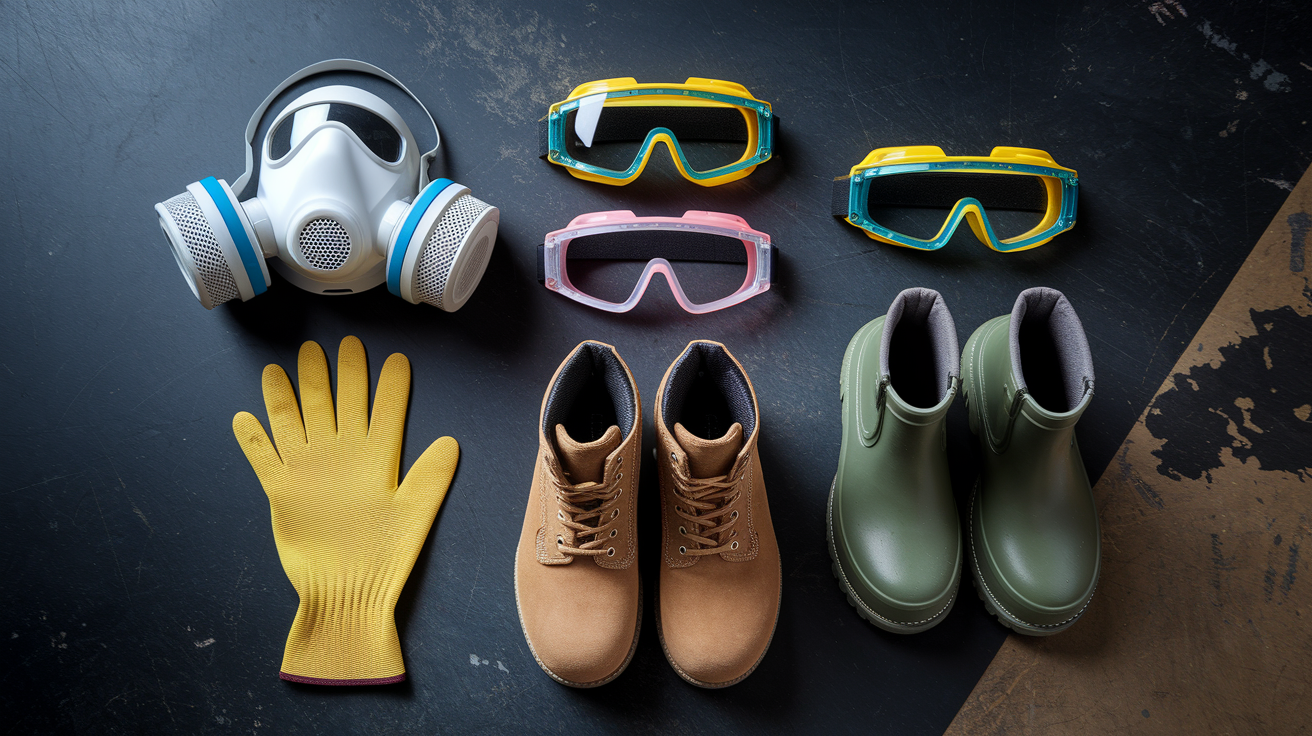
• Wear waterproof boots and heavy duty rubber gloves rated for chemical exposure whenever you’re in contact with floodwater or wet materials.
• Use an N95 mask when working in areas with visible mold or musty odors, and upgrade to a full face respirator if mold covers large sections of walls or ceilings.
• Protect your eyes with non vented goggles, especially during cleaning and disinfection work where splashes can carry contaminants.
• Never mix ammonia based cleaners with bleach, as the combination creates toxic chloramine gas that can cause serious respiratory damage within minutes.
• Keep all ventilation equipment power cords dry by routing them through areas confirmed free of moisture and securing them above floor level.
• Inspect ceilings, floors, and walls for sagging, warping, or cracks before you enter, as structural damage can cause sudden collapses.
Floodwater carries different contamination levels depending on the source. Rainwater that entered through windows is cleaner than water that backed up from rivers, but both pick up chemicals, oils, and bacteria as they flow through your home. If sewage mixed with the floodwater (toilet backups, sewer line failures, or flooding that submerged septic systems), the health risks jump significantly. Sewage contains E. coli, hepatitis, and other pathogens that cause severe illness through skin contact or breathing aerosolized particles.
When you see or smell sewage contamination (fecal matter, toilet paper, strong waste odors), stop ventilation work and call professional restoration services. They’ve got the protective gear, disinfection protocols, and disposal systems to handle contaminated materials safely. Trying to ventilate and dry a sewage flooded space yourself exposes you to infections that can hospitalize you. The cost of professional handling is always less than the cost of getting sick.
Essential Equipment for Effective House Drying After Flood Damage

Drying a flooded home requires three types of equipment working together. Tools that pull water out, tools that move air around, and tools that remove moisture from the air itself. Each one does something fans alone can’t do.
Extraction equipment removes the bulk water first. Wet/dry vacuums handle shallow water and small areas like bathrooms or closets. For larger volumes (basement flooding, whole floor coverage), rent a submersible pump or sump pump. Extraction speeds up everything else because ventilation and dehumidification work much faster once standing water’s gone.
Here’s what you need to keep air moving and humidity dropping:
Dehumidifiers pull moisture directly from the air and collect it in tanks or drain it continuously through hoses. Choose a unit rated for the square footage you’re drying. In flooded basements or large rooms, you may need two or more units running at once. Empty collection tanks every few hours or set up continuous drainage so they never shut off.
Box fans and oscillating fans cost less than specialized equipment and still move serious air volume. Place them in corners pointing toward open windows, against wet walls, and near doorways to push humid air out and pull fresh air in. Oscillating fans cover more area by sweeping back and forth.
Air movers are professional grade fans shaped like small jet engines. They blast focused air across floors and up walls at high velocity. You can rent these from equipment rental shops. They dry floors and walls faster than household fans.
Wet/dry vacuums switch between water extraction and drying support. After pulling up water, reposition the vacuum to suck moisture from carpet, upholstery, or floor cracks where fans can’t reach.
Pumps for larger volumes include submersible models you drop into basements or crawl spaces. They pump hundreds of gallons per hour straight outside through discharge hoses.
Heaters raise air temperature, which increases evaporation rates. Use them carefully in well ventilated areas. Never leave space heaters unattended or place them near wet materials that could ignite.
Run dehumidifiers 24 hours a day until moisture levels drop to normal. Pair them with fans to circulate the drier air they produce throughout the space. Position equipment so airflow moves from one side of the room to the other and out through windows or doors, creating a consistent path for moisture to exit. Keep all power cords dry by running them along walls, taping them above floor level, or using extension cords rated for damp locations. Check cords and connections twice a day for any signs of moisture, heat, or damage.
Ventilation Strategy Room by Room for Water Damage Restoration
Every part of your home needs air movement, but basements, main living areas, and attics each require different approaches to pull moisture out effectively.
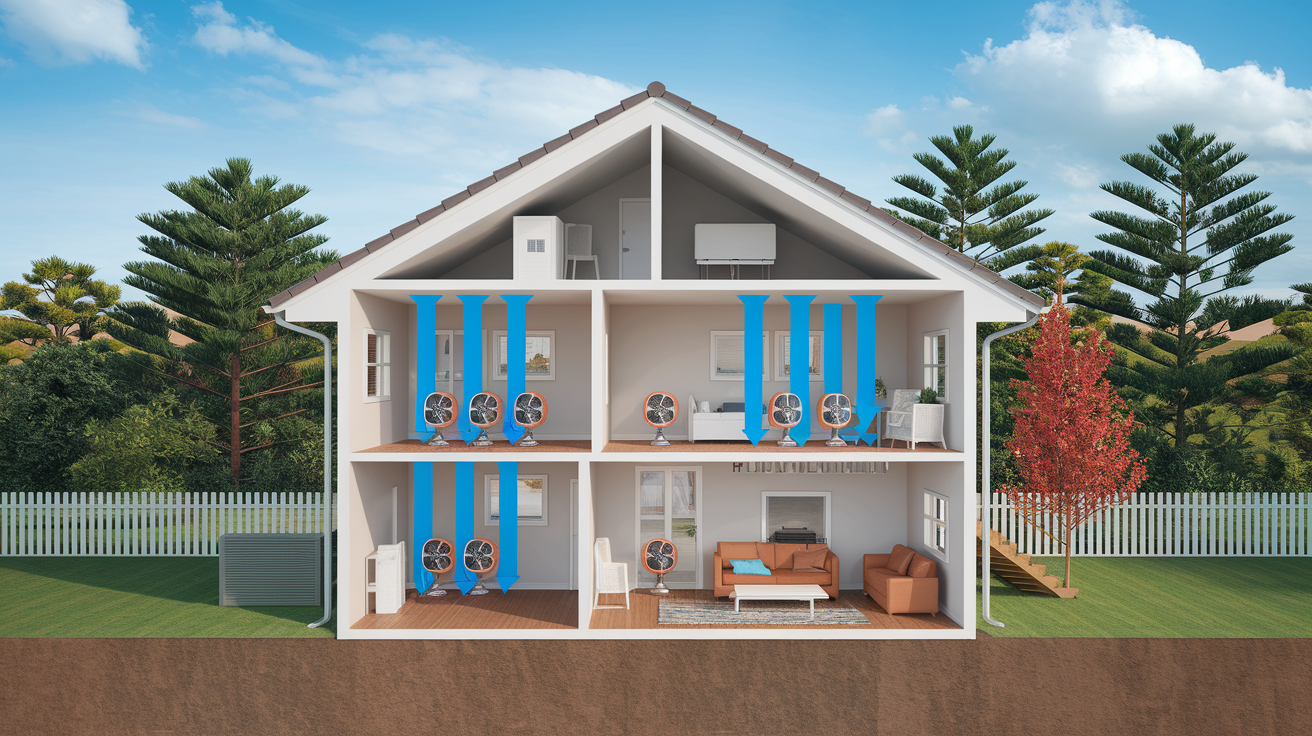
Basements and crawl spaces flood first and dry last. Water below ground level has nowhere to drain naturally, and cool underground temperatures slow evaporation. Set up fans to push air upward and out of the basement rather than just circulating it within the space. Position fans at the base of basement stairs pointing up, or aim them toward basement windows and bulkhead doors if you’ve got them. In crawl spaces, use smaller fans or air movers to force air toward foundation vents. Check crawl spaces for standing water pooling in low spots. Even an inch of water trapped under the house keeps humidity high and feeds mold growth in floor joists and insulation above.
Main living areas benefit most from cross ventilation. Open windows on opposite walls to create natural airflow through the room. Place fans in the center of rooms pointing toward open windows, or position them in doorways to push air from one room to the next and then outside. Direct airflow strategically across wet carpet, up wet walls, and over damaged furniture. If weather permits, open exterior doors too. The more exchange you create between indoor and outdoor air, the faster you’ll drop indoor humidity. Don’t just point fans at wet spots without an exit path for that humid air. It’ll just recirculate moisture.
Attics and upper levels trap heat and moisture rising from flooded areas below. If your attic has an exhaust fan and your electrical system is confirmed dry and safe, turn it on to vent hot, humid air accumulating near the roof. Check the attic for water that leaked through the roof or condensed on rafters. Wet insulation up there drips down into ceilings and walls, causing damage you won’t see until it’s serious. Open gable vents or install temporary fans in attic windows to push moisture outside.
If floodwater touched your HVAC system or entered your ductwork, don’t turn the system on. Running contaminated HVAC equipment spreads mold spores, bacteria, and odors throughout every room in the house through the ducts. Even if the system seems to run fine, floodwater leaves contaminants inside the unit and ducts that create health risks when air circulates. HVAC systems affected by flooding require professional dismantling, cleaning, and disinfection before they’re safe to use again. Until a technician clears your system, rely on portable fans, dehumidifiers, and open windows. If your HVAC stayed dry and you’re certain no water contacted it, you can use exhaust fans and the system’s fan mode (without heating or cooling) to supplement ventilation, but only after confirming the system is completely unaffected by the flood.
Coordinate airflow direction to move air from lower levels upward and outward. Basement fans push air up to main floors. Main floor fans push air toward upper levels or out through windows. Attic fans exhaust air from the top of the house. This whole house air movement prevents pockets of stagnant, humid air from hiding in corners and closets where mold grows unnoticed.
Drying Timeline and Humidity Control During Flood Recovery
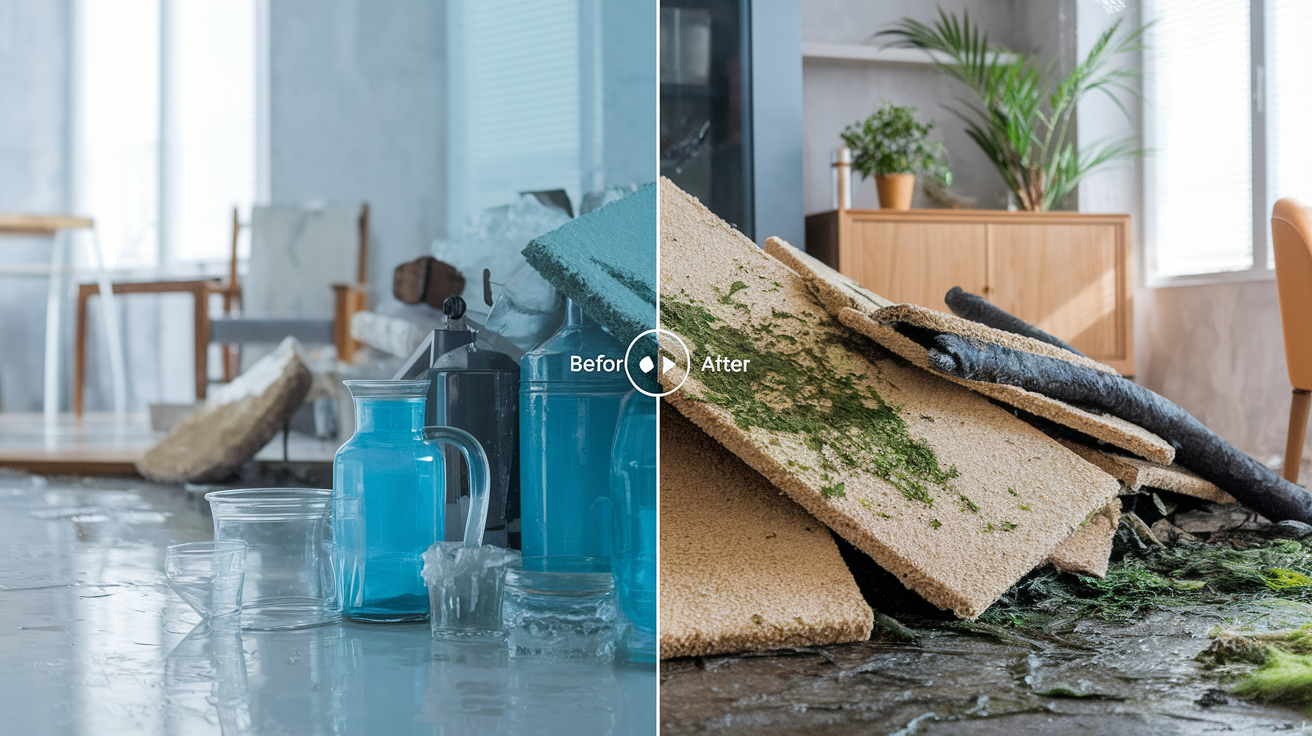
Mold begins growing within 24 to 48 hours after floodwater enters your home. That narrow window determines whether you’re preventing mold or fighting it. Every surface that stays wet past 48 hours becomes a potential mold colony. Once those colonies start, they keep expanding until you finally control moisture levels, which means the damage and cleanup costs grow with every delayed hour.
With proper ventilation equipment running constantly, drying typically takes 3 to 5 days. Cleaned surfaces must dry for several days before the home is safe to occupy again. That timeline assumes you’ve removed standing water, set up dehumidifiers and fans correctly, and kept them running around the clock. Smaller affected areas dry faster. Whole house flooding takes longer. But even in best case scenarios, you’re looking at nearly a week before moisture levels drop to safe ranges.
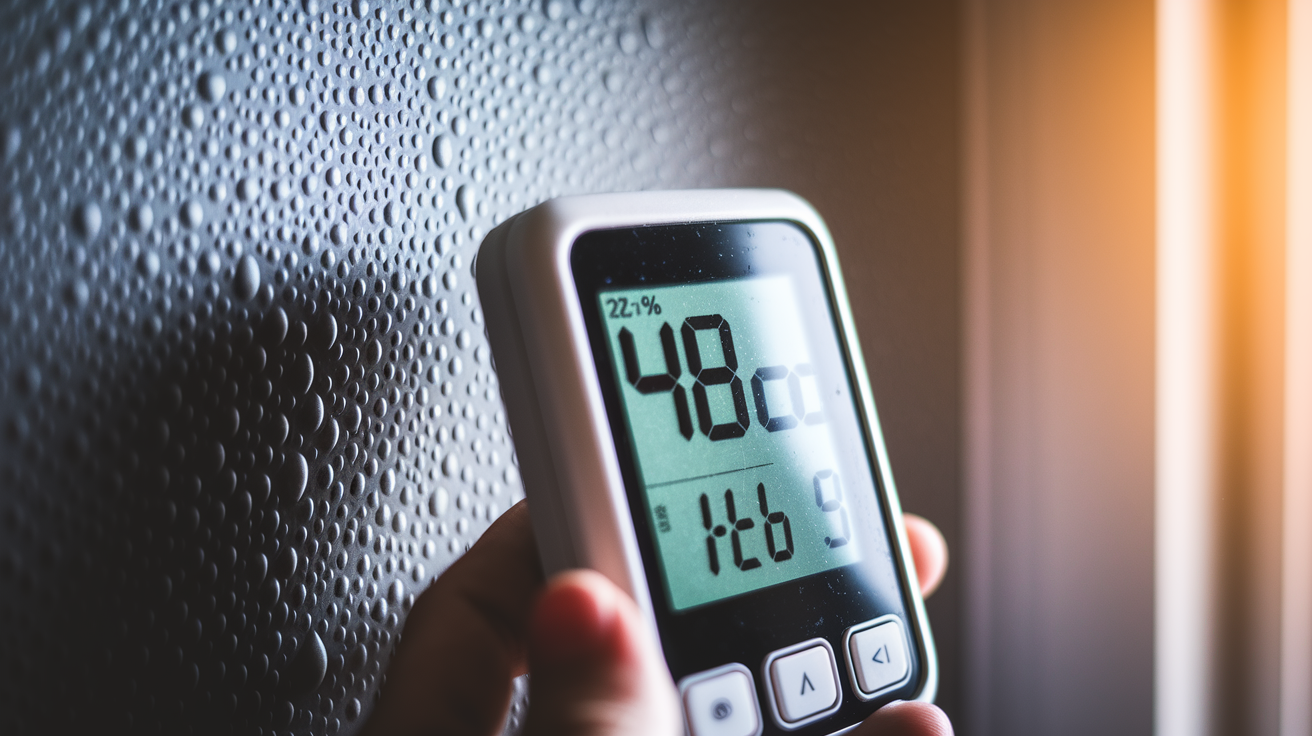
Monitor humidity levels with a hygrometer (inexpensive, available at hardware stores). Target indoor relative humidity below 50 percent. In the first few days after flooding, indoor humidity may spike to 70 or 80 percent even with equipment running. As dehumidifiers pull moisture out and fans push humid air outside, you’ll see the percentage drop. When it holds steady below 50 percent for 24 hours, you’re close to finishing the drying process. Run dehumidifiers constantly, emptying tanks or setting up continuous drainage so they never shut off due to full reservoirs. Humidity control isn’t a part time task during flood recovery.
Higher temperatures speed evaporation, but they also create comfort and safety limits. If you’re using space heaters to warm the air, monitor the space and never leave heaters unattended. Warmer air holds more moisture, which is why pairing heat with dehumidifiers and ventilation works. The heat lifts moisture from surfaces into the air, and the dehumidifiers pull it out before it condenses somewhere else.
Air circulation prevents mold growth by constantly removing moisture from surfaces before spores can germinate and spread. Stagnant air lets moisture settle and soak in. Moving air evaporates surface moisture and carries it away. This is why running fans matters as much as running dehumidifiers. Humidity control and airflow work as a team. One without the other leaves you vulnerable to mold even if your equipment runs nonstop.
Weather conditions outside affect indoor drying speed. If outdoor humidity is high (above 60 percent), opening windows may actually slow your progress by bringing more moisture inside. In that case, close windows and rely entirely on mechanical dehumidification. If outdoor humidity is low and temperatures are moderate, natural ventilation through open windows speeds drying dramatically. Material type also matters. Drywall and carpet hold moisture longer than tile and metal. Thick water volume (several inches of standing water) takes longer to extract and dry than surface water from a brief overflow. Expect drying timelines to extend when dealing with porous materials, cold weather, or high outdoor humidity.
Targeting Wall Cavities and Structural Elements for Complete Flood Drying
Moisture hides inside walls, under floors, and above ceilings where ventilation equipment can’t reach it directly. That hidden moisture causes long term damage even after visible surfaces feel dry.
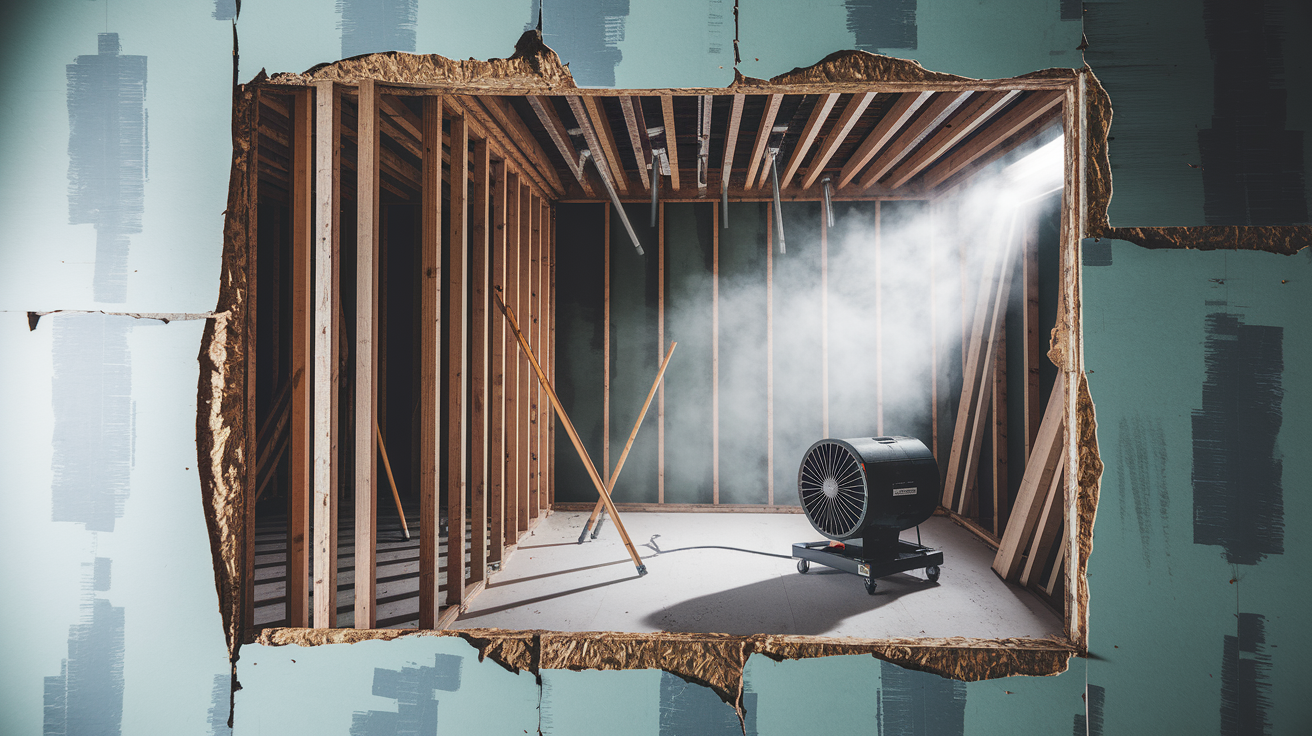
Drywall and plaster absorb floodwater like sponges. Once soaked, drywall loses structural integrity, crumbles when you press it, and becomes a mold growth medium. Sheetrock sections will almost certainly need replacement after flood damage. Inspect every wall that contacted water by pressing gently near the baseboard and midway up the wall. If the surface feels soft, spongy, or shows visible swelling, mark it for removal. Remove and replace drywall that absorbed water rather than trying to dry it in place. Cutting out damaged sections also opens wall cavities to airflow so the framing and insulation inside can dry. Use a utility knife to score a straight line about two feet above the water line, then pull the damaged section away. Direct fans into the open wall cavity and use a moisture meter to check studs and any remaining insulation. If you find moisture readings above 20 percent on framing lumber, keep ventilating that cavity until readings drop to 15 percent or below.
Floors and subfloors trap water between layers where it slowly rots the structure. If carpet or vinyl flooring got soaked, pull it up to expose the subfloor underneath. Waterlogged flooring holds moisture against the subfloor and prevents drying even with fans running above it. Once the subfloor’s visible, aim air movers or box fans directly at it and monitor moisture levels with a meter. Hardwood floors sometimes survive if you dry them fast enough, but engineered wood and laminate flooring almost always need replacement after flooding. The layers separate, warp, and buckle as water soaks through adhesives. Subfloors dry faster once you remove wet flooring materials. Place dehumidifiers nearby and keep air moving across the wood until moisture readings match pre flood levels (typically under 12 percent for wood).
Insulation and ceilings create hidden moisture traps that ruin air quality and weaken structures if you miss them. Wet insulation loses all effectiveness and becomes a sponge that drips water into ceilings and down walls for weeks after the flood. Fiberglass insulation that got soaked must be removed and replaced. It doesn’t dry properly and holds contaminants from floodwater. If you see water stains spreading on ceilings, check the attic or crawl space above for wet insulation. Pull it out, bag it, and dispose of it. Leave the cavity open to airflow until framing dries completely. Ceiling drywall that stays damp sags and eventually collapses. Probe ceiling surfaces with a moisture meter or gently press upward with your hand (wear gloves). Soft, sagging, or discolored ceiling sections need removal to prevent collapse and to ventilate the space above.
Materials Assessment: What Can Dry and What Requires Removal
Some materials dry out and return to service. Others stay contaminated or structurally compromised no matter how long you ventilate them, and leaving them in place blocks airflow you need for drying the rest of your home.
Porous materials absorb floodwater deep into their structure where bacteria, chemicals, and contaminants stay trapped even after the surface dries. Nonporous materials shed water and can be cleaned, disinfected, and reused. Knowing the difference saves you time and prevents health risks from items that look dry but still carry contamination.
| Material Type | Can Be Saved | Must Be Removed | Ventilation Notes |
|---|---|---|---|
| Upholstered furniture | No | Yes | Fabric and padding trap contaminants and mold; removal improves airflow |
| Carpet and padding | No | Yes | Pull up immediately to expose subfloor for drying |
| Drywall and sheetrock | Sometimes (if barely wet) | Usually yes | Removing damaged sections opens wall cavities to ventilation |
| Hardwood flooring | Sometimes | If warped or separating | Dry quickly with air movers; monitor for cupping and buckling |
| Metal, glass, plastic items | Yes | No | Clean and disinfect; these dry quickly and don’t block airflow |
| Mattresses and box springs | No | Yes | Impossible to disinfect interior; become mold and bacteria sources |
| Cabinetry | Solid wood yes, particle board no | If swollen or crumbling | Remove damaged units to ventilate walls and floors behind them |
Removing unsalvageable materials immediately improves air circulation throughout the affected area. A soaked couch in the middle of a room blocks airflow to the floor and wall behind it. Wet carpet on the floor prevents air from reaching and drying the subfloor underneath. Debris removal isn’t just cleanup. It’s part of the ventilation strategy. As you pull out damaged furniture, carpeting, and drywall, you’re opening pathways for air to flow across every surface that needs drying. Stack removed materials outside or in a garage (not in living areas) until you can arrange disposal. Keep cleared rooms as empty as possible so fans and dehumidifiers can work without obstructions.
Professional Restoration Services Versus DIY Flood Ventilation
Small scale flooding with clean water in a few rooms is manageable with rental equipment and your own labor. Large scale disasters, contaminated water, or structural damage require expertise and industrial tools you can’t rent at a hardware store.
Handle ventilation yourself when the water came from a clean source (burst pipe, rainwater through a window), affected only part of your home (one or two rooms, a basement), and your inspection shows no serious structural damage. If you can remove the water with a household wet/dry vacuum or a rented sump pump, set up fans and dehumidifiers from a rental shop, and safely access all the wet areas, DIY drying works. You’ll save thousands compared to professional services, and you’ll get the satisfaction of restoring your own space. Just commit to running equipment nonstop and checking progress twice daily with moisture meters and visual inspections.
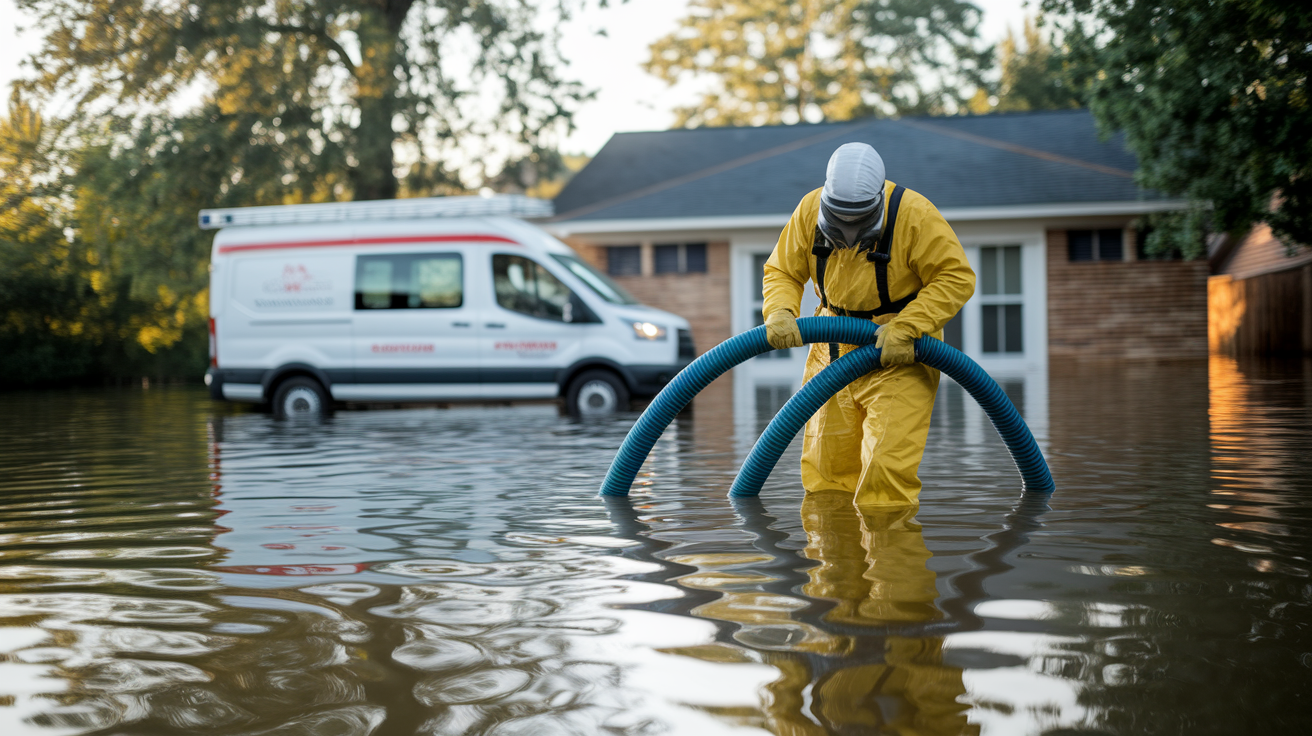
Call professional water damage restoration when the job exceeds your equipment, safety limits, or knowledge. Sewage backups contaminate everything they touch with pathogens that cause severe illness. Professionals have hazmat suits, respirators, and disinfection protocols that keep them safe while removing contaminated materials and treating surfaces. Flooding that affected your HVAC system and ductwork needs professional dismantling and cleaning before you can safely run the system again. Technicians pull apart the unit, disinfect internal components, clean ducts, and test airflow before certifying it’s safe. Large scale flooding (whole house, multiple feet of water, extended duration) requires industrial grade pumps, commercial dehumidifiers, and structural drying techniques that go beyond renting a few fans. When you see visible structural damage (sagging ceilings, cracked foundation walls, warped floors), professionals assess safety before beginning work and know when engineering evaluations are necessary. If mold already covers large areas (more than ten square feet), professional remediation prevents spreading spores throughout the house during cleanup.
Here’s when to stop DIY work and call the professionals:
• Sewage backup or blackwater contamination from toilets, sewer lines, or septic systems
• Flooding that submerged HVAC equipment, furnace, or ductwork
• Water volumes requiring industrial pumps and truck mounted extraction equipment
• Structural damage including foundation cracks, sagging floors, or compromised load bearing walls
• Mold growth covering more than a small closet sized area or visible throughout multiple rooms
Professionals arrive with extraction trucks, thermal imaging to find hidden moisture, air scrubbers to filter mold spores, and antimicrobial treatments for contaminated surfaces. They document everything for insurance claims and guarantee their work. The cost is higher than DIY, but the speed, safety, and thoroughness often make it worthwhile when damage is severe.
Monitoring Progress and Preventing Secondary Flood Damage
Running equipment isn’t enough. You need to track whether moisture levels are actually dropping and catch problems before they become disasters weeks after the flood.
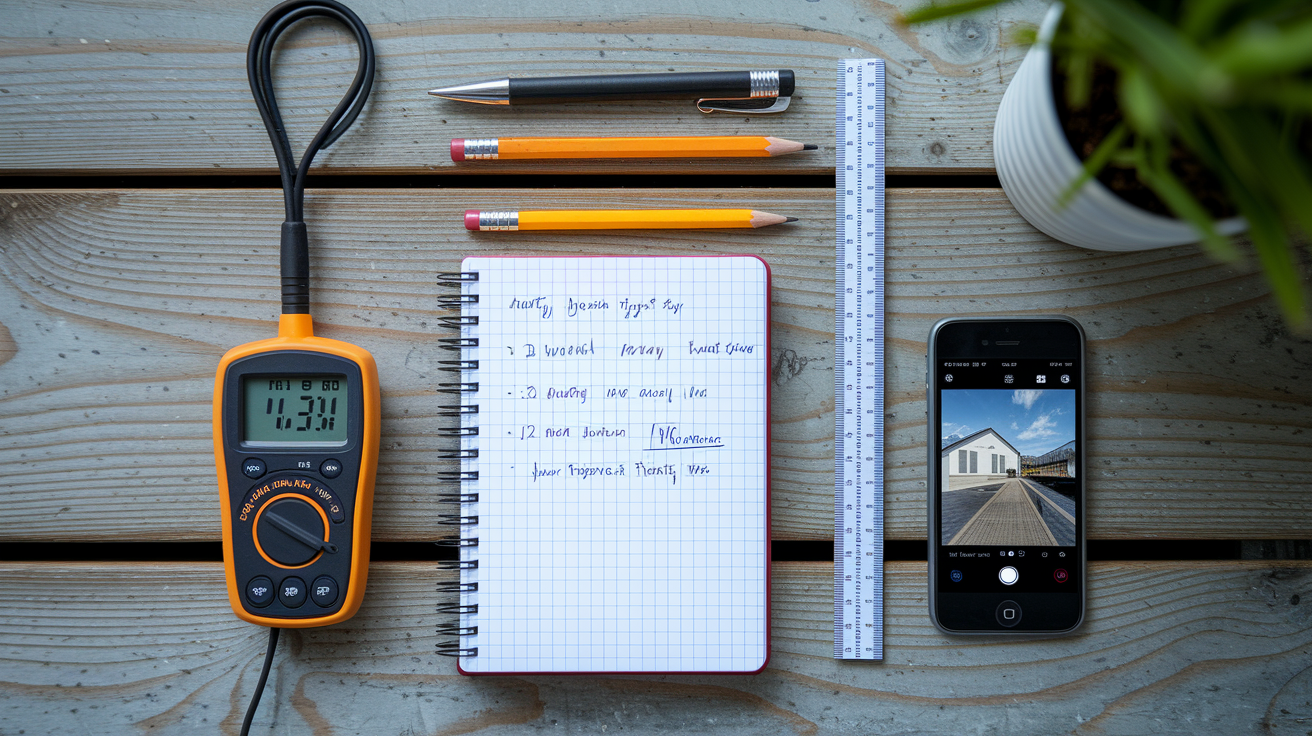
Use a moisture meter to measure water content inside walls, floors, and ceilings. These meters cost between twenty and one hundred dollars and give instant readings. Press the pins into drywall, wood, or subfloor and check the percentage. Dry materials read below 15 percent moisture. Readings above 20 percent mean moisture is still present and drying needs to continue. Check the same spots every day and write down the numbers. When readings stop dropping or plateau above safe levels, you’ve found a problem area that needs more ventilation, removal of materials blocking airflow, or professional help. Moisture meters find hidden water in wall cavities behind intact drywall, under flooring that looks dry on top, and in ceiling joists above stained sections.
Create an inspection routine that covers areas you can’t see from the main rooms. Check crawl spaces every other day for standing water pooling in low spots. Inspect attics for wet insulation, water stains on rafters, or dripping from roof leaks. Pull back edges of remaining carpet to check subfloor moisture. Look under sinks and inside cabinets for water trapped in enclosed spaces. Monitor for musty odors, which often appear before you see mold. A smell like damp earth, old books, or mildew means moisture is hiding somewhere, usually behind wall coverings, inside closed closets, or under materials you haven’t removed yet. Track down the source and increase ventilation in that area.
Document the drying process with photos and written notes. Take pictures of water damage on day one, then weekly progress photos showing how moisture levels drop and equipment placement. Note equipment run times, dehumidifier tank emptying frequency, and moisture meter readings with dates. This documentation supports insurance claims by proving you took immediate action to prevent further damage. Adjusters want to see that you didn’t let water sit for days or weeks without response. If you eventually need professional restoration, your notes help contractors understand what you’ve already done and what still needs attention.
Your home is safe to reoccupy when moisture readings hold steady in the safe range (below 15 percent for wood, below 1 percent for drywall by weight) for at least 24 hours, no musty odors remain anywhere in the affected areas, and all surfaces feel dry to the touch. Don’t move back in or bring belongings inside until everything is completely dry and you’ve confirmed there’s no mold growth. Furniture and boxes placed on damp floors or against damp walls trap moisture underneath and restart the mold growth cycle. Finish drying completely, then move in. Patience during this final stage prevents having to start ventilation all over again.
Weather Considerations for Outdoor Ventilation During Flood Drying
Opening windows to let fresh air in speeds drying on some days and slows it down on others, depending entirely on what the outdoor air brings with it.
The decision to open windows or keep them closed hinges on outdoor humidity levels. When outdoor air is drier than indoor air, natural ventilation pulls moisture out of your home. When outdoor air is more humid than inside, opening windows brings extra moisture in and works against your dehumidifiers.
Favorable conditions for opening windows include outdoor humidity below 50 percent, temperatures between 60 and 80 degrees, and breezy or windy conditions that push air through the house naturally. Dry weather with sunshine creates ideal ventilation conditions. On these days, open every window in the affected areas and position fans to push humid indoor air out while pulling fresh dry air in. Cross ventilation on a low humidity day does as much work as a dehumidifier, and it’s free.
Unfavorable conditions requiring closed windows include outdoor humidity above 60 percent, active rain or drizzle, cold temperatures that slow evaporation, and extreme heat that makes running dehumidifiers inefficient. High outdoor humidity often occurs after heavy rains, near bodies of water, or during muggy summer weather. Check outdoor humidity with a hygrometer placed outside or use a weather app that reports local humidity percentages. When outdoor humidity is high, close windows and rely entirely on mechanical dehumidification and fans to circulate air within the space. Opening windows under these conditions brings in moisture saturated air that increases indoor humidity instead of reducing it.
Balance natural and mechanical ventilation based on daily and hourly weather changes. Open windows during the driest part of the day (often mid afternoon when temperatures peak and humidity drops), then close them in early morning and evening when humidity rises. On partly cloudy days, watch for breaks in cloud cover when humidity dips, and take advantage of those windows (literally) for quick ventilation sessions. Keep dehumidifiers and fans running 24/7 regardless of whether windows are open or closed. Natural airflow supplements mechanical drying but doesn’t replace it during flood recovery. Monitor both indoor and outdoor humidity levels throughout the day and adjust your window strategy to match. When weather permits, open wide. When it doesn’t, seal up and let the equipment do the work.
Long Term Prevention: Improving Home Ventilation to Reduce Future Flood Risk
Once you’ve dried everything and started repairs, think about changes that make your home less vulnerable to the next flood and faster to dry if it happens again.
After surviving a flood, you know exactly which parts of your home flooded first, which areas stayed damp longest, and where moisture problems hid. Use that knowledge to improve ventilation and water management permanently.
Long term improvements that reduce future flood damage and speed recovery include:
Installing permanent dehumidification systems in basements and crawl spaces. Whole house dehumidifiers or dedicated basement units run automatically when humidity rises, preventing moisture buildup even when you’re not home. These systems cost a few hundred to a few thousand dollars but protect against gradual moisture damage year round.
Adding vapor barriers in moisture prone areas. Thick plastic sheeting installed over crawl space dirt floors prevents ground moisture from rising into floor joists and insulation. Vapor barriers in basements reduce condensation on walls and floors during humid months.
Improving foundation drainage and grading. If water pooled against your foundation during the flood, regrade soil to slope away from the house and install or upgrade foundation drains that channel water away before it enters the basement or crawl space.
Installing or upgrading sump pump systems. Basements that flooded need sump pumps with battery backup systems that keep running during power outages (when flooding often happens). Test pumps monthly and replace them every five to seven years.
Enhancing attic and crawl space ventilation permanently. Add soffit vents, ridge vents, or gable vents to attics that trapped moisture. Install foundation vents or powered crawl space ventilation fans that run on humidity sensors to automatically exhaust damp air.
Using mold resistant materials and sealants during restoration. Replace damaged drywall with mold resistant versions (often labeled as greenboard or purple board). Use mold resistant paint and sealants on repaired walls and ceilings. Choose tile or vinyl flooring instead of carpet in flood prone areas like basements.
Improved baseline ventilation reduces everyday moisture accumulation from cooking, bathing, and humidity, which means your home starts at lower moisture levels if flooding happens again. Lower starting moisture means faster drying and less mold risk. Creating a more flood resilient home through ventilation improvements isn’t about preparing for the worst. It’s about learning from what just happened and making practical changes that protect your investment and your family’s health. The first week of flood recovery is exhausting, but it’s also the foundation for long term prevention planning that makes your home stronger going forward.
Final Words
Getting air moving through your flood-damaged home stops mold in its tracks and protects what you can still save.
Start with safety first. Turn off power, remove standing water, then open windows and position fans to push moisture out.
The next few days matter. Run dehumidifiers constantly, monitor humidity levels, and remove materials that can’t dry.
When you combine the right equipment with smart airflow strategies, most homes dry completely in three to five days.
You’ve got this. Focus on one room at a time, keep checking progress, and don’t rush moving back in until everything feels completely dry.
FAQ
How quickly does mold grow after a flood?
Mold grows within 24 to 48 hours after floodwater enters a home. This short window creates urgency for immediate ventilation and drying efforts. Mold colonies continue expanding until you control moisture levels through proper air circulation and dehumidification.
How to dehumidify a room after flooding?
To dehumidify a room after flooding, run dehumidifiers constantly while using fans to circulate air throughout the space. Remove standing water first, then position dehumidifiers in the wettest areas. Keep windows closed during mechanical dehumidification when outdoor humidity is high.
Is it safe to live in a house after flooding?
A house is safe to live in after flooding only when everything is completely dry and mold-free. Surfaces must dry for several days with proper ventilation before the home is safe. Do not move back in until moisture meters confirm dryness and no musty odors remain.
How long to dry out a house after a flood?
Drying out a house after a flood typically takes 3 to 5 days with proper ventilation and equipment. This timeline assumes you remove standing water immediately, run dehumidifiers constantly, and maintain good air circulation. Weather conditions, material types, and water volume can extend this timeline.
What equipment do I need to ventilate my house after a flood?
To ventilate your house after a flood, you need dehumidifiers, box fans or air movers, and wet/dry vacuums for water removal. Position fans to create cross ventilation and run dehumidifiers continuously. Keep all electrical cords completely dry during operation to prevent hazards.
When should I open windows after a flood?
You should open windows after a flood when outdoor humidity is low and weather is dry. Close windows during rain, high outdoor humidity, or when running dehumidifiers. Check daily weather conditions and open windows only when outdoor air will help dry your home rather than add moisture.
What flood-damaged materials must be removed instead of dried?
Flood-damaged porous materials like upholstered furniture, mattresses, carpet, and soaked drywall must be removed instead of dried. These materials absorb contaminated water and cannot be adequately cleaned. Removing unsalvageable items improves air circulation and prevents mold growth in materials that trap moisture.
Do I need professional help to ventilate my flooded house?
You need professional help to ventilate your flooded house if you have sewage contamination, extensive water volumes, HVAC system damage, or structural concerns. DIY ventilation works for limited clean water flooding in accessible areas when you have proper equipment and no safety hazards.
How do I ventilate a basement after flooding?
To ventilate a basement after flooding, use fans to push air upward and out of the below-grade space. Position dehumidifiers in the wettest areas and direct airflow toward stairs or windows. Inspect crawl spaces for retained water and create airflow pathways from lower to upper levels.
Can I use my HVAC system to help dry my flooded house?
You can use your HVAC system to help dry your flooded house only if the system had no contact with floodwater and ducts are uncontaminated. HVAC systems affected by floodwater require professional dismantling, cleaning, and disinfection before use to prevent circulating mold spores throughout your home.