
When the power cuts at 2 AM and someone needs asthma medication fast, will they find it in 30 seconds or waste five minutes digging through unmarked bins? Most families organize emergency supplies once, label nothing clearly, then discover the chaos when it’s too late. A simple labeling system turns that scramble into a calm, fast grab. You’ll learn how to mark supplies so anyone in your household, even a visiting grandparent or stressed teenager, can locate water, medications, or tools without hunting. Clear labels mean faster decisions, less panic, and supplies that actually work when you need them most.
Core Labeling Methods for Family Emergency Supplies
Clear labels turn chaos into action when someone needs medication fast or has to grab supplies in the dark. Wrong supplies during a disaster can make things worse. Confusion costs time you don’t have.
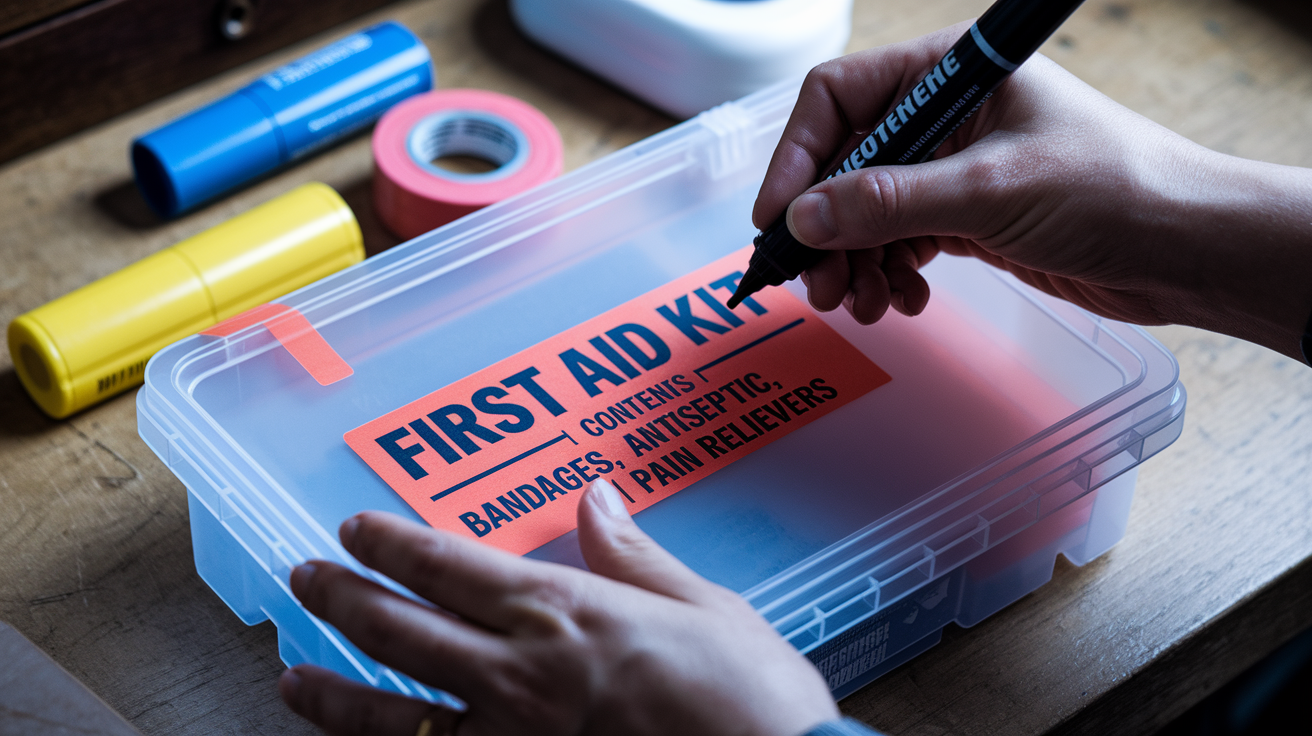
Here’s what every emergency supply label needs: “FIRST AID KIT | Contents: Bandages, Antiseptic, Pain Relievers | Stored: 03/15/2024 | Rotate By: 09/15/2024 | Location: Hall Closet, Top Shelf.”
Anyone who finds that kit gets all the information they need. No guessing.
Labeling techniques that actually work under pressure:
-
Use permanent oil-based markers on waterproof labels. Water-based markers smear when wet, which makes them useless during floods or in humid storage.
-
Write expiration dates in large numbers. 12/2025 reads faster than December 2025, especially for kids or stressed adults.
-
Mark contents and quantities clearly. “24 water bottles” tells you if you have enough. “Water” doesn’t.
-
Add rotation dates six months before expiration. Writing “Rotate By: 06/2024” means supplies get replaced while they’re still fresh.
-
Label storage container locations. “Kitchen Pantry, Bottom Shelf” helps someone unfamiliar with your home find what they need.
-
Include handling instructions when needed. “Shake Before Use” or “Keep Upright” prevents ruined supplies.
-
Place labels on multiple sides. Top, front, and one end. You’ll see them regardless of how things stack.
-
Use high-contrast colors. Black on white or white on red reads fastest from distance.
Your labels need to work for everyone in your household. A 6-year-old and a 75-year-old with reading glasses should both understand them in poor lighting. Simple words. Skip abbreviations except the obvious ones like “oz” for ounce. Make text large enough to read without hunting for glasses. Minimum 16-point font for labels you’ll read up close, 24-point for labels you need to spot across a room.
Test your labels before you need them. Stick samples on containers, spray them with water, leave them in a hot garage for a week. Try to read them after that. If ink runs or labels peel, they’ll fail when it matters.
Comprehensive Labeling Implementation: Materials, Placement, and Readability

Regular labels fail during disasters. Paper disintegrates when wet. Adhesive quits in extreme temperatures. Ink fades in sunlight. Material selection isn’t about perfection. It’s about reliability when conditions turn bad.
Label materials that actually withstand disaster conditions:
Oil-based permanent markers beat water-based markers every single time for emergency labeling. Sharpie brand oil-based markers work on plastic bins, metal containers, and fabric bags without bleeding or fading. Water-based markers smear when touched with wet hands. Exactly what happens during floods or when grabbing supplies in rain. On smooth plastic, permanent markers sometimes wipe off with heavy handling. Add a strip of clear packing tape over marker text to seal it and create a waterproof layer. You can build an entire labeling system with one package of permanent markers and a roll of clear tape for under ten dollars.
- Adhesive waterproof labels work on plastic and metal, found at office supply stores
- Laminated paper labels are budget friendly. Print labels on regular paper, seal in laminating pouches or clear packing tape
- Permanent marker directly on containers with oil-based Sharpie. No adhesive to fail
- Engraved or embossed labels by scratching info into plastic with a knife point or heated tool. Permanent but time consuming
- Weather-resistant tag systems like plastic luggage tags or plant markers attached with zip ties. Replaceable and durable
- Heat-shrink label sleeves slip printed labels into clear tubing that seals around container necks. Waterproof and professional looking
Strategic Label Placement and Font Size Guidelines
Label containers on at least three sides: top, front, and one end. When bins stack in a closet, the front label shows. When bins sit on high shelves, the top label shows. When bins wedge sideways in vehicle trunks, the end label shows. Triple labeling means someone sees it no matter how it’s stored.
| Container Type | Recommended Label Location | Minimum Font Size |
|---|---|---|
| Large storage bins (18 gallons or larger) | Front center, top center, right end | 24-point (1-inch tall letters) |
| Backpacks and duffle bags | Both sides, top flap or opening | 18-point (0.75-inch tall letters) |
| Plastic stackable containers | Front, top, one narrow end | 16-point for contents, 24-point for category |
| Vehicle emergency kits | All four sides and top | 24-point minimum (visible in dim trunk light) |
| Grab-and-go bags | Both broad sides, attached luggage tag | 1-inch tall letters, bold or all caps |
Position labels at eye level on storage areas whenever you can. When organizing pantry shelves or closet zones, place large category signs (WATER, FOOD, MEDICAL) where someone standing in the doorway sees them right away. Add directional arrows when shelves or bins sit above or below eye level. A “FOOD SUPPLIES ↑” sign on a pantry door saves seconds of searching.
Use large, bold, sans-serif fonts like Arial or Helvetica. Cursive and decorative fonts become illegible when you’re reading fast, lighting is poor, or you don’t have reading glasses. Print in all capital letters for maximum visibility. “FIRST AID KIT” reads faster than “First Aid Kit” from distance. Minimum 16-point text for labels you’ll read close up while kneeling in a closet. Minimum 24-point text for labels you need to identify from across a garage or basement.
Creating a Supply Categorization and Labeling System for Family Emergency Kits
Categorization cuts search time from minutes to seconds. When you need a specific supply during a power outage or evacuation, wandering between storage areas looking through unlabeled containers wastes time and increases stress for everyone.
| Category | Label Color Suggestion | Essential Label Information | Storage Notes |
|---|---|---|---|
| Water and Hydration | Blue | Total gallons, storage date, rotation date, container count | Store in cool, dark areas away from chemicals or gasoline |
| Food Supplies | Green | Contents list, expiration dates, preparation requirements, allergens | Group by shelf-stable proteins, grains, fruits, ready-to-eat items |
| Medical/First Aid | Red | Contents, quantities, expiration dates, prescription patient names | Keep in sealed containers, check quarterly for expired medications |
| Tools and Equipment | Yellow | Item list, battery types needed, last maintenance date | Store flashlights, radios, multi-tools, manual can openers together |
| Hygiene Products | Orange | Contents, quantities, special needs notes, replacement dates | Include soap, toilet paper, feminine products, diapers as needed |
| Documents and Communication | Purple | Document types, last update date, waterproof seal check date | Use waterproof containers, store digital backups separately |
| Special Needs Items | Pink | Family member name, item description, replacement schedule | Include mobility aids, hearing aid batteries, glasses, denture supplies |
| Pet Supplies | Brown | Pet name, food type, medication names, vet contact information | Store food, water bowls, leash, medical papers, comfort items together |
Subdivide large categories into smaller labeled sections within storage containers. A food supply bin might contain labeled bags for “Breakfast Items,” “Proteins,” “Snacks,” and “Special Diet (Gluten-Free).” Label both the main container exterior with the broad category and individual internal bags with specific contents. This double-layer system lets someone quickly identify the right storage bin, then find exact items inside without unpacking everything.
Medical and First Aid Supply Labeling Details
Medical supplies get accessed by stressed family members and sometimes by emergency responders who don’t know your organizational system. Labels communicate critical information instantly. No interpretation. No guesswork.
Critical medical supply label information:
-
Medication names and dosages. Write both generic and brand names plus strength, like “Ibuprofen (Advil) 200mg tablets”
-
Clear expiration dates. Write “Expires: 08/2025” in large text so expired medications get discarded immediately
-
Patient names for prescription medications. Write “FOR: Sarah Miller” so medications don’t get mixed up between family members
-
Allergy warnings. Add “PENICILLIN ALLERGY, Sarah” to prevent dangerous administration errors
-
Usage instructions. Include “Take 2 tablets every 6 hours with food” or “Apply to clean wound twice daily”
-
Quantity counts. Write “24 tablets remaining as of 03/15/2024” to track when supplies need restocking
-
Emergency contact numbers. Include prescribing doctor’s phone number for questions during extended emergencies
Create a detailed medication list on a laminated card stored inside your first aid kit. List every family member with their current prescription medications, dosages, prescribing doctors, pharmacy phone numbers, known allergies, and chronic conditions. Update this list quarterly and whenever prescriptions change. If emergency medical personnel need to treat an unconscious family member, this list provides critical information immediately.
Label individual compartments within first aid containers using small adhesive labels or permanent marker directly on plastic organizer sections. A tackle box used for first aid should have each compartment labeled: “Bandages 2×2,” “Gauze 4×4,” “Antibiotic Ointment,” “Pain Relievers,” “Tweezers & Scissors.” Place highly visible “FIRST AID” labels with red cross symbols on container exteriors, using letters at least one inch tall so anyone in your home can identify medical supplies at a glance.
Food Supply Labeling for Dietary Safety
Food supply labels prevent dangerous situations where family members with allergies or dietary restrictions consume unsafe items during high-stress emergencies when careful reading gets skipped.
Food label essentials:
- Main ingredients. List top three ingredients so people understand what they’re eating
- Common allergens present. Clearly mark “CONTAINS: Peanuts” or “CONTAINS: Gluten” in all caps
- Calorie content per serving. Helps ration food appropriately based on family needs
- Preparation requirements. Specify “Add Water,” “Heat Before Eating,” or “Ready to Eat”
- Expiration dates. Use “Best By: 12/2025” format for quick recognition
- Serving sizes. Write “4 servings per can” to plan meals accurately
Create separate labeled sections for family members with specific dietary needs. If someone has celiac disease, label one entire storage container “GLUTEN-FREE FOODS ONLY, Sarah’s Safe Foods.” Stock it with certified gluten-free crackers, pasta, granola bars, and canned goods. Prevents cross-contamination risk during emergencies when food safety practices might relax. Diabetic-friendly foods with low sugar content go in their own labeled section. Infant formula gets stored separately with large labels stating formula type, preparation instructions, and expiration dates.
Water Storage Labeling System
Water storage tracking prevents illness from stale water and ensures adequate quantities for your family’s actual needs. Two gallons per person per day means a family of four needs 24 gallons for a three-day supply. That’s twelve 2-liter bottles or six standard 5-gallon jugs.
Essential water label information:
- Date water was stored. Write “Filled: 03/15/2024” so you track age accurately
- Six-month rotation date. Calculate and write “Rotate By: 09/15/2024” for replacement schedule
- Container size and quantity. Label “5 gallons” or “2 liters, 1 of 12” for inventory tracking
- Treatment status. Mark “Treated with bleach” or “Untreated tap water” for safety information
- Intended use. Designate “Drinking Water” or “Sanitation/Cleaning Water” to prioritize usage
- Container number in total supply. Number bottles sequentially like “Bottle 3 of 12” so you track complete inventory
Calculate your family’s total water needs and label container groups to match daily requirements. For a family of four needing eight gallons daily, group containers into labeled sets. Mark four 2-liter bottles with “DAY 1, Family of 4,” another four with “DAY 2, Family of 4,” and so on through your three-day supply. During emergencies, you’ll know exactly which containers to use first and how many days of supply remain at a glance.
Special Needs and Prescription Medication Supply Labels
Family members with unique medical, age-related, or disability-related needs require careful labeling that addresses specific requirements and prevents life-threatening mistakes.
Special needs supply categories requiring distinct labels:
- Prescription medications with patient names and dosages. Every medication bottle labeled with full name, drug name, strength, and “Take 1 tablet daily with breakfast”
- Infant supplies. Label formula type, diaper sizes, feeding schedules like “Feed every 3 hours, 4 oz per bottle”
- Elderly care items. Mark supplies like “Dad’s hearing aid batteries, Size 312” or “Mom’s denture adhesive”
- Vision correction supplies. Label spare glasses with prescription strength and owner name
- Diabetic testing and medication supplies. Mark testing strips with expiration dates, insulin with storage requirements
- Mobility equipment. Label walker replacement parts, wheelchair repair tools, cane tip replacements
- Communication devices. Mark speech devices or communication boards with user name and basic instructions
- Pet supplies with medical papers. Label pet medications with animal name, dosing instructions, vet contact information
Create medication management labels that include timing schedules and interactions to avoid. If someone takes blood pressure medication that shouldn’t be combined with certain pain relievers, note that restriction directly on both medication containers: “DO NOT take with ibuprofen, see Dr. Chen.” Label backup supplies for critical items like EpiPens or insulin with the patient name and “BACKUP, Check Primary Supply First” so you maintain proper rotation and don’t accidentally use backup supplies prematurely.
Integrated Supply Management: Tracking, Inventory, and Rotation Schedules
Tracking systems built into your labeling prevent the common disaster scenario where you reach for emergency food only to find everything expired months ago. Rotation schedules keep supplies fresh, inventory lists track what you actually have, and date tracking tells you when action is needed.
Expiration Date and Rotation Schedule Labeling
Time-sensitive emergency supplies become worthless or dangerous when they exceed shelf life. Water grows bacteria after sitting too long. Food loses nutritional value and develops off flavors. Batteries leak acid. Medications lose potency or turn toxic.
Date-tracking methods that maintain supply readiness:
-
Write purchase dates and expiration dates clearly. Use permanent marker to add “Purchased: 03/2024 | Expires: 03/2026” directly on containers
-
Use “rotate by” dates set six months before expiration. If food expires in December 2025, write “Rotate By: 06/2025” so you replace it while still fresh
-
Create quarterly check schedules. Label containers with “Check: Jan/Apr/Jul/Oct” so you inspect four times yearly
-
Mark seasonal review dates. Write “Review: Spring 2024” and conduct full supply checks when clocks change
-
Implement color-coded year systems. Use blue stickers for all 2024 expiration dates, green for 2025, red for 2026, making rotation visual
-
Add “last checked” dates. Write “Inspected: 03/15/2024” so you know when supplies were last verified
-
Document rotation in inventory lists. Note when items get rotated and new stock added
Calculate rotation dates for items without printed expiration dates using conservative timelines. Water bottles stored in clean food-grade containers stay safe for six months before rotation. Alkaline batteries maintain charge for about ten years in original packaging but should be tested annually. Rotate them every two years to ensure reliability. Medications generally keep potency until printed expiration dates, but heat and humidity accelerate degradation. Rotate medications stored in garages or outdoor sheds every year regardless of printed dates.
Document rotation schedules on an inventory list kept with emergency supplies. Create a simple chart listing each supply category, current rotation date, and next rotation date. When you rotate water in September 2024, update the list to show “Last Rotation: 09/2024” and “Next Rotation: 03/2025.” This written record prevents confusion about when supplies were last refreshed and helps other family members maintain your system if you’re unavailable.
Master Inventory Lists to Complement Container Labels
Container labels identify individual items. Inventory lists track your complete preparedness system, showing what you have, where it’s stored, how much remains, and when action is required.
| Supply Category | Location | Quantity | Last Check Date | Next Rotation Date | Notes |
|---|---|---|---|---|---|
| Water Storage | Garage, North Wall | 24 gallons (twelve 2-liter bottles) | 03/15/2024 | 09/15/2024 | Family of 4, 3-day supply |
| Food Supplies | Kitchen Pantry, Bottom Shelf | 36 cans various, 12 granola bars, 2 jars peanut butter | 03/15/2024 | 09/15/2024 | Rotate oldest items first |
| First Aid/Medical | Hall Closet, Top Shelf, Red Tackle Box | Complete first aid kit plus family prescriptions | 01/15/2024 | 04/15/2024 | Check prescription expirations quarterly |
| Tools/Equipment | Garage, Pegboard | 2 flashlights, radio, batteries, multi-tool, manual can opener | 03/15/2024 | 03/15/2025 | Test batteries and radio annually |
| Hygiene Products | Bathroom Cabinet, Lower Shelf | Toilet paper (12 rolls), soap (4 bars), feminine products (2 boxes) | 03/15/2024 | No expiration | Restock when quantity drops below half |
| Important Documents | Hall Closet, Top Shelf, Waterproof Box | Insurance papers, IDs, medical records, USB backup | 01/01/2024 | 01/01/2025 | Update annually or after major life changes |
| Special Needs (Sarah, Diabetic) | Bedroom Closet, Pink Container | Testing strips (50 count), insulin (2 vials), syringes (box of 100) | 03/01/2024 | 06/01/2024 | Insulin expires 05/2024, reorder by April |
| Pet Supplies (Max, Dog) | Garage, Brown Bin | Dog food (20 lbs), water bowl, leash, medications, vet records | 03/15/2024 | 09/15/2024 | Food expires 08/2024 |
Create both physical inventory sheets stored with supplies and digital backup copies accessible on smartphones. A laminated inventory checklist kept in your emergency supply closet lets you update it with dry-erase marker during checks. The same information typed into a smartphone note app or spreadsheet gives you access even if you can’t get home during an emergency. For more comprehensive emergency kit planning, including additional items to track in your inventory system, see the complete emergency kit planning guide.
Update inventory lists every time supplies are rotated or restocked. Don’t wait for scheduled reviews to document changes. When you replace expired batteries or add new canned goods, immediately mark the change on both physical and digital inventory lists. Treat the inventory as a living document that reflects your actual current supplies, not an outdated snapshot from six months ago.
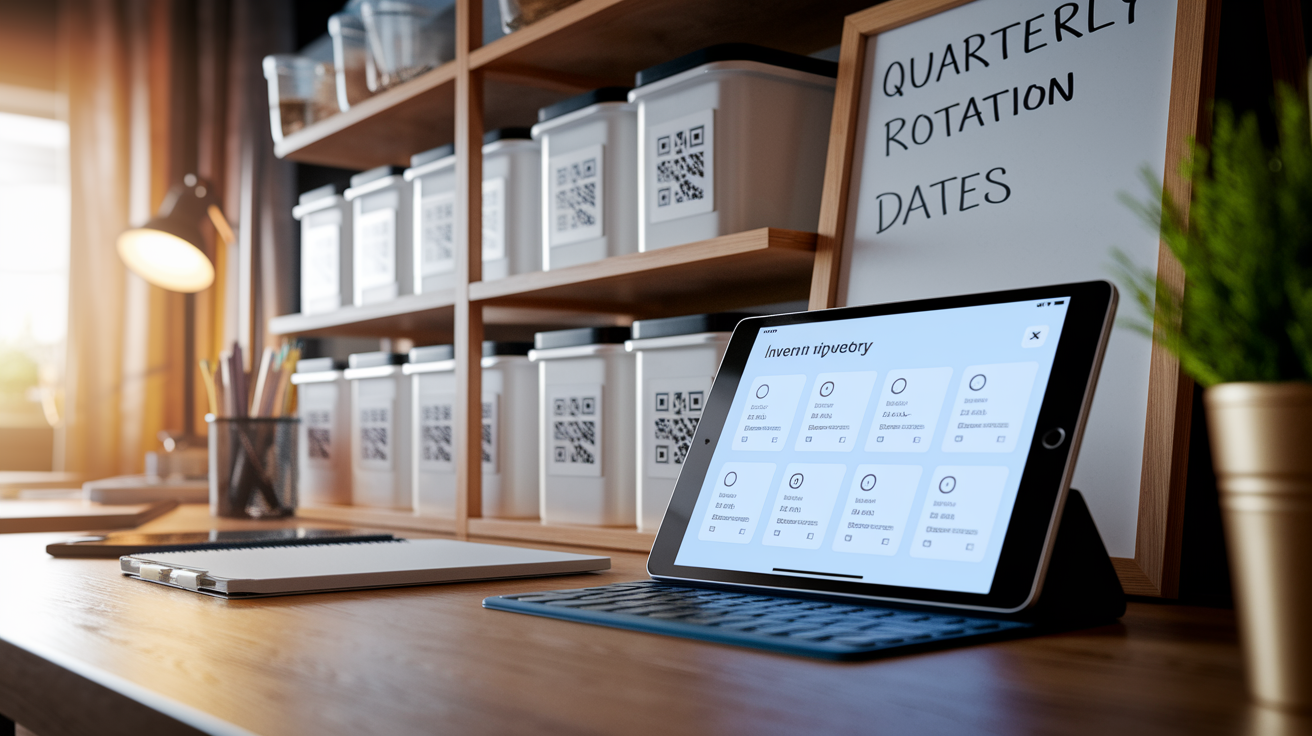
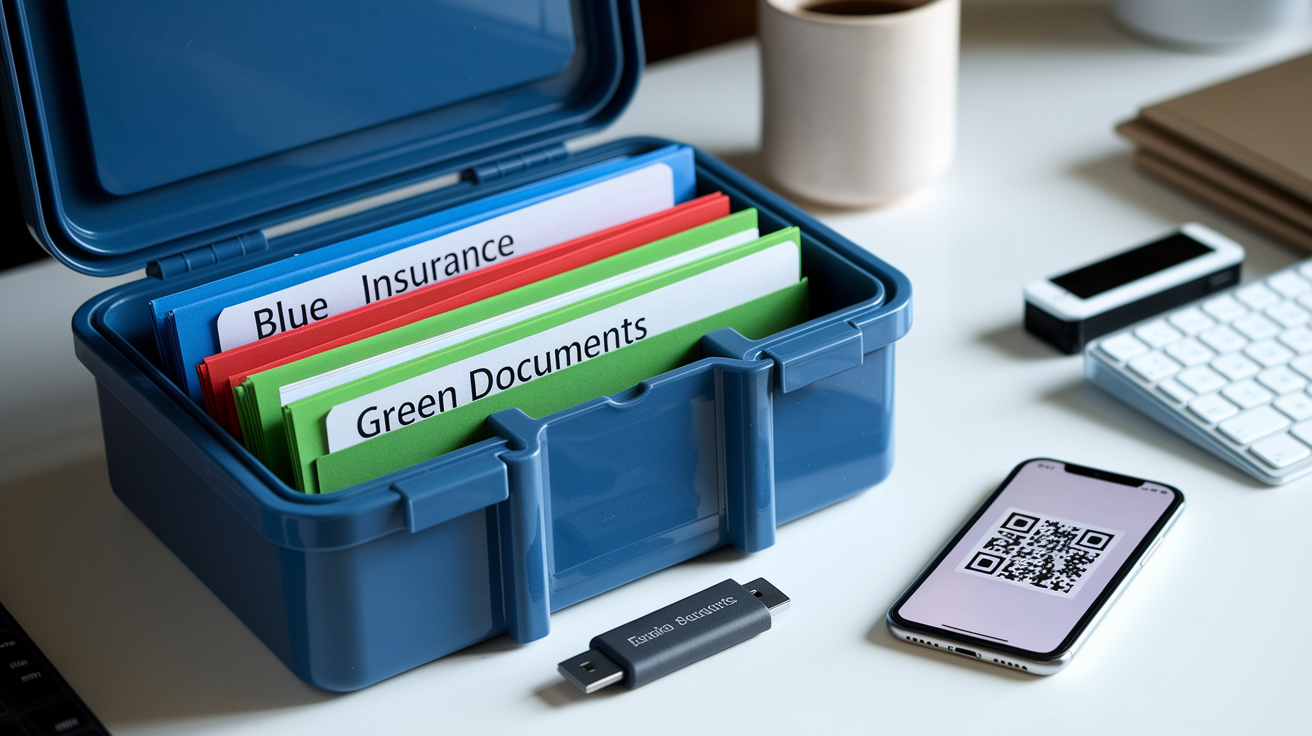
Use QR code labels on containers that link to detailed digital inventory records. Free QR code generators online let you create codes linking to cloud-stored spreadsheets or documents. Stick the QR code on your emergency supply container lid. Anyone with a smartphone can scan it and instantly see a complete list of contents, expiration dates, and usage instructions without opening the container or searching through papers.
Color-Coding Emergency Supplies for Visual Recognition by All Ages
Color association works when reading skills fail under stress, poor lighting reduces visibility, or young children need to help during emergencies. The human brain processes color faster than text. Color-coding becomes a powerful redundant system alongside written labels.
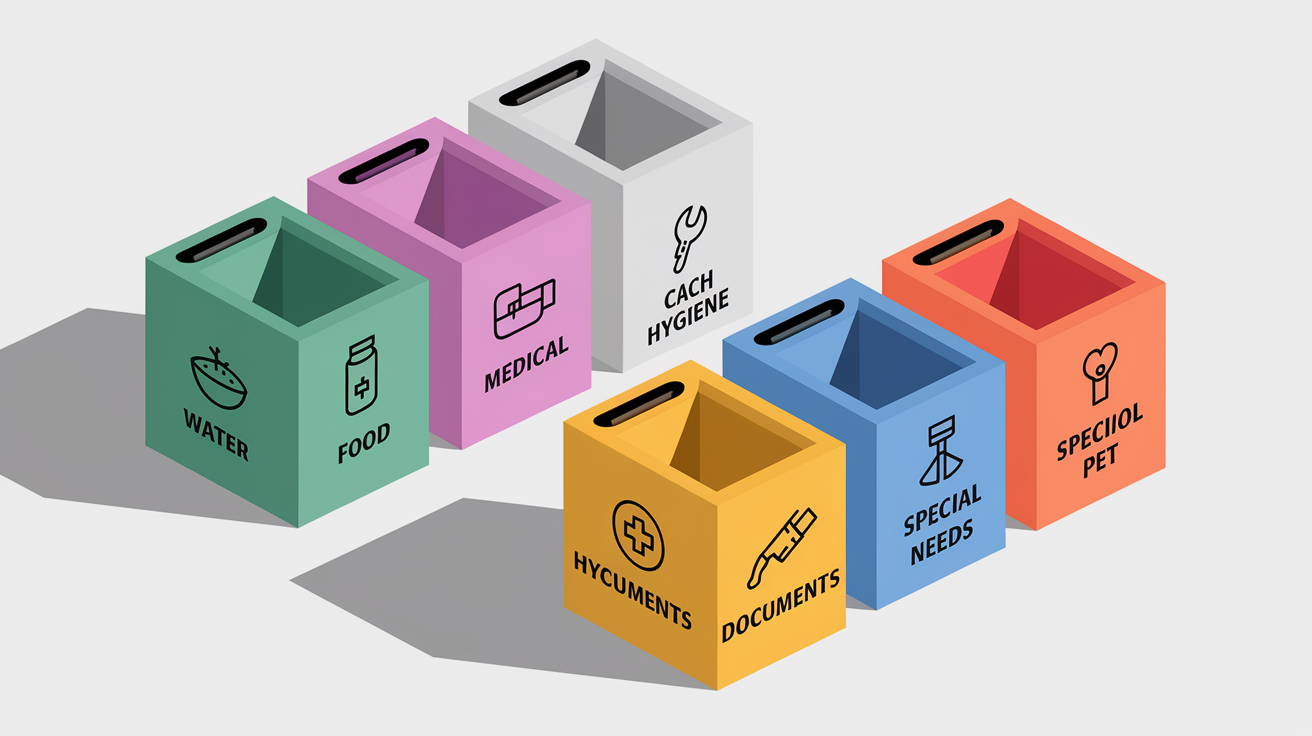
Suggested color assignments for emergency supply categories:
- Red for medical supplies. Universally recognized for first aid and emergency medical care
- Blue for water and hydration. Natural association with water makes it intuitive
- Green for food supplies. Connects to growth, nutrition, and plant-based foods
- Yellow for tools and safety equipment. High visibility color used for caution and attention
- Orange for communication devices. Bright, attention-getting color for radios, phones, chargers
- Purple for special needs and medications. Distinctive color that stands out from other categories
- Brown for pet supplies. Earth-tone color different enough from other categories to avoid confusion
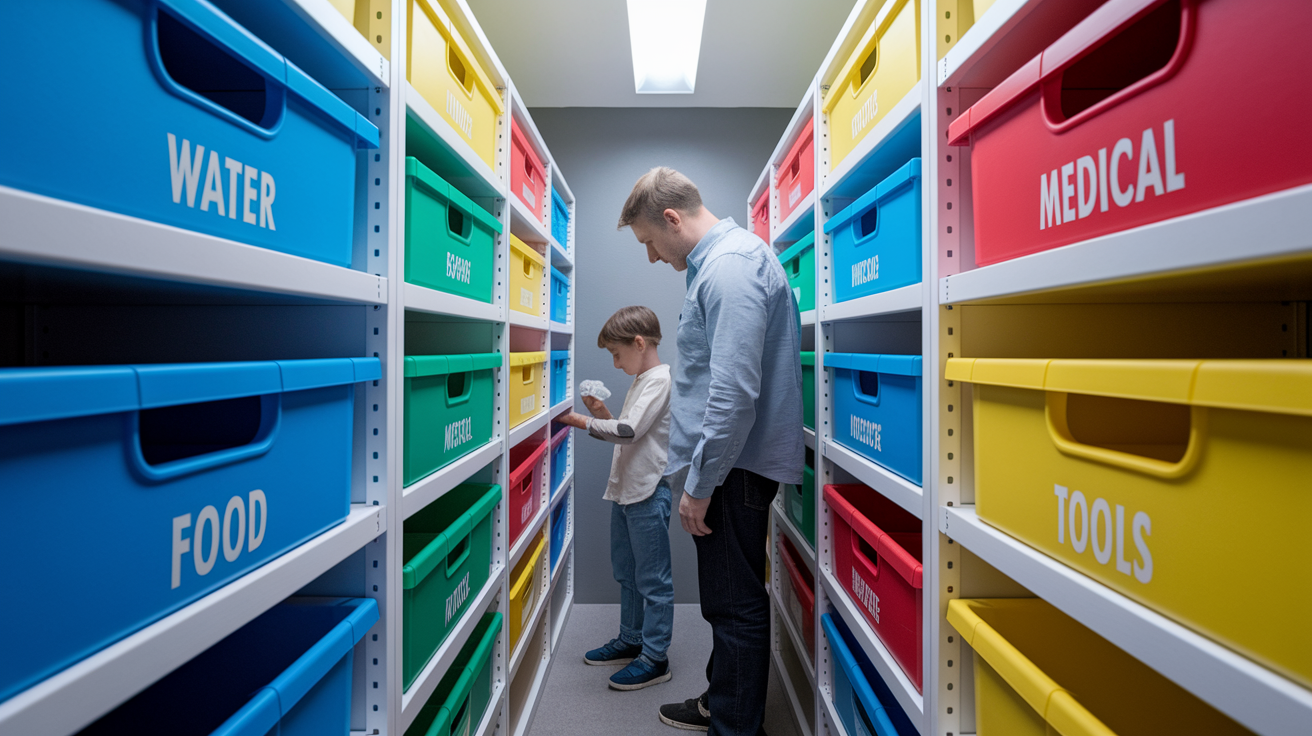
Implement the color system using colored labels, colored electrical tape wrapped around container handles, colored plastic storage bins, or colored paint markers for permanent markings. Consistency matters more than perfection. Once you assign blue to water supplies, every water storage container in your home should have blue marking. Use the same colors in your garage, kitchen pantry, vehicle emergency kit, and evacuation bag. Color zones work too. Dedicate one colored shelf in a closet to each supply type, marking the shelf edge with colored tape that matches labeled container colors.
Teach children the color-coding system before emergencies occur. Make it a household standard, like “Red containers are medicine, don’t touch without asking an adult” or “Blue containers have water you can drink.” Practice during family drills by asking kids to find the green food supplies or bring the yellow toolbox. When color codes become familiar parts of daily organization, they work automatically under stress.
Adding Pictograms and Visual Symbols to Emergency Supply Labels
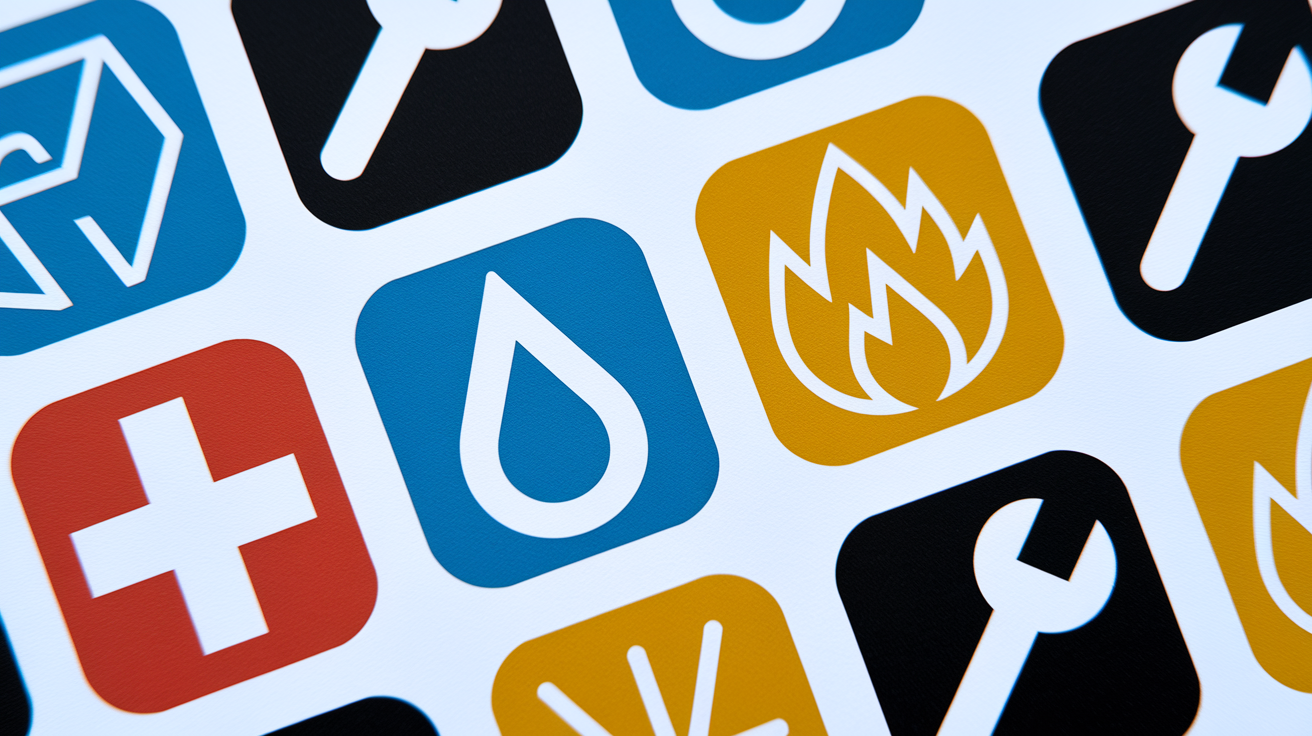
Symbols transcend language barriers and work for non-readers including young children, elderly family members with vision impairments, and emergency responders who don’t speak your household’s primary language. A red cross means medical supplies whether you read English, Spanish, or no written language at all.
Universal symbols to use on emergency supply labels:
- Red cross for medical supplies. Globally recognized symbol for first aid and emergency medical care
- Water drop for hydration supplies. Simple blue teardrop shape instantly communicates water storage
- Flame symbol for cooking and heating supplies. Indicates fuel, matches, cooking equipment requiring fire safety precautions
- Wrench for tools. Represents mechanical equipment, repair supplies, multi-tools
- Document icon for important papers. Simple rectangle with lines suggests paperwork and records
- Paw print for pet supplies. Unmistakable indicator for animal-related emergency items
- Baby bottle for infant needs. Communicates formula, diapers, baby food at a glance
- Flashlight for lighting and power equipment. Shows batteries, lights, radios, solar chargers
Source printable symbols from free emergency preparedness websites, purchase pre-made symbol sticker sets designed for household organization, or hand-draw simple symbols with permanent markers. Symbols should be at least two inches in size for quick recognition from several feet away. Larger is better when space permits. A three-inch red cross on a medical supply container reads instantly from across a garage.
Combine pictograms with text labels rather than using symbols alone. Redundancy builds reliability. A container marked with both a red cross symbol and the words “FIRST AID KIT” works for symbol-readers, text-readers, and anyone who recognizes either system. This doubled identification remains effective even when labels partially degrade or viewing conditions are poor.
Implementing Grab-and-Go Labels for Rapid Evacuation Supplies
Evacuation scenarios demand labels visible from across rooms in chaotic conditions, with information priorities different from long-term storage supplies. You need to identify bags in seconds, determine who carries what, and grab the right priority items before leaving.
Grab-and-go labeling strategies for evacuation readiness:
-
Large bold text on bag exteriors. Use minimum one-inch tall letters, preferably larger
-
High-visibility colors. Choose red, yellow, or orange labels that stand out against bag colors
-
Labels on multiple sides of bags. Both broad sides plus top flap so bags are identifiable regardless of position
-
Glow-in-the-dark or reflective label materials. Helps during nighttime evacuations or power outages
-
Weight information on labels. Writing “25 lbs” warns carriers what to expect and helps assign bags appropriately
-
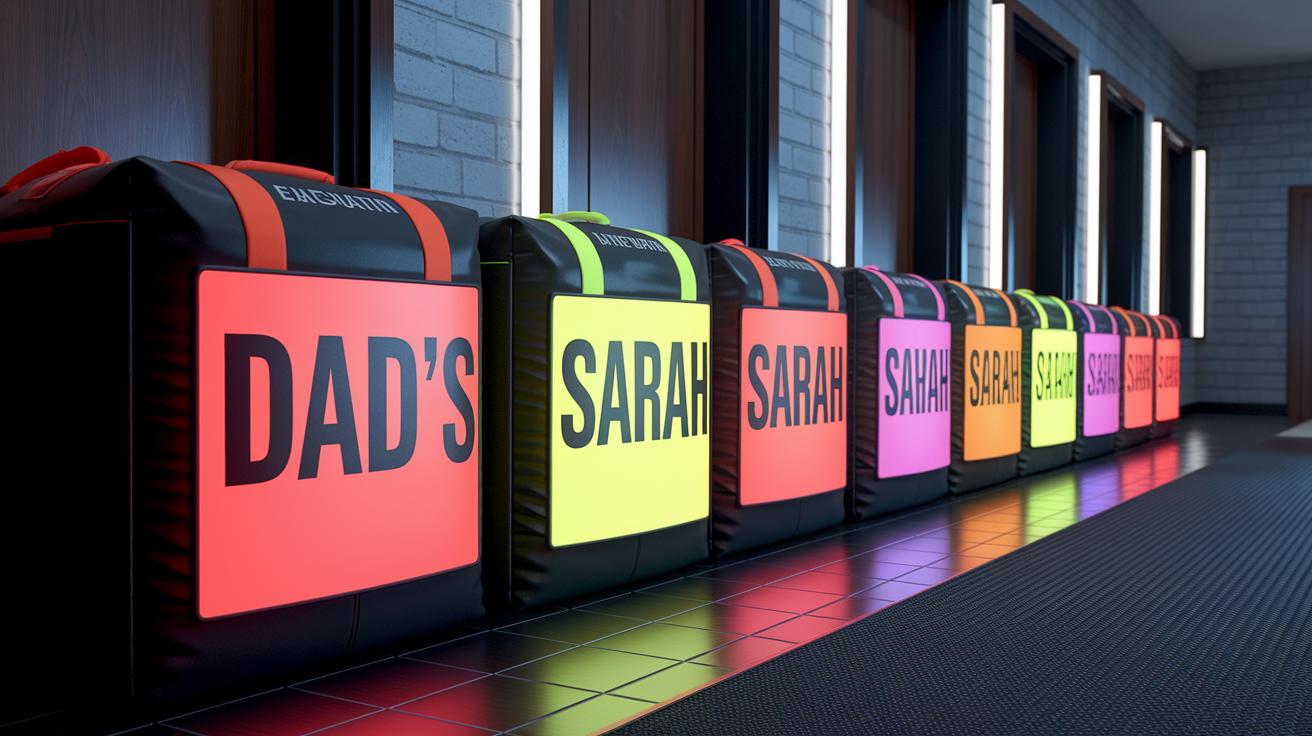
Family member assignments. Mark “DAD’S BAG” or “SARAH’S BAG” so everyone knows their responsibility
-
Priority level indicators. Color-coded or numbered systems showing which bags to take first
Label evacuation supply priority levels using a three-tier system visible at a glance. Apply red labels to bags marked “CRITICAL, Take First” containing medications, documents, water, immediate-need items. Use yellow labels for bags marked “IMPORTANT, Take If Time Allows” with extra clothing, additional food, comfort items. Apply green labels to bags marked “SUPPLEMENTARY, Leave If Necessary” holding nice-to-have items that aren’t survival-critical. During rushed evacuations when you have 10 minutes to leave, grab all red-labeled items first, add yellow-labeled items if time permits, leave green-labeled items behind if necessary.
Use luggage tags or laminated cards attached with carabiners for evacuation bag labels that won’t tear off during transport. Heavy-duty plastic luggage tags designed for airline travel survive rough handling and weather exposure. Laminated cards made from printed paper sealed in packing tape or laminating sheets provide custom labels at low cost. Attach tags with metal carabiners or heavy-duty zip ties, avoiding string or ribbon that snaps under stress.
Labeling Essential Documents and Emergency Contact Information
Document labeling prevents loss of vital information when stress impairs decision-making and seconds matter. Insurance claims, medical treatment, financial access, and legal processes all depend on having the right paperwork immediately accessible.
Document categories requiring clear labels:
- Identification documents. Passports, birth certificates, Social Security cards, driver’s licenses marked “IDENTIFICATION, Family of 4”
- Insurance policies. Home, auto, health, life insurance marked “INSURANCE, Keep Dry” with policy numbers visible
- Medical records and prescription lists. Vaccination records, chronic condition documentation, current medication lists marked “MEDICAL RECORDS”
- Financial account information. Bank account numbers, credit card contacts, investment statements marked “FINANCIAL, Emergency Access”
- Property deeds and titles. House deed, vehicle titles, rental agreements marked “PROPERTY DOCUMENTS”
- Emergency contact lists. Family phone numbers, out-of-state contacts, insurance agents marked “EMERGENCY CONTACTS”
- Family photos for identification. Current photos of each family member and pets marked “IDENTIFICATION PHOTOS, For Recovery Services”
Use layered labeling systems for documents. Label the waterproof document container exterior with large letters reading “IMPORTANT DOCUMENTS, GRAB DURING EVACUATION” so anyone in your home recognizes it instantly. Inside the container, use labeled folders or pouches for each document category. A red folder marked “MEDICAL,” a blue folder marked “FINANCIAL,” a green folder marked “INSURANCE.” This double-layer system works even if someone unfamiliar with your organization needs to access specific documents quickly.
Create multiple labeled copies stored in different locations. Keep one complete set of labeled documents in your home emergency kit, another in your vehicle emergency kit, a third with a trusted relative in another city, and digital copies on a labeled USB drive in a bank safe deposit box. Label each storage location clearly. The vehicle kit container should say “VEHICLE EMERGENCY DOCUMENTS, Duplicate Set” so users know the originals exist elsewhere.
Label digital backup storage devices with contents, last-update dates, and access information. A USB drive marked “FAMILY DOCUMENTS | Updated: 03/2024 | Password Hint: Mom’s Birthplace” gives enough information to access critical files without fully compromising security. For comprehensive emergency preparedness planning, including what documents to include in your emergency systems, review the complete emergency preparedness guide.
Designating Storage Locations with Zone Labels for Emergency Supplies
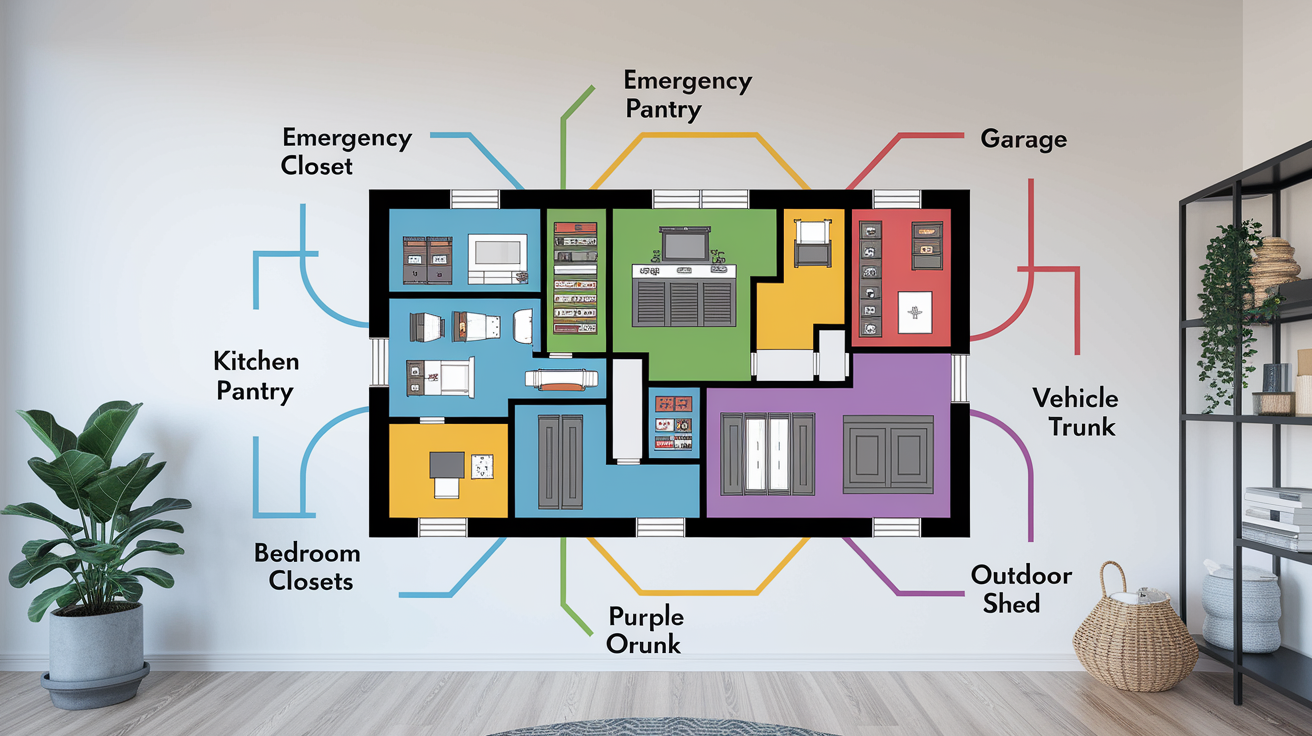
Location labeling helps family members, guests, or emergency responders find supplies quickly even when the primary organizer is unavailable or incapacitated. Clear zones prevent the frustrating scenario where someone searches through five different closets looking for the first aid kit while someone bleeds.
| Zone | Supplies Stored | Label Placement | Access Notes |
|---|---|---|---|
| Primary Emergency Closet/Pantry | Main water supply, bulk food storage, primary first aid kit | Door exterior, eye-level shelf signs inside | Central accessible location, all family members know this zone |
| Kitchen Storage Area | Ready-to-eat foods, manual can opener, eating supplies | Inside cabinet doors, shelf edge labels | Everyday access area, rotate food with regular groceries |
| Garage or Basement | Long-term water storage, camping equipment, tools | Wall-mounted signs, storage bin labels visible from entrance | Temperature-stable area for bulk storage |
| Vehicle Trunk | Portable emergency kit, evacuation supplies, seasonal items | Container sides and top, trunk mat labels | Always accessible even when away from home |
| Bedroom Closets | Individual grab-and-go bags, personal medications, clothing | Shelf labels, hanging tags on bags | Each family member manages own bedroom supplies |
| Outdoor Storage (Shed) | Sanitation supplies, outdoor tools, extra fuel storage | Exterior door sign, bin labels
Final WordsGrab a permanent marker and start with one container today. Pick your medical supplies, write what’s inside, add the date, and stick a label where you can see it. That’s how you build this system, one clear label at a time. When floodwater is rising or an evacuation order comes through, you won’t have time to wonder what’s in each box or where you stored the first aid kit. How to label emergency supplies for family isn’t busy work. It’s the difference between grabbing what you need in 30 seconds or losing precious minutes searching through chaos. Your labels work while stress levels are high and thinking is hard. Run a quick test this week. Can everyone in your household find the water, the flashlights, and the go bag without asking? If not, add more labels. You’ve got this. FAQWhat should you include in your family’s disaster supplies kit?A family disaster supplies kit should include water (two gallons per person per day for three days), non-perishable food, a first aid kit, flashlights, batteries, medications, important documents in waterproof containers, and personal hygiene items. What are the 5 P’s of emergency?The 5 P’s of emergency are people (family safety first), prescriptions (medications and medical equipment), papers (important documents), personal needs (clothing, hygiene items), and priceless items (irreplaceable valuables and sentimental objects). How to organize emergency prep supplies?Organize emergency prep supplies by category using labeled storage containers, keeping related items together in sturdy, easy-to-carry bins. Store supplies in accessible locations with clear labels showing contents, dates, and locations for quick identification. What are the 7 essentials for survival?The 7 essentials for survival include water (two gallons per person per day), food, shelter materials, first aid supplies, light sources (flashlights and batteries), communication devices (battery-powered radio), and tools (multi-purpose knife, duct tape). How often should you rotate emergency food and water supplies?You should rotate emergency food and water supplies every six months to maintain freshness and safety. Mark rotation dates clearly on labels, using older items before expiration and replacing them with fresh supplies. What information should appear on emergency supply labels?Emergency supply labels should show the item name, contents list, storage date, expiration or rotation date, and location. Add handling instructions and place labels on multiple sides of containers for visibility. Why use waterproof labels for emergency supplies?Waterproof labels resist moisture, temperature changes, and handling damage that occur during disasters. They remain readable when ordinary paper labels fail, ensuring you can identify critical supplies when conditions are wet or humid. How can color-coding help organize emergency supplies?Color-coding helps family members identify supplies instantly without reading labels. Assign consistent colors to categories like red for medical supplies, blue for water, and green for food so everyone recognizes items quickly. What size font works best for emergency supply labels?Use minimum 16-point font for labels you will read up close and 24-point font for labels you need to see from across the room. Choose bold, sans-serif fonts that stay readable under stress and poor lighting. Should you label individual items or just containers?Label both individual items and their storage containers for complete organization. Container labels identify categories quickly while individual item labels show specific contents, expiration dates, and instructions when containers are opened. Where should you place labels on emergency storage containers?Place labels on the top, front, and one end of containers so they stay visible regardless of how containers are stacked. Position labels at eye level on storage areas for easy scanning. How do you label medical supplies for emergency use?Label medical supplies with medication names, dosages, patient names, expiration dates, and allergy warnings. Include usage instructions and emergency contact numbers for prescribing doctors inside first aid kits for responders. What labeling system works for grab-and-go evacuation bags?Use large bold text (minimum 1-inch letters), high-visibility colors, and reflective materials on evacuation bags. Add priority level indicators like red for critical items and yellow for important items you take if time allows. How do pictograms improve emergency supply labels?Pictograms provide instant recognition for children, non-readers, and emergency responders who need quick identification. Universal symbols like red crosses for medical supplies and water drops for hydration transcend language barriers and work under stress. Should emergency document containers have special labels?Label document containers with large “IMPORTANT DOCUMENTS” text on exteriors and category labels on individual folders inside. Use waterproof materials and store labeled copies in multiple locations for redundancy. How often should you update emergency supply labels?Check and update emergency supply labels during quarterly inspections and whenever contents change. Replace faded or damaged labels immediately and refresh all labels during annual kit reviews to maintain readability. What makes a good labeling system for multiple storage zones?A good zone labeling system uses matching codes on both storage areas and containers, like “Zone A – Hall Closet.” Create location maps showing exact supply spots and post them in central areas. How do you teach children your emergency labeling system?Teach children through family walkthroughs of supply locations, color-coding games with pictograms, and timed drills finding specific items. Practice reading labels under flashlight conditions and involve kids in supply rotation days. What label materials work best for vehicle emergency kits?Use adhesive waterproof labels, laminated tags attached with carabiners, or permanent oil-based markers directly on containers. Materials must withstand temperature extremes and vehicle movement without peeling or fading. Should you keep extra labeling supplies with your emergency kit?Keep a labeled “Label Maintenance Kit” with blank waterproof labels, oil-based permanent markers, label maker tape, and laminating sheets. Having materials ready lets you update labels quickly during supply rotations. Latest articlesMore like this |