
Most renters learn the hard way that “I had stuff and it got ruined” won’t cut it with insurance companies. Without photos, measurements, and detailed lists taken before cleanup starts, you’re looking at claim denials or payouts so low they won’t cover half your losses. The difference between getting reimbursed and getting stuck with the bill comes down to documentation done right in those first critical hours after floodwater hits your apartment.
Essential Documentation Steps for Apartment Flood Damage
Documenting flood damage in your apartment means taking photographs, shooting videos, writing descriptions, and building detailed inventory lists. This evidence is the foundation of insurance claims and settles disputes with landlords about who’s responsible and what it’s going to cost. Without solid documentation, you’re risking claim denials, smaller payouts, or paying out of pocket for damage that isn’t your fault.
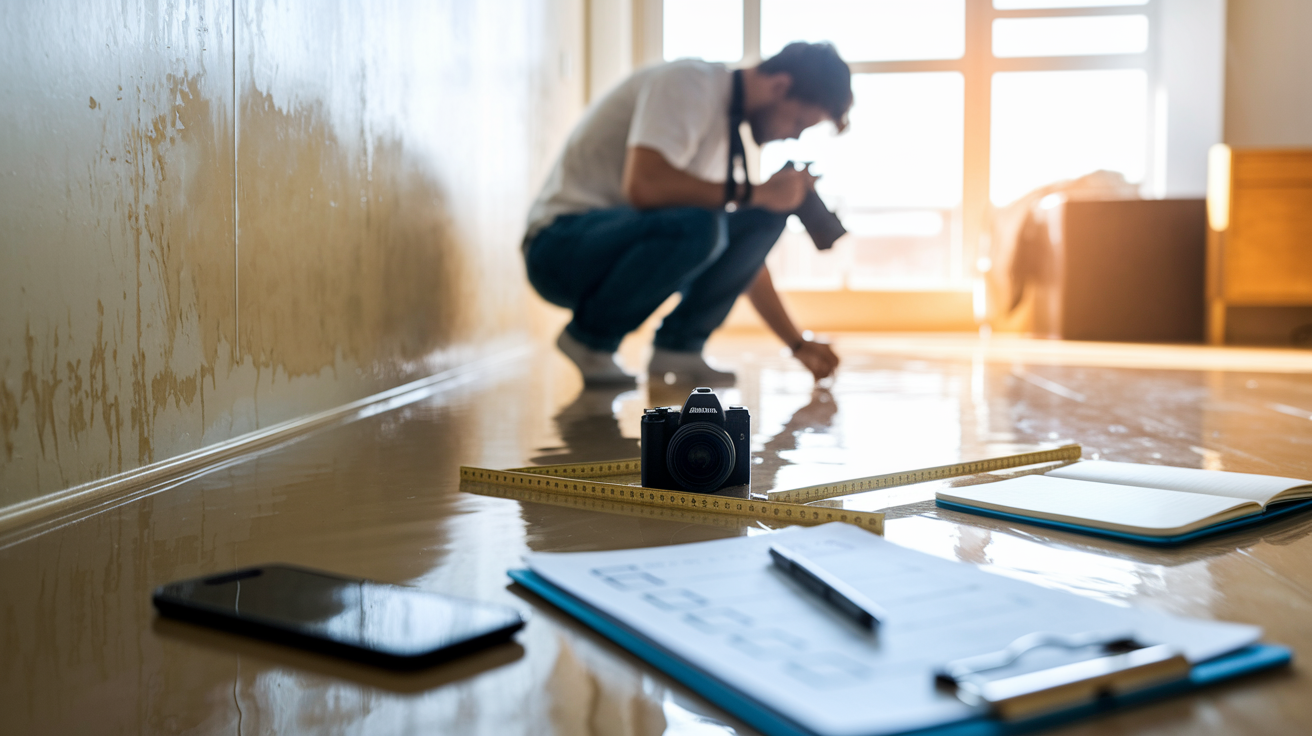
Good documentation follows some basic rules. Capture everything before you start cleanup, make sure your photos and videos have timestamps, record damage from different angles, measure affected areas with a tape measure, and keep original evidence exactly as you found it. These steps create an undeniable record of what happened and how much damage you’re dealing with.
-
Photograph all damaged areas and items. That means walls, ceilings, floors, furniture, appliances, and personal stuff.
-
Record video walkthroughs with verbal narration. Describe what you’re showing, the date and time, and the damage you’re seeing.
-
Measure affected areas and water levels. Use a tape measure to note square footage of flooded rooms and height of water lines on walls.
-
Create written damage descriptions for each room. Detail material conditions like how saturated the carpet is, whether drywall’s gone soft, or if baseboards are separating.
-
Document the flood source and entry points. Photograph burst pipes, leaking appliances, or gaps where water came in from adjacent units.
-
Note the exact date and time you discovered the flooding. If you know when damage occurred, write that down too.
-
Capture overall apartment condition showing the full scope, not just close ups of individual damaged items.
-
Identify all damaged belongings by recording model numbers, serial numbers, and brand information for insurance inventory.
Before you start any documentation, take safety precautions. Shut off electricity and gas to prevent fire or electrocution. Check for structural hazards like sagging ceilings, unstable flooring, or visible cracks in walls. Only enter the apartment when it’s safe. If you smell gas, see sparks, or notice major structural damage, stay out and call professionals.
Document everything before removing a single item or beginning cleanup. Insurance adjusters and landlords need to see damage in its original state. Once you clean up or throw things away, you’ve lost critical evidence. Take your time with documentation even though you want to start fixing things. Those extra minutes spent photographing could save you thousands of dollars in disputed claims.
Complete Photo and Video Documentation Guide
Systematic room by room visual documentation prevents missed damage and creates the strongest evidence for insurance claims and landlord accountability. Rushing through photos or skipping certain areas leaves gaps that insurance companies will use to reduce payouts or deny coverage.
Photography techniques make the difference between useful evidence and unclear images. Work with good lighting, open blinds and curtains during daytime, or use bright flashlights at night. Shoot wide angle shots showing entire rooms first, then move to close ups of specific damage. Place common objects like coins, pens, or your hand next to damaged areas to show scale. Photograph the same damage from multiple angles so nothing can be dismissed as a trick of perspective or lighting. Include context, capture enough of the surrounding room that someone looking at the photo later can identify exactly where the damage is.
In each room, photograph water lines on walls showing how high water reached, ceiling stains and discoloration, damaged or separated baseboards, warped or buckled flooring, saturated carpets with visible water or dark wet patches, cabinet damage both outside and inside, door and window damage including swelling or warping, inside all cabinets and closets showing wet contents, under sinks and behind appliances where hidden damage occurs, and all affected utilities including outlets, light fixtures, HVAC vents, and plumbing fixtures.
Video recording works best when you:
• Hold the camera steady and pan slowly across damaged areas instead of making quick jerky movements.
• Record in good lighting using the same principles as photography for visibility.
• Work in order from the entry point through each room following a logical path.
• Add verbal narration describing what’s shown with current date and time, identifying rooms by name and specific damage types you’re recording.
• Note smells like mold, sewage, or standing water odors, and describe water characteristics such as clean, dirty, or contaminated appearance.
• Aim for comprehensive coverage, with total video length of 5 to 10 minutes depending on apartment size, recording enough detail without repeating yourself too much.
• Record any active leaking, dripping, or water movement to prove ongoing damage.
Video documentation does things that photos can’t. Videos show movement and water flow, demonstrating active leaking that a still image misses. They capture comprehensive coverage with your verbal narration adding context about smells, textures, and concerns that aren’t visible. Videos reveal spatial relationships between damaged areas, helping adjusters understand how flooding spread through your apartment. The timeline created by walking through your space on video tells the complete story in a way individual photos can’t.
Timestamp all visual evidence and don’t edit or alter original files. Most smartphones and cameras automatically embed metadata showing when each photo or video was taken. This timestamp proves when you documented damage and prevents disputes about whether damage existed before or after certain dates. Never crop photos, apply filters, or modify original files in any way. Alterations can raise authenticity questions and give insurance companies reasons to doubt your evidence.
Save footage to multiple locations right after recording to prevent loss of critical evidence. Upload everything to cloud storage services like Google Drive, Dropbox, or iCloud while you’re still on site if possible. Copy files to an external hard drive or USB drive as soon as you get home. Email copies to yourself creating another backup. Send copies to a trusted family member or friend. Hard drives fail, phones get lost, and computers crash. The only way to guarantee you don’t lose irreplaceable documentation is storing it in at least three separate locations.
Creating a Detailed Inventory of Damaged Apartment Belongings
Detailed inventories provide written records of all damaged personal property with supporting documentation that insurance companies require to process claims. For each damaged item, include the item description, brand name, model number, serial number, purchase date, estimated value at time of flooding, extent of damage (total loss, partially damaged, repairable), and room location. This level of detail prevents insurance companies from undervaluing your losses or claiming you haven’t proven ownership.
Gather supporting documentation by locating receipts, credit card statements, warranty cards, product manuals, and online purchase confirmations. Check email for digital receipts from Amazon, Target, or other retailers. Log into your bank account and download statements showing major purchases. Dig through file cabinets, desk drawers, and storage boxes for paper receipts. Photograph item labels and serial number plates on appliances, electronics, and furniture even if those items are ruined. Save samples of destroyed materials including wallpaper, carpets, and furniture fabrics by cutting small pieces and storing them in labeled bags as claim evidence. If you bought something recently and don’t have a receipt, check the store’s customer service desk. Many retailers can reprint receipts using your credit card number or phone number.
| Item Category | Documentation Priority | Key Details to Record |
|---|---|---|
| Electronics | High | Model numbers, serial numbers, purchase dates, original prices, manufacturer details |
| Furniture | High | Brand, material type, dimensions, purchase location, age, replacement cost estimates |
| Appliances | High | Serial numbers, energy ratings, capacity specifications, installation dates |
| Clothing | Medium | Quantity by type, brand names for expensive items, general condition before damage |
| Documents | High | Types of documents lost, whether originals or copies, replacement difficulty level |
| Kitchen Items | Medium | Cookware sets, small appliances, dishes and glassware counts, specialty tools |
| Bathroom Items | Low | Towels, toiletries, medications with prescription information if water damaged |
| Other Personal Property | Variable | Books, art, collectibles, sports equipment, hobby supplies, tools, decorations |
Organize your inventory by room to make verification easier during adjuster visits and claim reviews. Group all living room items together, all bedroom items together, and so on. Note which items need immediate disposal because they’re health hazards versus those that can be stored separately for adjuster inspection. Store damaged items safely in a garage, storage unit, or unused room where they won’t cause additional damage or create mold problems. Keep multiple copies of your inventory list in both digital formats (spreadsheet, word document, cloud storage) and printed hard copies. Update the list as you discover additional damage, because hidden problems often appear days or weeks after initial flooding when materials dry out and secondary issues emerge.
Written Damage Descriptions and Measurement Documentation

Written descriptions provide context that photos alone can’t convey, helping insurance adjusters understand damage severity, material conditions, and repair complexity. A photo shows a wet wall, but a written description explains that the drywall has gone soft and crumbles when touched, the paint is bubbling across a 6 foot section, and the baseboard has separated 2 inches from the wall.
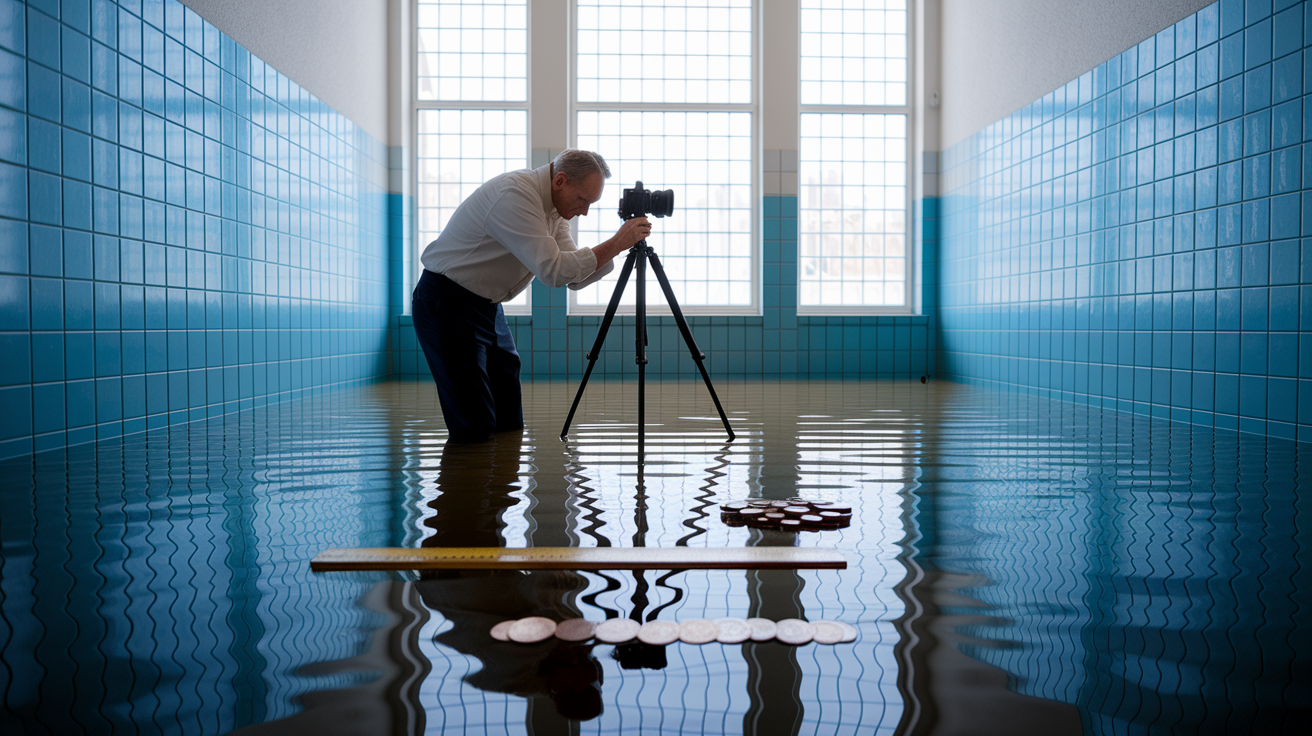
Measure and record affected areas using a tape measure or laser measuring tool. Note the square footage of flooded rooms by multiplying length times width. Record the height of water lines on walls by measuring from the floor to the visible stain or discoloration mark. Measure dimensions of damaged sections, like a 4 by 8 foot area of buckled hardwood or a 3 by 5 foot ceiling stain. Document depth of standing water at the time you discovered flooding, using a ruler or noting if water reached your ankles, knees, or higher. These measurements help contractors create accurate repair estimates and prevent insurance companies from minimizing damage scope.
Describe material damage in detail for every affected surface and item. For carpet, note whether it’s damp, saturated, or has standing water on top, whether padding underneath feels squishy, and if you can see water when you press down. For drywall, describe whether it’s firm, slightly soft, or crumbling and falling apart when touched. Note baseboard separation from walls and whether you can see water damage or mold behind the gap. Describe paint bubbling, peeling, or discoloration patterns. Detail flooring warping where boards have lifted or buckled, tiles that have come loose, or vinyl that’s separating from the subfloor.
Note sensory details that cameras can’t capture. Describe water color and clarity, whether it appeared clean, dirty brown, or black with visible sewage or debris. Record odors indicating sewage contamination or early mold growth, describing smells as musty, sewage like, or chemical. Note temperature differences like cold spots on walls or floors suggesting hidden moisture. Listen for and document sounds of dripping water inside walls, running water when nothing is turned on, or other audio clues to hidden damage or ongoing leaks.
Date all written descriptions and organize notes in order to create a clear damage timeline. Start entries with the date and time, then describe what you observed at that moment. This timeline proves when damage occurred, when you discovered it, how conditions changed, and when you took action. It makes it easy to reference your notes during phone calls with insurance companies, meetings with adjusters, or discussions with your landlord about repair timelines and responsibilities.
Documenting Flood Source and Water Type in Your Apartment
Flood source identification determines who’s responsible for damage and whether your insurance will cover losses. If flooding came from a burst pipe inside your apartment, that’s different from flooding caused by a neighboring unit’s toilet overflow or external rainwater entering through a roof leak. Each scenario involves different liability and different coverage.
Common apartment flood sources have distinct identifying characteristics. Burst pipes show visible pipe damage, water spraying or gushing from the break point, and often affect areas near plumbing like under sinks, behind toilets, or in walls near bathrooms and kitchens. Toilet overflows create flooding that starts in the bathroom and spreads outward, with water appearing around the toilet base. Washing machine malfunctions show water pooling near the machine, with supply hoses that may be disconnected, cracked, or leaking at connection points. Water heater failures create large volumes of water originating from the heater closet or utility area. HVAC system leaks often affect areas near air handler units or condensate drain lines. Roof leaks enter from above, creating ceiling damage first before affecting floors and contents. Neighboring unit flooding enters through shared walls, ceilings if you’re on a lower floor, or floors if you’re below the source.
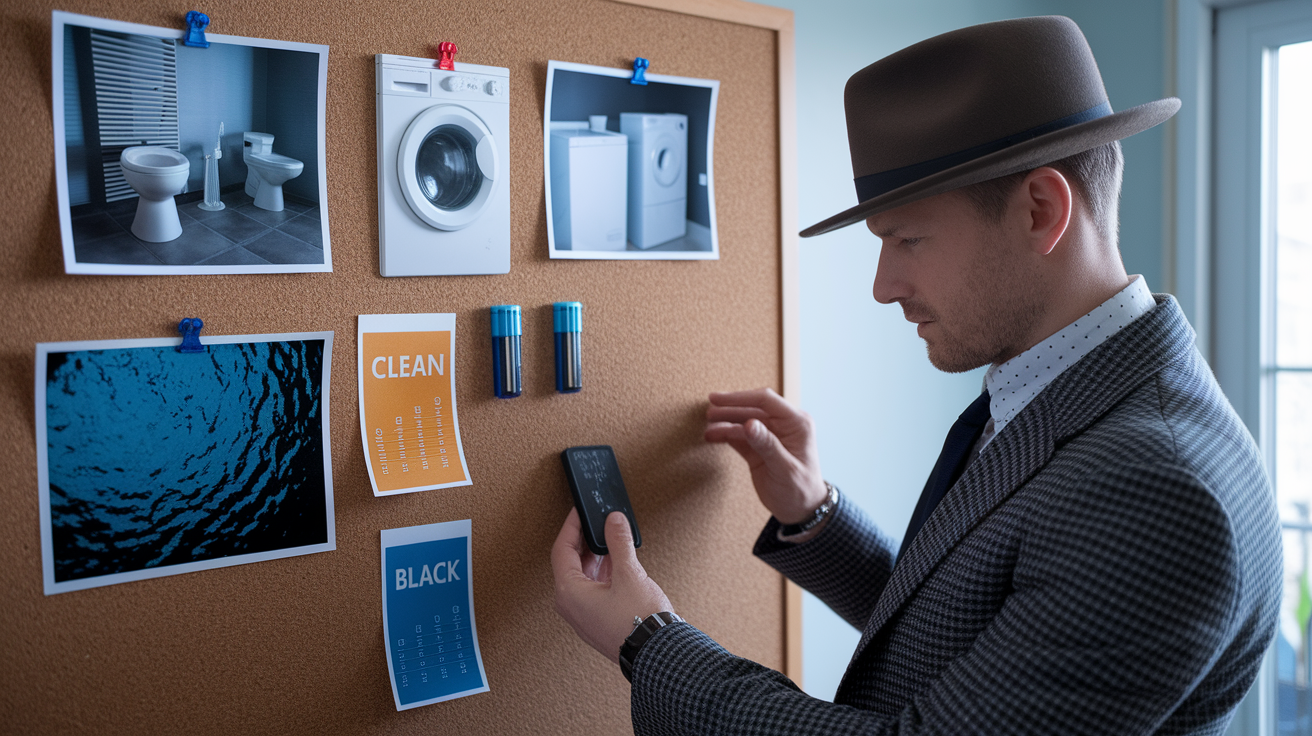
Water contamination levels affect cleanup requirements and health hazards:
• Clean water from burst supply pipes or rainwater poses the lowest contamination risk and comes from sources without sewage or chemical contact.
• Gray water from appliances, sinks, washing machines, or dishwashers contains some contamination from soaps, food particles, or other household substances.
• Black water from sewage backups, toilet overflows with feces, or flooding that has contacted outdoor ground surfaces contains dangerous bacteria and requires professional remediation.
• Document each water type with photos showing color, clarity, and source, and note any visible debris, sewage material, or hazardous substances in written descriptions.
• Photograph black water scenarios extensively and avoid direct contact. This evidence proves the need for professional cleaning and affects landlord liability.
• Wear safety gear like gloves and boots when documenting gray or black water contamination.
Photograph the source point from multiple angles showing exactly where water originated. Capture close ups of any visible pipe damage including cracks, holes, or complete breaks. Document appliance malfunction evidence like disconnected hoses, error codes on digital displays, or pooling water directly under the machine. Photograph entry points where water entered from adjacent units, including wet spots on shared walls, water coming through light fixtures or vents, or moisture appearing along the ceiling wall joint if flooding came from above.
Note whether the source is within your apartment unit, building infrastructure like pipes inside walls or roof systems, or external like rainwater or neighboring unit flooding. This determination affects whether your landlord is responsible for repairs and damages or whether the issue falls under your renter’s insurance. Building infrastructure problems are landlord responsibilities. Damage from your own actions or negligence may fall on you. Flooding from neighboring units often involves that neighbor’s liability insurance. Clear source documentation protects you from unfair blame and ensures the responsible party covers costs.
Communication and Notification Protocols

Contact your renters insurance company within 24 to 48 hours of discovering flood damage and notify your landlord using emergency contact procedures outlined in your lease. Both notifications must happen fast to protect your rights and start the claims process before deadlines expire. Delays give insurance companies reasons to deny claims and let landlords argue you didn’t properly report emergencies.
When contacting insurance, get your claim number immediately and write it down along with the representative’s name and direct phone number. Ask about policy deadlines for submitting documentation, inspection scheduling, and claim decisions. Review your coverage specifics including personal property limits, actual cash value versus replacement cost, temporary housing coverage (also called loss of use or additional living expenses), and what exclusions apply. Know your deductible amount so you understand your out of pocket costs. Required documentation for claim submission typically includes completed claim forms with detailed incident descriptions, photographic evidence showing all damage, video recordings of affected areas, detailed inventory lists of damaged belongings, receipts and proof of ownership for valuable items, written damage descriptions with measurements, and repair estimates from licensed contractors. For help preparing your documentation, review guidance on how to prepare your apartment for a flood which covers proactive measures and insurance policy review.
Essential information to include in landlord notification:
-
Discovery time including exact date and time you found the flooding.
-
Flood source if known, such as burst pipe under kitchen sink or toilet overflow from upstairs unit.
-
Extent of damage including affected rooms, estimated square footage, and severity.
-
Safety hazards present like electrical risks, structural concerns, or contaminated water.
-
Immediate actions you’ve taken such as shutting off water, turning off electricity, or calling emergency services.
Communicate with your landlord using multiple written methods to create a clear record. Send an email with photos attached. Follow up with a text message if that’s how you normally communicate. Mail a certified letter with return receipt requested for formal documentation. Create an incident report detailing the flooding event, your documentation efforts, damage discovered, and actions taken. Request written acknowledgment of your report and ask for a timeline for repairs. Understand your tenant rights regarding habitability. Most states require landlords to maintain habitable conditions including working plumbing, weatherproof structures, and prompt repairs after emergencies. If flooding makes your apartment unlivable, your landlord may be required to pay for temporary housing or reduce rent.
Keep comprehensive communication logs for both insurance and landlord interactions. Save all emails in a dedicated folder. Screenshot and save all text messages. Keep voicemails or transcribe their content. Record dates and times of phone calls along with names of representatives or landlord contacts. Note what was discussed, what was promised, and what responses you received or didn’t receive. Keep your claim number and any reference numbers in an easy to find note. Track whether people followed through on commitments or missed deadlines.
Track and document additional expenses resulting from the flood because many insurance policies cover these costs. Keep receipts for temporary housing such as hotels or short term rentals if your apartment is uninhabitable. Save meal expense receipts if you can’t use your kitchen due to flood damage. Document emergency purchases like cleaning supplies, fans, dehumidifiers, or replacement clothing and toiletries. Keep invoices from professional cleaning services or water extraction companies. Save storage unit rental receipts if you need to store salvageable items during repairs. Track any other rental expenses like car rentals if your vehicle was damaged or you need transportation because parking areas flooded. File all receipts immediately in a labeled envelope or folder, and create a spreadsheet listing each expense with date, vendor, amount, and purpose.
Document any landlord failures to respond or repair in a timely manner by continuing to send written follow ups. If your landlord ignores emergency repair requests, send another email and certified letter referencing previous communications and noting days passed without response. Take additional photos showing how damage is worsening due to repair delays. Keep records of any conversations where the landlord made excuses or refused to take action. Communicate with your insurance company before proceeding with repairs to electrical, water, or gas heating systems, as some policies require approval before major work begins, and unauthorized repairs can void coverage.
Professional Inspection and Moisture Detection Documentation
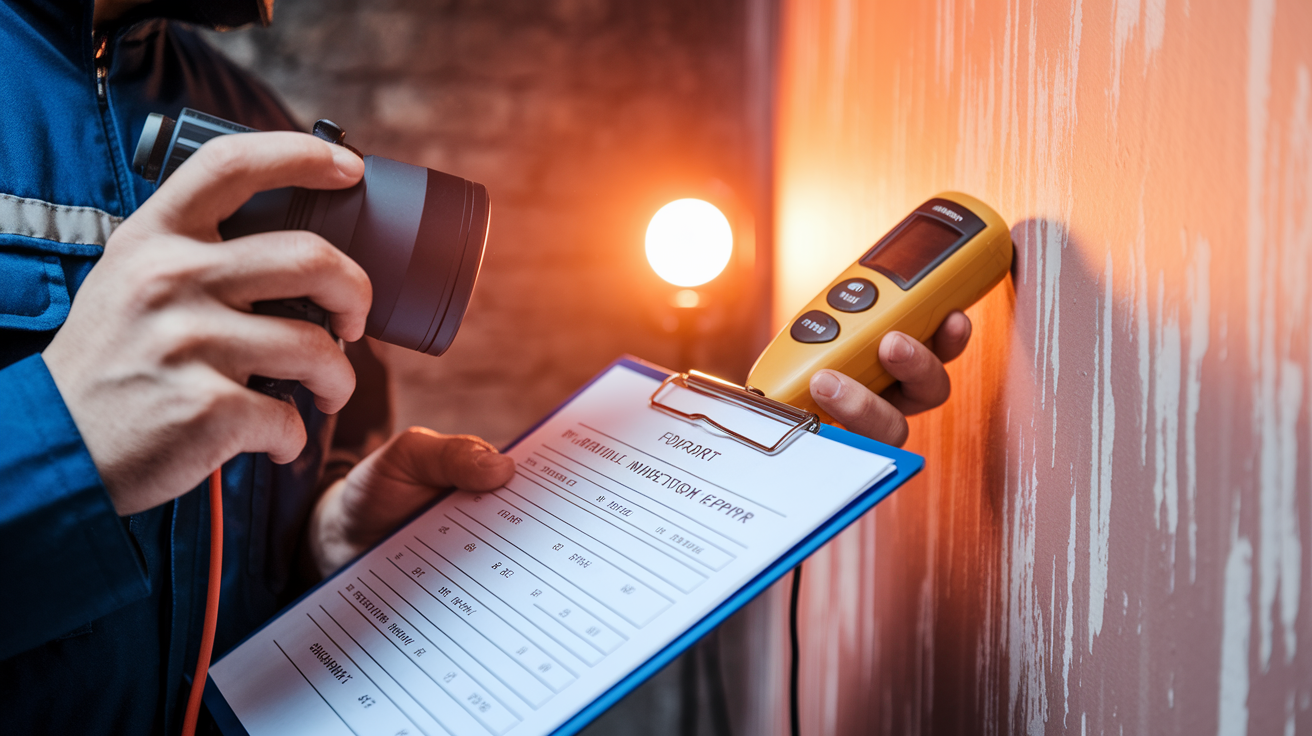
Professional inspections are necessary when flooding is extensive throughout the apartment, suspected structural damage exists like sagging ceilings or unstable floors, hidden moisture concerns require specialized detection equipment, electrical hazards prevent safe power restoration, or your insurance company specifically requires professional assessment before approving claims. Don’t skip this step to save money, because hidden damage will cost far more in the long run.
Water restoration companies provide thorough assessments using specialized tools. They take moisture meter readings with both pin type meters that penetrate materials to measure moisture extent within walls and floors, and pinless meters that scan surfaces to identify affected areas without causing damage. Thermal imaging cameras identify hidden moisture behind walls or under floors by displaying temperature differences, with cooler spots often signaling trapped moisture. Structural integrity evaluations assess whether framing, subflooring, or load bearing elements have been compromised. Request written reports documenting specific measurements, moisture levels as percentages, thermal imaging results with annotated photos, and detailed findings about damage extent and necessary repairs.
Have a licensed electrician inspect all electrical systems before restoring power to your apartment. Water and electricity create deadly hazards. The electrician will check outlets, light fixtures, circuit breaker panels, and wiring for water damage, corrosion, or short circuit risks. Document any utility damage or safety hazards identified in the inspection report. Photograph damaged electrical components that the electrician points out. Keep copies of the electrician’s report and invoice showing you took proper safety precautions, which protects you from landlord or insurance company claims that you acted recklessly.
Get repair estimates from at least two or three licensed contractors showing detailed scope of work, itemized costs broken down by materials and labor, timeline projections from start to completion, and contractor license and insurance information. Multiple estimates give you negotiating power with insurance companies who may try to lowball repair costs. Use these estimates as supporting documentation for insurance claims by submitting all estimates to show consistency in pricing and necessary work. Detailed scopes of work prevent disputes about what repairs are actually needed.
Professional photography services make sense when damage is extensive and valuable items are destroyed, making a few hundred dollars in professional photos worthwhile compared to tens of thousands in claims. Professional photographers have high quality equipment, proper lighting, and experience documenting damage in ways that stand up in legal disputes. Third party verification from professionals adds credibility to disputed claims because insurance companies can’t dismiss professional documentation as easily as smartphone photos. Ensure all professional reports include inspection dates, professional credentials like licenses and certifications, and detailed findings with measurements and assessments. These elements make reports defensible and harder for insurance companies to ignore or minimize.
Mold Documentation and Mitigation Evidence
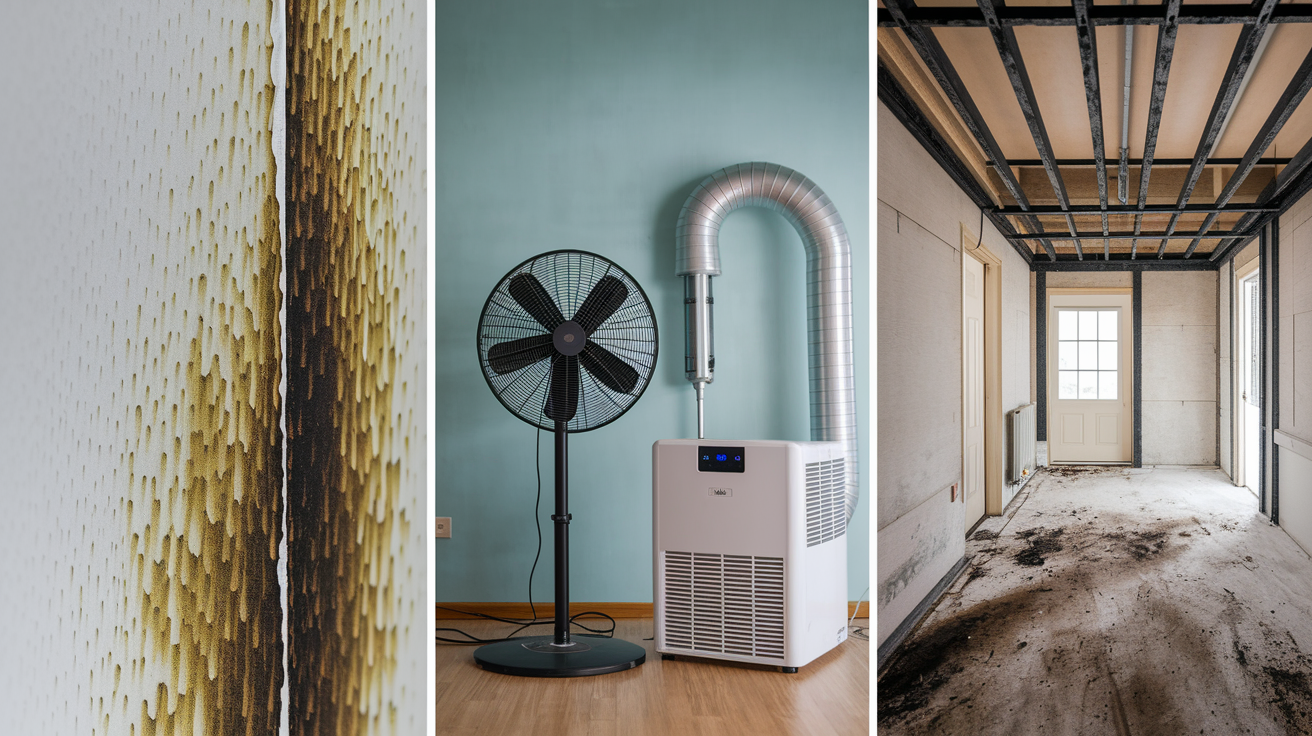
Photograph any visible mold growth using timestamps and date stamped photos to create a clear record of when mold appeared and how fast it spread. Note location by room and specific surface (ceiling corner in bathroom, baseboard in bedroom, inside closet on back wall). Measure and record size using a tape measure, like a 6 inch circular patch or a 2 foot by 3 foot area. Describe color such as black, green, white, or brown, since different mold types have different health risks and remediation requirements. Take sequential dated photos every day or every few days to document progression over time, proving whether mold is spreading despite your mitigation efforts or whether your actions are controlling growth.
Mitigation and temporary repair efforts must be documented to prove you acted immediately to prevent further damage:
• Photograph water removal actions including using wet dry vacuums, mops, towels, or professional extraction equipment.
• Document ventilation measures like opening windows, running exhaust fans, or setting up box fans to increase air circulation.
• Record dehumidifier use by photographing the units in place, noting make and model, and keeping logs of settings and runtime hours.
• Take photos of cleaning product applications showing bottles of mold killing cleaners, before and after treatment photos, and product labels.
• Document emergency repairs like tarping holes in ceilings or walls, temporary plywood coverings over broken windows, or water extraction services with photos of work in progress.
• Photograph temporary fixes to prevent additional damage such as buckets catching drips or plastic sheeting protecting undamaged areas.
• Create before, during, and after photo sequences for all mitigation work to prove completion and effectiveness.
Document conditions that prevented immediate cleanup or repairs because many insurance policies require proof that delays weren’t your fault. Take photos of blocked building access including fallen trees across driveways, flooding that prevents safe entry, or official barriers. Photograph utility shutoff notices or tags on electrical panels showing power was cut by the utility company. Save mandatory evacuation orders, official notices, or news reports about area evacuations. Document continuing water intrusion with photos showing ongoing leaks or rising water that made cleanup impossible. Record landlord delays by saving emails or texts where you requested access or repairs and the landlord failed to respond or provide timely access. Photograph damage before adjuster visits if you’re told to wait for inspection before beginning repairs.
Get insurer approval before permanent repairs when possible by calling your insurance company, explaining what needs repair, and asking whether you should wait for adjuster approval or proceed with emergency fixes. Communicate repair needs in writing through email or your insurance company’s online portal so you have proof of requests and responses. Document any emergency repairs that couldn’t wait for approval with detailed explanations of why immediate action was necessary (active leak causing new damage, electrical hazard, or safety issue). Take photos showing the emergency condition before repair, during repair work, and after completion. Keep all receipts and contractor invoices.
Keep receipts for all mold prevention supplies including fans, dehumidifiers, cleaning products, protective gear like gloves and masks, plastic sheeting, and any other materials purchased to stop mold growth. Save invoices from professional mold remediation services hired to handle contamination beyond simple surface cleaning. Document equipment rentals for industrial dehumidifiers, air movers, or moisture detection tools. Track emergency purchases made to address immediate needs and prevent additional damage. Create an itemized expense list matching each receipt to specific prevention actions taken, and file everything together for organized reimbursement claims.
Most insurance policies have limited mold coverage and require proof of immediate mitigation efforts to qualify for any mold related claims. Standard renters insurance policies often exclude mold damage entirely or cap coverage at $5,000 to $10,000. To qualify for even limited coverage, you must prove you acted quickly to prevent mold growth, took reasonable mitigation steps, and documented conditions that prevented faster action. Without this proof, insurance companies will deny mold claims arguing that the mold resulted from your negligence or failure to mitigate damage. For additional information on cleanup procedures, see how to clean up after a flood.
Organizing and Preserving Flood Damage Evidence

Create multiple backups of all digital documentation immediately to prevent catastrophic loss if a device fails or files become corrupted. Upload every photo and video to cloud storage services like Google Drive, Dropbox, iCloud, or Microsoft OneDrive while you’re still documenting or as soon as you get home. Copy all files to an external hard drive or large capacity USB flash drive. Email complete sets of photos and videos to yourself using a reliable email service that won’t delete messages. Share copies with a trusted family member or close friend, asking them to save everything to their computer or cloud storage as an additional backup. Losing your only copy of flood damage documentation can cost you thousands in denied claims.
Organize files using a system that makes finding specific evidence quick and easy. Create folders by date for chronological organization, like “Flood Damage January 15, 2024.” Create folders by room such as “Living Room Damage,” “Kitchen Damage,” “Bedroom Damage” for location based organization. Create folders by damage type including “Water Source Photos,” “Structural Damage,” “Personal Property,” “Mold Documentation” for category based organization. Use descriptive file names with dates like “2024 01 15KitchenCeilingStain.jpg” or “2024 01 15DamageVideoWalkthrough.mp4.” Keep both digital copies on multiple devices and cloud storage, and printed copies of critical documents like inventory lists, key photos, receipts, and correspondence in physical folders.
Preserve photo and video metadata that includes automatic timestamps embedded by cameras and smartphones. This metadata proves when images were captured and prevents disputes about timing. Never crop photos, never apply filters or editing effects, and never modify original files in any way. Editing raises authenticity questions and gives insurance companies ammunition to claim you manipulated evidence. If you need to highlight something in a photo for clarity, create a copy for annotation and always keep unedited originals in a separate clearly labeled folder.
Store physical evidence carefully by keeping damaged material samples in sealed plastic bags with labels showing the date collected, location (which room and specific area), and type of material (carpet padding, drywall, baseboard). Keep damaged items that haven’t been disposed of separated from undamaged belongings in a garage, storage unit, empty room, or other safe space where they remain accessible for adjuster inspection but won’t cause additional damage or create health hazards. Photograph items in their storage location showing organization and care. Document items before disposal by taking final photos of anything you must throw away for health or safety reasons, keeping the photos filed with notes explaining why disposal was necessary.
Create a master checklist tracking all documentation you’ve submitted to insurance companies and landlords, all copies you’ve retained in various backup locations, and items still needed to complete your claim package. Use a simple spreadsheet or written list with columns for document type, date created, date submitted, submitted to whom, backup locations, and status. Check off each item as you complete it. This master list prevents oversights and makes it easy to respond when insurance companies request additional documentation.
Adjuster Visit Preparation and Documentation

Schedule the adjuster visit as soon as your insurance company assigns one, typically within a few days of filing your claim. Prepare organized documentation packets including printed photo compilations showing before and after damage comparisons, your detailed inventory list with highlighted high value items, receipts and proof of purchase in a labeled folder, your written damage descriptions organized by room, and professional inspection reports if obtained. Keep damaged items accessible by ensuring the adjuster can easily view stored damaged belongings, walk through all affected rooms without obstacles, and inspect areas you’ve documented in photos.
| Documentation Type | What to Provide | Purpose |
|---|---|---|
| Photo Evidence | Printed copies of key photos, organized by room, with dates visible | Visual proof of damage extent and condition immediately after flooding |
| Video Recordings | Full walkthrough video on laptop or tablet ready to play, or links to cloud stored videos | Comprehensive damage overview showing spatial relationships and narrated context |
| Written Inventory | Printed itemized list with columns for item description, value, damage extent, and location | Detailed personal property loss documentation for accurate claim valuation |
| Receipts and Proof of Purchase | Original receipts, credit card statements, warranty cards, online order confirmations | Verification of ownership and purchase price for claimed items |
| Professional Reports | Water restoration assessments, electrician inspections, mold remediation quotes, contractor estimates | Third party verification of damage severity and necessary repair scope |
| Communication Logs | Printed timeline of landlord communications, insurance company call records, repair request emails | Proof of timely notification, mitigation efforts, and response to flooding event |
Conduct the walkthrough by leading the adjuster through each damaged room in the order shown in your documentation. Point out all damage including obvious issues and subtle problems they might miss like water stains behind furniture or moisture in cabinets. Reference your documentation by saying things like “As you can see in these photos from January 15, the water line reached 18 inches on this wall.” Ask questions about coverage and valuation methods, including whether they’re using replacement cost or actual cash value, how depreciation is calculated, and what documentation they need for specific high value items. Take notes during the visit recording the adjuster’s comments, areas they focus on, items they question, and any coverage concerns they mention.
Document the adjuster’s visit itself by writing down their full name, direct phone number, and email address immediately. Record the inspection date and exact times they arrived and left. List all areas they examined and rooms they entered. Note specific items discussed in detail and any that seemed to concern them. Write down any commitments they made including timeline promises for claim decisions, follow up inspection scheduling, or additional documentation requests. Record any concerns they expressed about coverage, damage cause, or claim validity so you can address these issues.
Follow up in writing within 24 hours after the adjuster visit using email to create a permanent record. Thank them for their time, confirm what was discussed during the inspection, summarize any agreements or next steps, and request written damage assessments with specific dollar amounts. Ask for claim decision timelines in writing stating when you can expect a settlement offer or denial letter. Reference specific conversations, like “As we discussed regarding the damaged hardwood flooring, you mentioned needing a contractor estimate before approval.” This written follow up prevents misunderstandings and holds the adjuster accountable for statements made during the visit.
Final Words
Document flood damage in your apartment immediately with photos, videos, detailed inventories, and written descriptions before touching anything.
Back up everything to cloud storage right away. Keep copies in at least three places.
Notify your insurance company and landlord fast. Track every conversation. Save every receipt.
Your thorough documentation protects your claim and speeds up recovery. The work you put in now makes the difference between full compensation and fighting for every dollar later.
You’ve got this.
FAQ
How do you report flood damage in an apartment?
You report flood damage in an apartment by immediately notifying your renters insurance company within 24 to 48 hours and sending written notice to your landlord via email, text, and certified letter documenting the discovery time, flood source, damage extent, and safety hazards present.
Are renters responsible for flood damage in their apartment?
Renters are typically not responsible for flood damage in their apartment if the source is building infrastructure like burst pipes, roof leaks, or neighboring units, as these fall under landlord responsibility, but renters may be liable if their negligence or actions caused the flooding.
How do you document water damage in an apartment?
You document water damage in an apartment by taking timestamped photos and videos of all affected areas before cleanup, creating a detailed written inventory of damaged belongings with measurements, recording the flood source and entry points, and preserving all evidence for insurance claims.
How do you describe water damage for insurance claims?
You describe water damage for insurance claims by recording square footage of flooded rooms, height of water lines on walls, material conditions like carpet saturation or drywall softness, water color and odors, and organizing descriptions chronologically with dates and times of discovery.
What photos should you take after apartment flooding?
You should take photos after apartment flooding showing water lines on walls, ceiling stains, damaged baseboards and flooring, saturated carpets, cabinet damage, inside closets and under sinks, all damaged belongings, and the flood source with multiple angles and reference objects for scale.
How do you create an inventory of flood damaged belongings?
You create an inventory of flood damaged belongings by listing each item’s description, brand, model number, serial number, purchase date, estimated value, damage extent, and room location, then gathering receipts, credit card statements, and photographing item labels as supporting documentation.
What should you photograph first after apartment flooding?
You should photograph the overall apartment condition and flood source first after apartment flooding, then systematically document each room with wide shots showing context and close ups of specific damage before removing any items or beginning cleanup to preserve evidence.
How do you document mold growth after flooding?
You document mold growth after flooding by taking timestamped photos showing location, size, color, and progression over time, photographing all mitigation efforts like ventilation and dehumidifier use, and keeping receipts for mold prevention supplies and professional remediation services.
What records should you keep for flood damage claims?
You should keep records for flood damage claims including all photos and videos with timestamps, detailed written inventories, receipts for damaged items, professional inspection reports, repair estimates, communication logs with insurance and landlord, and receipts for temporary housing and mitigation expenses.
How do you identify the flood source in an apartment?
You identify the flood source in an apartment by examining common origins like burst pipes, toilet overflows, washing machine malfunctions, water heater failures, roof leaks, or neighboring unit flooding, then photographing the source point and any visible damage or entry points where water entered.
What measurements should you record for flood damage?
You should record measurements for flood damage including square footage of flooded rooms, height of water lines on walls in inches, dimensions of damaged sections, depth of standing water at discovery, and affected area measurements for carpets, drywall, and baseboards.
How do you prepare for an insurance adjuster visit after flooding?
You prepare for an insurance adjuster visit after flooding by organizing all documentation into packets including photos, videos, written inventories, receipts, and professional reports, keeping damaged items accessible for inspection, and creating a list of all damage to review during the walkthrough.