
You just scooped the last bucket of mud out of your living room, and you realize you’ve been doing it wrong the whole time. Mud removal after a flood isn’t just hard work. It’s a sequence that matters. Skip the safety check, rush the water extraction, or use the wrong scraping angle, and you’ll damage your floors, spread contamination, or worse, get hurt. This guide walks you through the correct order, the right tools, and the specific techniques that make mud removal safe, efficient, and actually complete.
Essential Safety Assessment and Initial Mud Removal
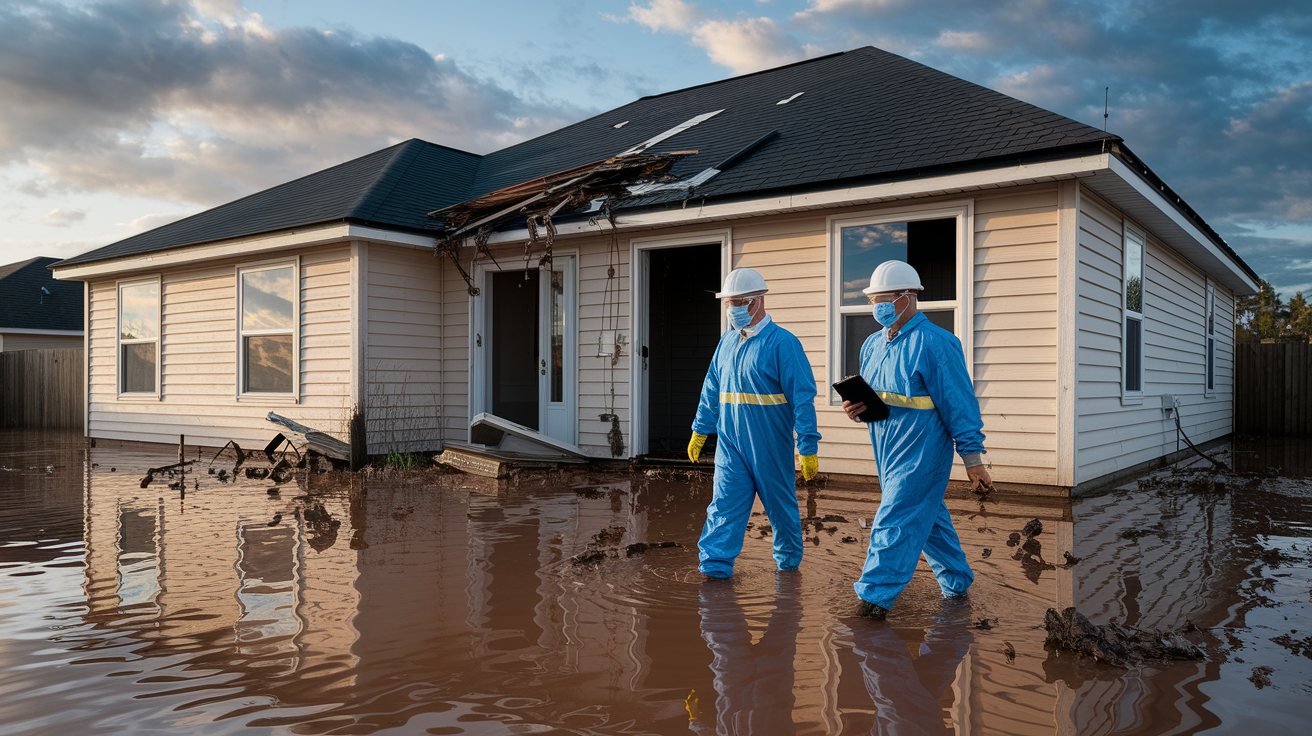
Walking into a mud-filled house feels overwhelming. But a systematic safety-first approach prevents injuries and keeps structural damage from getting worse. Never enter your flooded home alone. Bring a second person and keep a charged phone within reach. The mud can wait. Your safety assessment can’t.
Walk the entire perimeter of your house before stepping inside. Look for foundation cracks and shifting. If the concrete moved or separated, that’s a red flag. Check for bent or bulging walls, especially around windows and doors. Scan the roofline for debris and tree damage. Look closely at door frames and window frames. If they’re crooked or won’t close properly, the structure may have shifted. Check the condition of your electrical service panel and gas meter from the outside. If you smell gas or see damaged gas lines, call the utility company immediately and do not enter. Any of these signs (significant foundation movement, major wall bowing, or severe structural shifting) require a professional structural engineer’s assessment before you proceed with cleanup.
Shut off your electricity at the main breaker if you can do it safely from outside the house. If you smell gas or suspect gas line damage, shut off the gas at the meter. Never, under any circumstances, enter standing water if the electricity’s still on. Use battery-powered flashlights and lanterns only. Don’t operate gas-powered generators indoors. Not in the basement, not in the garage, not anywhere inside the structure. Carbon monoxide kills silently. Before you begin full restoration work, have licensed professionals inspect your water, gas, electric, and sewer lines. These systems may look fine but have hidden damage that creates serious problems.
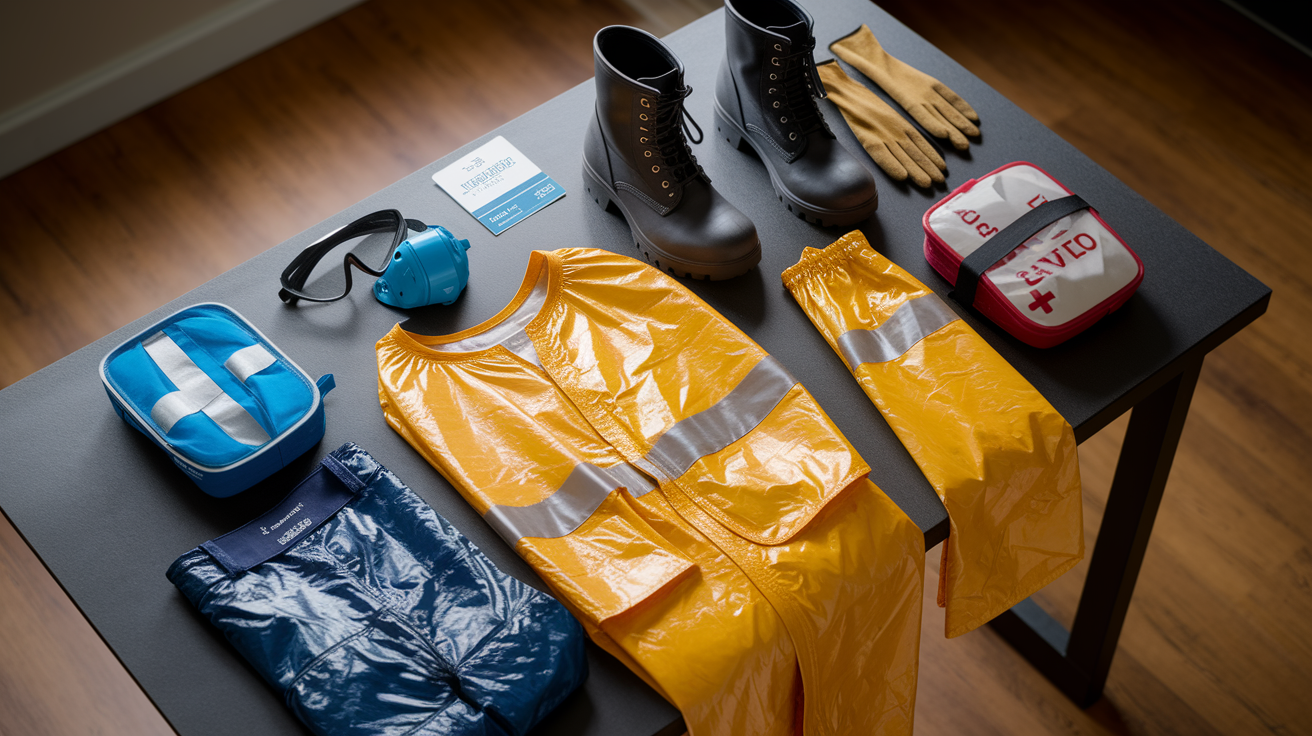
Required protective equipment before entering:
- Tear-resistant work pants and long sleeves
- High-ankle rubber boots with protected toes
- Waterproof work gloves with good dexterity
- Hard hat for areas with debris or structural concerns
- Safety goggles or face shield
- N95 or N100 respirator mask (mandatory if mold visible)
- Full Tyvek suit for sewage or heavy contamination
- First aid kit within easy reach
Remove standing water first using a sump pump before mud removal becomes possible. If your basement flooded, pump out water gradually at a rate of two feet of water per day to prevent structural collapse from exterior soil pressure. The ground outside your home is still saturated and pushes against your foundation walls. If you pump the basement empty too fast, the pressure difference can collapse those walls inward. Once standing water’s gone and it’s safe to enter, open all windows and doors for cross-ventilation.
Initial mud removal follows a specific sequence:
- Document all damage with photos and video before touching anything for insurance claims
- Work from highest level downward to prevent recontamination of cleaned areas
- Scrape top mud layer with flat shovel held at 30-degree angle
- Work in small sections to prevent mud from drying and becoming harder to remove
- Scoop loosened mud into buckets or wheelbarrow, staging outside in designated disposal area
- Make multiple passes rather than attempting complete removal in single effort
Take photographs and video before you move a single shovelful of mud. Capture water lines on walls, all damaged items, close-ups of structural issues, and wide shots of every affected room. This documentation is critical for insurance claim settlement and can mean thousands of dollars in the final payout.
Required Protective Gear and Equipment for Mud Removal
Floodwater isn’t just dirty water. It contains raw sewage, industrial chemicals, pesticides, bacteria, viruses, and petroleum products. Full body protection isn’t optional. It’s mandatory. The right equipment also makes the physical work safer and more efficient, turning an impossible task into a series of manageable steps.
| Equipment Type | Specific Items | Purpose |
|---|---|---|
| Protective Clothing | Tear-resistant work pants, long-sleeve shirts, full Tyvek suit for sewage contamination | Prevents skin contact with contaminated mud and prevents cuts from hidden debris |
| Footwear | High-ankle rubber boots with steel or composite toe protection | Waterproof barrier and protects feet from puncture wounds, nails, glass |
| Hand Protection | Waterproof work gloves with good grip and dexterity | Protects hands while allowing tool operation and debris handling |
| Respiratory Protection | N95 or N100 respirator masks, replace following the five Ds | Filters bacteria, mold spores, and airborne contaminants |
| Eye Protection | Safety goggles or full face shield | Prevents splashes and airborne particles from reaching eyes |
| Mud Removal Tools | Flat shovel, wide dustpan, buckets, wheelbarrow, stiff deck brush | Scrapes, scoops, transports, and scrubs mud from surfaces |
| Water Extraction Tools | Sump pump, wet/dry vacuum, squeegees, mop and bucket | Removes standing water and extracts moisture before mud removal |
| Cleaning Supplies | Phosphate-free detergent, spray bottles, sponges, scrub brushes, garden hose | Deep cleans surfaces after bulk mud removal |
Replace your respirator mask immediately if any of the five Ds apply: Dirty (visible contamination on the mask surface), Damaged (straps broken, filter torn, or mask cracked), Damp (moisture reduces filtration effectiveness), Deformed (no longer seals properly against your face), or Difficult to breathe (filter is clogged and airflow restricted). If you have immune system disorders, COPD, asthma, or other respiratory conditions, don’t enter the space until professionals complete mold cleaning. If you must be present, use enhanced respiratory protection and minimize exposure time. Clean your protective equipment between work sessions. Rinse boots, gloves, and goggles with clean water and air-dry completely before the next use.
Removing Standing Water and Excess Moisture
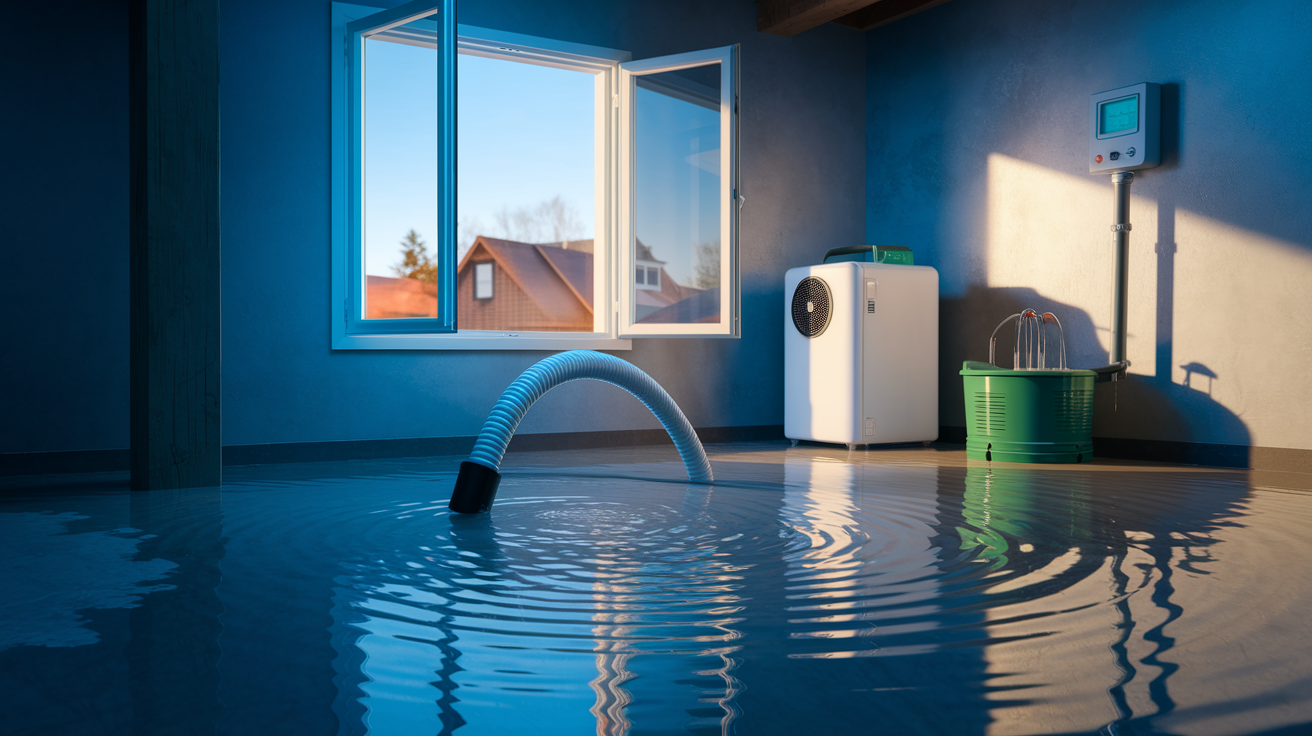
Standing water makes mud removal impossible and accelerates structural damage with every hour it sits. Water extraction creates stable working conditions and stops additional deterioration. Think of it as setting the stage. You can’t clean mud until you remove the water it’s sitting in.
If your basement flooded, pump water out gradually at a maximum rate of two feet per day. The reason matters. The soil outside your foundation walls is still saturated and exerting tremendous pressure inward. When you pump the basement dry too quickly, you remove the water pressure that was balancing that exterior force. The result can be foundation walls collapsing inward. Watch for signs of structural stress during pumping. New cracks appearing in foundation walls, walls bowing inward, or water suddenly seeping through concrete. If you see any of these, stop pumping immediately and call a structural engineer.
Water extraction methods and tools:
- Sump pump operation for deep water. Place pump on blocks to avoid sucking up sediment that clogs the mechanism
- Wet/dry vacuum for remaining pools and corners where pumps can’t reach
- Squeegees for pushing thin water layers toward drainage points or collection areas
- Bucket brigade for small areas or when power isn’t available
- Professional extraction equipment rental for severe flooding affecting multiple rooms
Open all windows and doors for cross-ventilation once it’s safe to do so. But if sewage contamination or visible mold is present, don’t use fans yet. Fans spread airborne pathogens and mold spores throughout your home, contaminating areas that were previously clean.
Shoveling and Scraping Bulk Mud From Floors

Work from the back of your house toward the front door, and from the top floor downward. This systematic approach prevents you from tracking mud through areas you’ve already cleaned. Start at the highest flooded level and complete that entire floor before moving to the next level down.
Proper shoveling technique removes mud efficiently without damaging underlying surfaces:
- Scrape off the top mud layer with a flat shovel held at a 30-degree angle. This low angle skims mud off the surface instead of gouging into flooring
- Work in small sections, roughly 4 feet by 4 feet, to prevent mud from drying and hardening
- Scoop loosened mud into buckets or a wheelbarrow, making regular trips to your outdoor staging area
- Use a wide dustpan for corners and edges where the shovel doesn’t fit
- Make multiple passes through each section rather than trying to get everything perfectly clean in one attempt
Different flooring types require adjusted techniques. On concrete floors, you can scrape aggressively without worry. Concrete handles rough treatment. For tile surfaces, use medium pressure to avoid damaging grout lines. Damaged grout creates pathways for moisture to reach the subfloor. Hardwood floors require careful assessment before you start scraping. If boards are severely swollen or warped, they’ll need replacement anyway, so focus on bulk removal. If hardwood looks salvageable, use lighter pressure and avoid gouging the finish. Carpet should be removed and discarded entirely, not cleaned. We’ll cover that in the disposal section.
Stage removed mud outside in a designated area, keeping it separate from other debris categories. Maintain clear pathways from your work area to the exit so you’re not constantly navigating around piles of wet mud. The staging area organizes your disposal process and keeps work areas safer.
Cleaning Mud From Walls and Vertical Surfaces
Waterlogged drywall often requires removal rather than cleaning. Run your hand along the wall surface. If it feels soft, spongy, or crumbles under light pressure, that drywall is done. Visual inspection reveals the extent: bubbling paint, brown staining that wasn’t there before, and visible sagging all indicate drywall that won’t recover.
Remove damaged drywall by cutting a horizontal line one foot above the visible watermark or at the nearest drywall seam, whichever is higher. Use a utility knife to score the line, then snap the drywall along the cut. Remove a six-inch horizontal section at ceiling level as well. This opening promotes airflow inside the wall cavity, which prevents mold from growing on studs and insulation you can’t see. Pull out all wet insulation from the exposed cavities. Wet insulation doesn’t dry properly and becomes a mold factory.
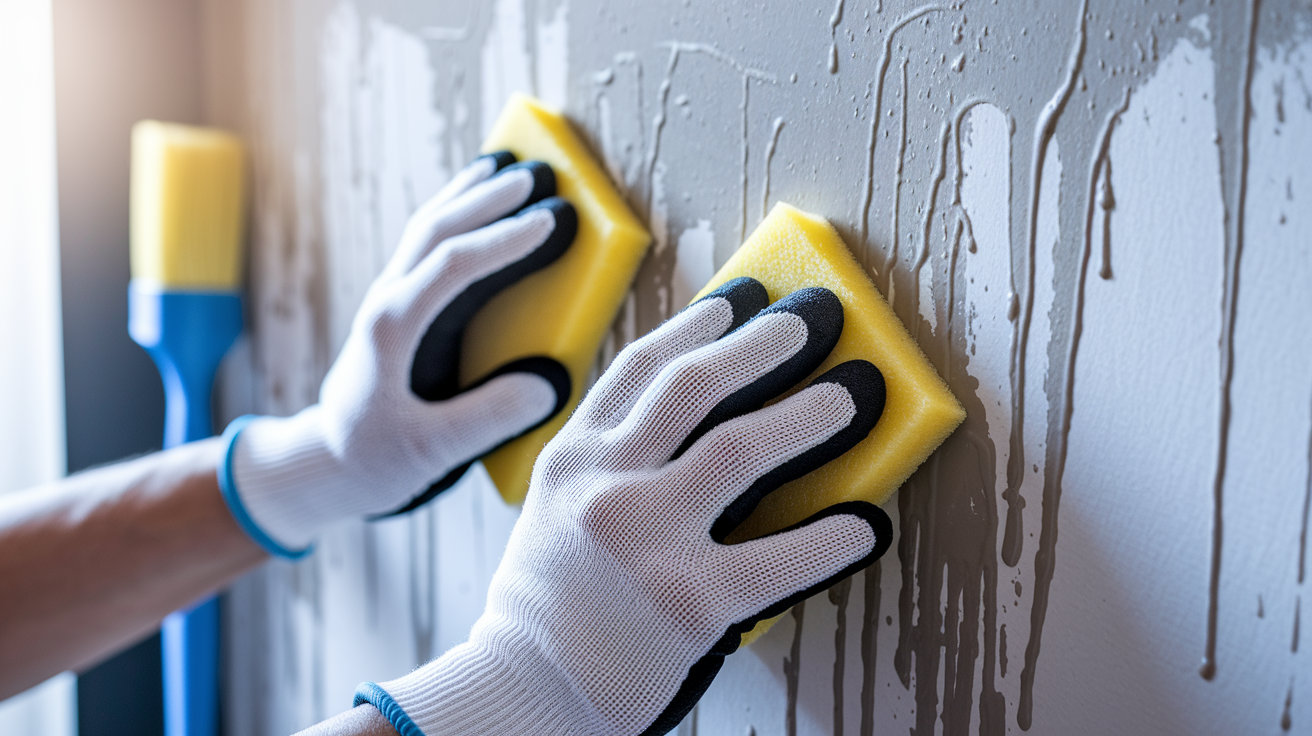
For walls that can be salvaged, follow these cleaning steps:
- Wipe down mud with damp sponges working top to bottom so dirty water doesn’t run over clean areas
- Use a soft bristle brush for textured surfaces like popcorn texture or heavy orange peel
- Apply phosphate-free detergent solution mixed at 1/4 cup detergent per gallon of warm water
- Rinse thoroughly with clean water, changing rinse water frequently
- Use a pressure washer on exterior brick walls, but keep pressure on a low setting to avoid damaging mortar
- Allow complete drying before assessing whether paint is salvageable or needs replacement
Remove all baseboard trim along flooded walls. Baseboards trap moisture at the wall-floor junction and prevent proper drying. Pry them off carefully if you plan to reuse them, or remove them quickly if they’re damaged beyond salvage. Exposed wall cavities and removed baseboards facilitate complete drying and prevent moisture from getting trapped where you can’t see it turning into mold.
Deep Cleaning, Sanitizing and Disinfecting After Mud Removal

The two-stage process is mandatory: clean first with detergent, then disinfect with bleach or approved sanitizer. Skipping the detergent stage doesn’t work. Here’s why. Disinfectants kill germs on contact with surfaces, but they can’t penetrate through layers of organic material and embedded sediment. Detergent breaks down that material and lifts it away, exposing the actual surface so disinfectant can do its job.
Mix your cleaning solution using 1/4 cup phosphate-free detergent per gallon of warm water. Apply it generously with a mop or large sponge, working in sections. Let the solution sit for five minutes. This contact time allows the detergent to break down organic matter. Then scrub with appropriate brushes for each surface type. Work methodically through each room, maintaining wet contact with the cleaning solution.
Surface-specific cleaning approaches:
- Concrete floors require a stiff deck brush with aggressive scrubbing to remove embedded sediment from porous concrete
- Tile surfaces need a medium bristle brush, using care around grout lines to avoid damage
- Wood surfaces get minimal water and quick drying to prevent additional swelling
- Metal surfaces need non-abrasive sponges to avoid scratching protective finishes
- Foundation walls require extra attention because concrete is highly porous and retains both moisture and contaminants
- Stairs get cleaned top-to-bottom so dirty water flows downward away from clean areas
- Counters and cabinets need gentle wiping with a wrung-out cloth to avoid oversaturation
Remove all dirty rinse water completely before starting the disinfection stage. Mop it up, vacuum it with a wet-dry vac, or squeegee it toward drains. Leftover dirty water dilutes your disinfectant solution and reduces its effectiveness.
Floodwater contains raw sewage, bacteria like E. coli and Salmonella, viruses including Hepatitis A, and chemical contaminants from fuel, pesticides, and industrial waste. Disinfection isn’t optional or paranoid. It’s mandatory for health safety. Proper disinfection also removes the lingering musty smell that develops after floodwaters recede.
| Surface Type | Bleach Solution | Contact Time | Special Notes |
|---|---|---|---|
| General hard surfaces (walls, counters, most floors) | 1/2 cup bleach per 1 gallon water | 5 to 10 minutes | Standard solution for non-porous surfaces; rinse thoroughly after contact time |
| Mold spots under 10 square feet | 2 cups bleach per 2 gallons water | Minimum 4 hours | Spray affected surface until soaked; reapply if surface dries before 4 hours |
| Porous concrete (foundation walls, basement floors) | 1 cup bleach per 1 gallon water (double concentration) | 10 to 15 minutes | Concrete absorbs solution; apply liberally and scrub while wet |
| Non-porous tile and sealed surfaces | 1/2 cup bleach per 1 gallon water | 5 to 10 minutes | Standard solution works well; avoid excessive scrubbing on grout |
| Wood surfaces (if salvageable) | 1/4 cup bleach per 1 gallon water | 5 minutes maximum | Test small hidden area first; bleach can discolor some wood finishes |
| Metal surfaces | Do not use bleach | N/A | Use quaternary ammonium or hydrogen peroxide-based disinfectant instead |
Apply disinfectant solution using a spray bottle for even coverage on walls, a mop for floors, or a sponge for smaller areas. Ensure complete surface saturation. The surface should look wet and stay wet for the entire contact time. If the solution starts drying before the contact time ends, reapply immediately. After the required contact time, rinse all surfaces thoroughly with clean water. Change rinse water frequently so you’re not just redistributing contaminants. Keep the area well-ventilated during application by opening windows and using fans if sewage and mold have been removed.
Never mix bleach with ammonia, vinegar, or other cleaning products. This combination creates toxic chloramine gas that can cause severe respiratory damage or death. Surfaces where bleach can’t be used include HVAC systems and ductwork, metals prone to corrosion like aluminum or unsealed steel, fine woods with delicate finishes, and any non-colorfast materials that will bleach or discolor. For these surfaces, use alternative disinfectants like quaternary ammonium compounds (follow label instructions for dilution, usually 1/2 ounce per gallon of water) or hydrogen peroxide solutions (typically 3% concentration used full strength). Always follow manufacturer instructions for commercial disinfecting products. Wear waterproof gloves and safety goggles during all disinfectant application to protect skin and eyes from chemical exposure.
Thorough Drying and Dehumidification Process
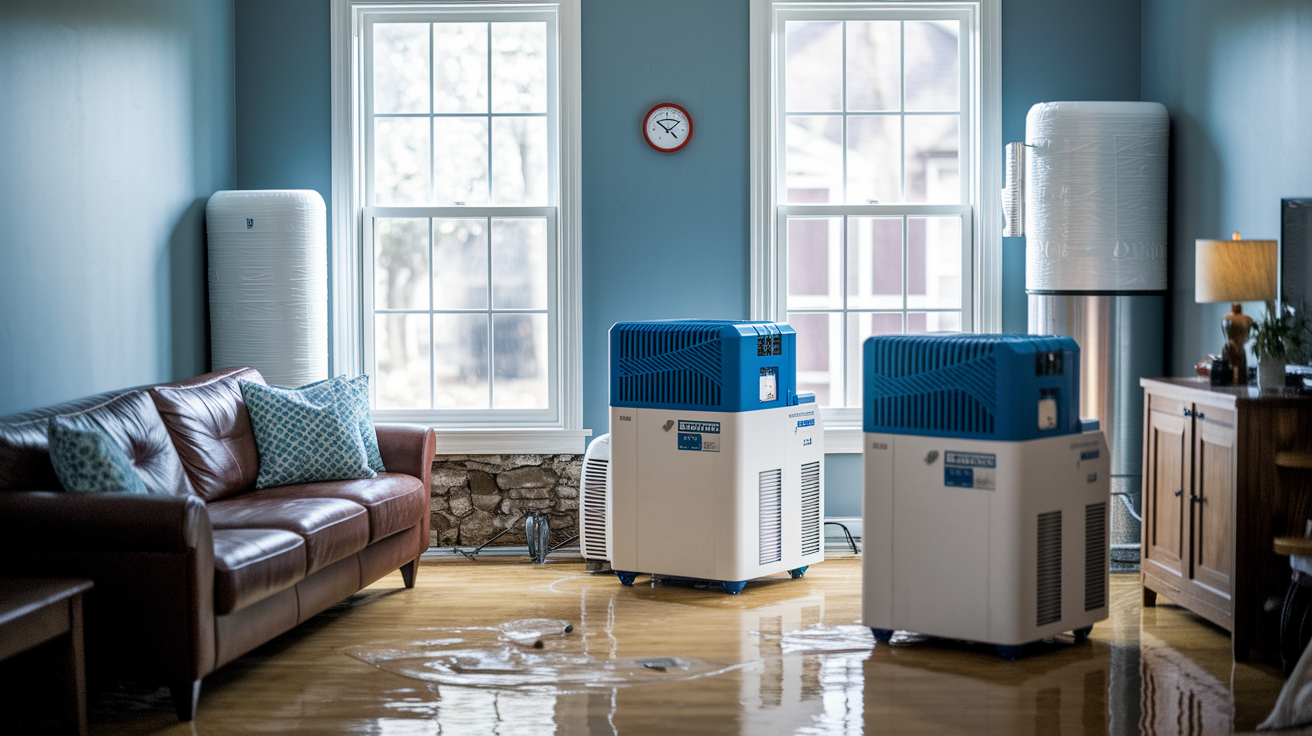
Mold can develop within 24 to 48 hours in damp conditions, turning a flood cleanup into a mold remediation project that costs thousands more. Complete drying prevents structural damage from rot and eliminates the conditions mold needs to grow. Proper drying and mold prevention aren’t separate tasks. They’re the same process.
Choose dehumidifiers with capacity appropriate for your square footage. A general rule: 30-pint capacity for spaces up to 1,500 square feet, 50-pint for 2,000 to 2,500 square feet, and 70-pint for larger areas. Empty collection buckets twice daily, or better yet, connect a continuous drain hose that runs to a floor drain or sump pump. Position dehumidifiers in the center of rooms for maximum air circulation and coverage. Run them continuously until moisture levels normalize, which can take two to four weeks depending on saturation extent.
Drying and mold prevention sequence:
- Open wall cavities for internal air circulation by cutting drywall one foot above watermarks and removing a six-inch section at ceiling level
- Remove all wet porous materials within 24 hours including carpet, padding, mattresses, upholstered furniture, and soaked insulation
- Position commercial-grade dehumidifiers in each affected room and turn them on
- Run fans for air movement only after sewage and visible mold have been completely removed (fans spread pathogens and spores if used too early)
- Keep windows closed when dehumidifiers are operating so you’re not trying to dehumidify the entire outdoors
- Monitor humidity levels with a hygrometer, targeting levels below 50 percent
- Apply fungicide spray to exposed wall studs, floor joists, and wooden structural elements after cleaning and disinfecting
- Complete all surface cleaning and disinfection before beginning the drying phase
Apply fungicide immediately after surfaces are cleaned and disinfected. Spray all exposed wall studs, floor joists, subflooring, and any wooden structural elements that were touched by floodwater. Follow the specific product’s application instructions and required contact times. Some need to stay wet for 10 minutes, others require longer. This application creates a protective chemical barrier against mold colonization during the extended drying period when moisture levels are still elevated.
Additional mold prevention strategies during drying:
- Never cover damp surfaces with plastic sheeting, tarps, or vapor barriers because this traps moisture underneath and creates ideal mold conditions
- Discard rather than salvage high-risk porous items like upholstered furniture, mattresses, and box springs
- Maintain continuous ventilation throughout the entire drying phase
- Monitor daily for new mold growth appearing on any surface
- Keep a detailed log of humidity readings and drying progress
- Address any musty odors immediately as an indicator of hidden moisture or early mold development
Typical drying time runs two to four weeks depending on the extent of saturation, outdoor humidity levels, and how much infrastructure you removed. Check moisture levels in floors, walls, and cavities using a moisture meter. Signs that drying is complete include no musty odor anywhere in the house, all surfaces feel completely dry to the touch, and humidity readings stay stable below 50 percent for at least three consecutive days. Small mold spots covering less than 10 square feet can be treated with a bleach solution of 2 cups bleach mixed with 2 gallons of water, sprayed until the surface is soaked, and left for a minimum 4-hour contact time. Mold-contaminated areas exceeding 10 square feet, any subsurface mold growing inside walls or under flooring, or mold affecting HVAC systems require professional mold remediation contractors. People with immune system disorders, COPD, or asthma shouldn’t enter the property until mold cleaning is professionally completed and verified.
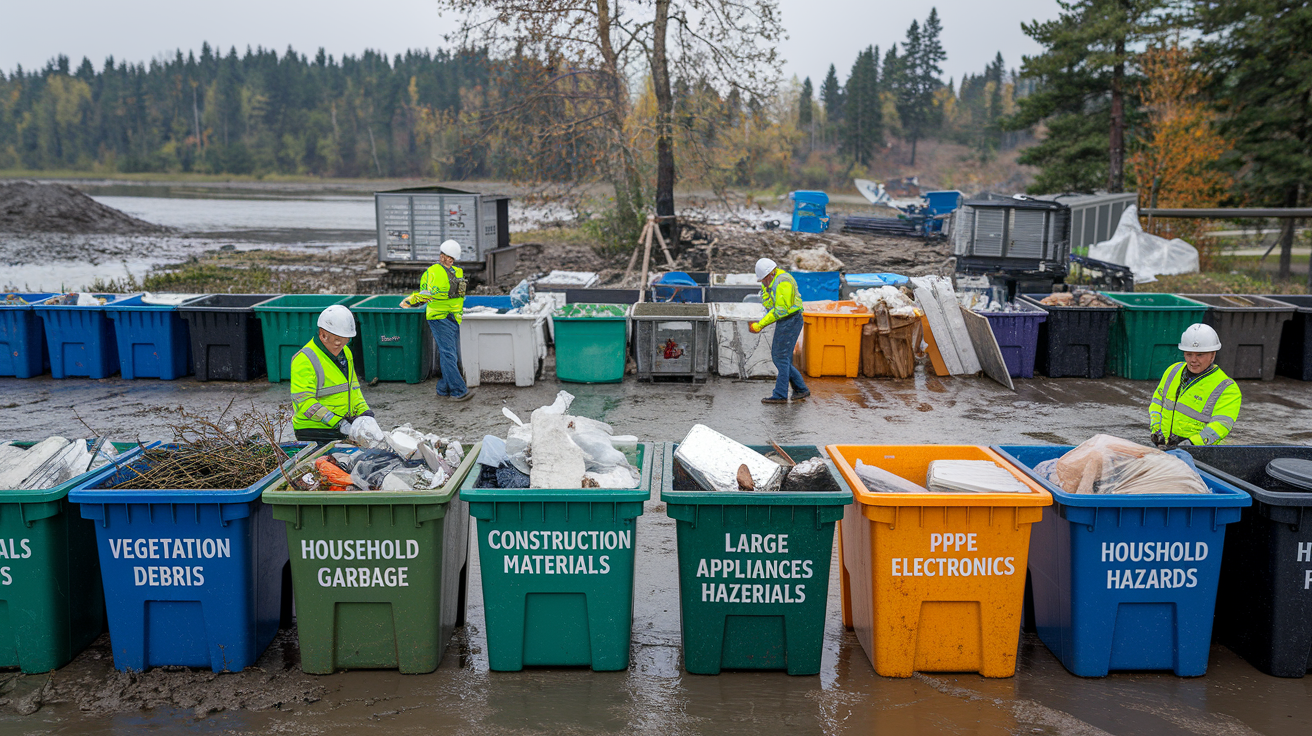
Disposing of Mud, Debris, and Contaminated Materials
Keep all discarded items on-site until your insurance adjuster photographs and documents everything. Moving items to the curb or dump before the adjuster arrives can reduce your claim settlement by thousands of dollars. Once you get approval, track all disposal costs including dump fees and dumpster rentals for potential reimbursement.
| Category | Items to Discard | Disposal Method |
|---|---|---|
| Vegetation Debris | Tree branches, leaves, lawn debris, landscaping materials | Curbside pickup on designated vegetation collection days or haul to yard waste facility |
| Household Garbage | All food items, contaminated clothing, bedding, towels, curtains, porous furniture | Bag securely and place at curb on regular trash days or special flood debris pickup |
| Construction Materials | Drywall, insulation, carpet, padding, damaged lumber, flooring materials | Separate pile at curbside or rent construction dumpster for large quantities |
| Large Appliances | Refrigerators, washers, dryers, dishwashers, water heaters | Special appliance pickup through municipality or scrap metal recycler |
| Electronics | TVs, computers, small appliances, audio equipment | Electronics recycling center or special e-waste collection events |
| Household Hazards | Paint cans, cleaning chemicals, pesticides, motor oil, batteries, propane tanks | Household hazardous waste facility; never place in regular trash |
Anything made from absorbent or porous materials that touched floodwater should be discarded. This includes pressboard furniture, plywood, particleboard, carpets and padding, curtains and drapes, couches and upholstered chairs, mattresses and box springs, and fabric items. Replace all of these due to contamination from bacteria, sewage, and chemicals in floodwater. All food items touched by floodwater should be thrown out immediately.
Items that can often be salvaged include those made from solid wood, natural stone, metal, and hard plastics. Window frames, door frames, baseboards, and floor trimming are usually salvageable if cleaned properly. Commercially canned goods in sealed cans can be saved: remove labels, clean cans thoroughly with detergent and water, sanitize in bleach solution (1/2 cup bleach per gallon of water) for 15 minutes, rinse with clean water, air-dry completely, and relabel with a marker including the contents and original expiration date. Solid wood furniture, metal cabinets, and hard plastic items follow a similar process: rinse thoroughly to remove all mud, clean with phosphate-free detergent solution, sanitize with bleach solution, rinse again with clean water, and air-dry completely away from direct sunlight which can cause warping or fading. Important documents and photographs can be frozen in sealed plastic bags in a frost-free freezer until you can arrange professional document restoration services.
Separate all debris into the six categories at your curbside or in a designated staging area. Check with your local municipality for special flood debris pickup schedules. Many communities establish dedicated collection routes after widespread flooding. Hazardous materials including paints, solvents, cleaning chemicals, automotive fluids, pesticides, and batteries require special handling through your local household hazardous waste facility. Never place these items in regular trash where they can contaminate groundwater or cause fires in garbage trucks.
Special Considerations for Basement Mud Removal
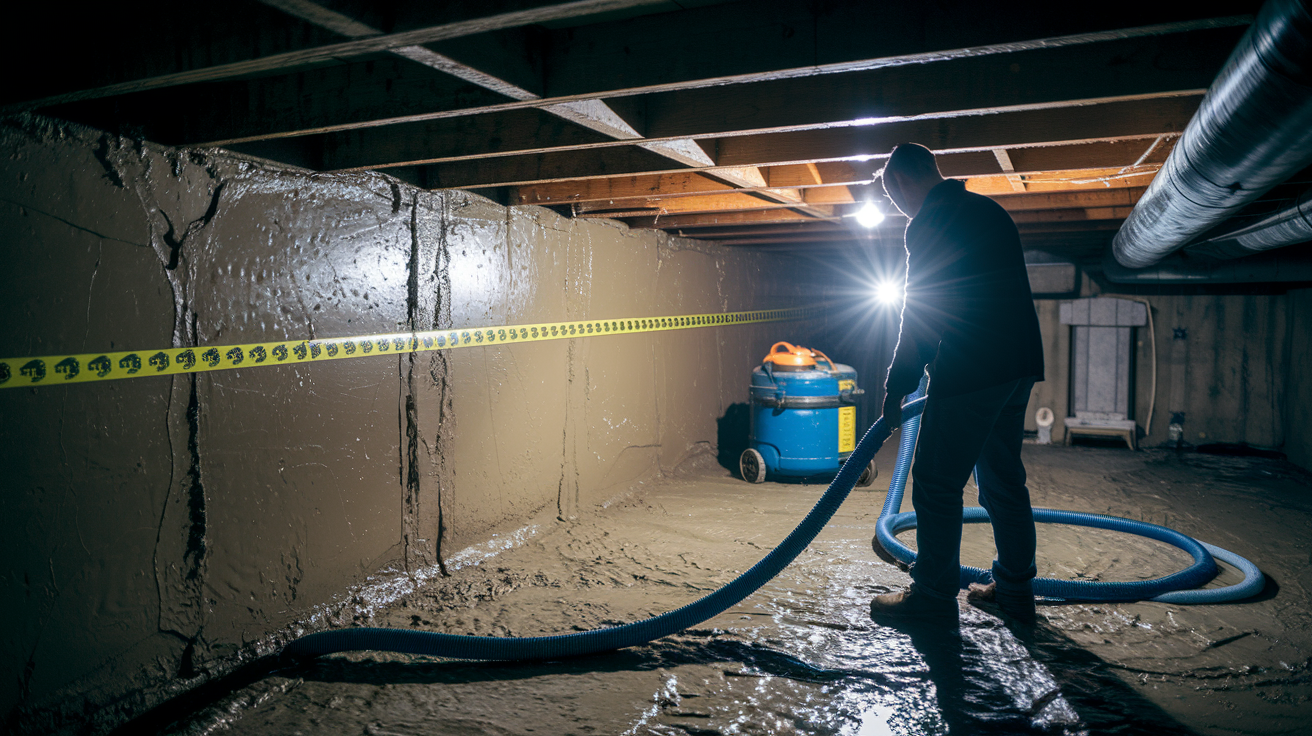
Basements face unique risks during cleanup: potential structural collapse, highly porous foundation walls that retain moisture and contaminants, and limited ventilation that concentrates harmful gases. Below-grade spaces require modified techniques and extra caution.
Never pump your flooded basement completely in one session. Maximum safe removal rate is two feet of water per day, measured from the top of the water surface. The reason this matters: the soil outside your foundation walls absorbed massive amounts of water during the flood and remains saturated for days or weeks. That waterlogged soil exerts tremendous inward pressure on your foundation walls. When water fills your basement, it creates outward pressure that balances the exterior soil pressure. Pump the basement dry too quickly, and you remove that balancing force while the exterior pressure remains. The result is foundation walls collapsing inward, causing structural damage that costs tens of thousands to repair. Watch closely for warning signs during gradual pumping: new cracks appearing in foundation walls, existing cracks widening, walls bowing inward even slightly, or water suddenly seeping through concrete where it wasn’t before. If you observe any of these, stop pumping immediately and call a structural engineer before proceeding.
Basement-specific mud removal steps:
- Remove standing water gradually over multiple days at the two-feet-per-day maximum rate
- Clean the basement only after completing upper levels to prevent mud from higher floors recontaminating the basement
- Pay special attention to foundation wall cleaning because concrete is porous and retains both moisture and bacteria deep in the material
- Apply double-concentration disinfectant to porous concrete surfaces (1 cup bleach per gallon of water instead of the standard 1/2 cup)
- Remove all wet insulation from basement walls and ceiling if present
- Check sump pump function and clear the discharge line to ensure proper drainage
- Install or improve foundation drainage systems and sump pump capacity to reduce future flooding risk
Crawl spaces require a similar gradual water removal approach. Enhanced ventilation is critical in confined crawl spaces because harmful gases concentrate quickly in tight areas with limited airflow. Wear your respirator mask at all times in crawl spaces. Consider professional assessment and cleanup for crawl spaces with difficult access, extensive contamination, or structural concerns. The confined workspace and awkward positions increase injury risk significantly.
When to Call Professional Flood Restoration Services
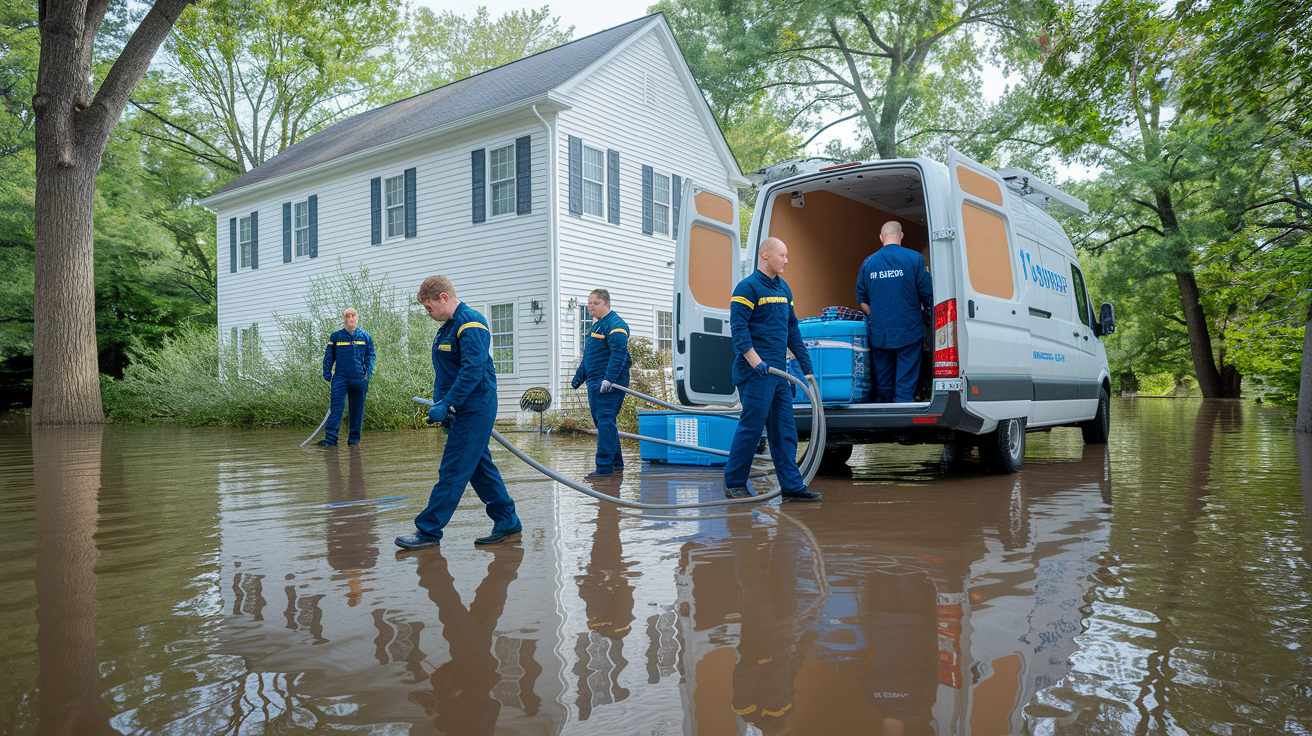
Some flood situations are unsafe or impractical for DIY cleanup. Calling professionals isn’t admitting defeat. It’s making a smart decision that protects your health, prevents additional damage, and often saves money compared to attempting repairs beyond your skill level. For urgent professional help scenarios and immediate response guidance, see our Emergency Response Tips.
Scenarios requiring professional restoration services:
- Extensive structural damage including foundation cracks, wall bowing, sagging floors, or shifted framing
- Mold contamination exceeding 10 square feet in total area or any subsurface mold growing inside walls, under flooring, or in HVAC systems
- Sewage backup or Category 3 “black water” flooding containing raw sewage or toxic chemicals
- Electrical system compromise requiring a licensed electrician to assess safety and rewiring needs
- Gas line damage, persistent gas odors, or visible gas line disconnection
- Household members with respiratory conditions like asthma or COPD, or immune system disorders that make exposure dangerous
- Flooding affecting HVAC systems, ductwork, or ventilation equipment that requires specialized cleaning
- Contaminated well water requiring professional testing, treatment, and system disinfection
- Extensive water damage affecting multiple rooms, multiple levels, or the entire structure
- Lack of proper equipment like commercial dehumidifiers, air movers, moisture meters, and infrared cameras for detecting hidden moisture
Select qualified contractors carefully. Verify they hold proper state licensing for restoration work, carry both general liability and workers compensation insurance, and hold flood restoration certifications. Request multiple detailed estimates showing scope of work, labor costs, equipment charges, materials, and disposal fees. Check references from recent flood jobs and review their Better Business Bureau rating and complaint history. Ensure contractors document all work with photos and detailed reports for your insurance claim. Look specifically for IICRC (Institute of Inspection, Cleaning and Restoration Certification) credentials, which indicate professional training in water damage restoration and mold remediation. For more information on finding qualified contractors and understanding restoration services, visit our Professional Restoration Resources.
Professional restoration typically costs $3,000 to $15,000 or more depending on flooding extent, square footage affected, and required structural repairs. Many homeowner insurance policies cover professional flood cleanup costs if you have flood insurance in place, though standard homeowner policies typically exclude flood damage. Coordinate with your insurance adjuster before signing restoration contracts to ensure the work is covered and the contractor’s estimate aligns with your policy coverage. Get everything in writing: detailed estimates showing itemized costs, contracts specifying completion timelines and payment schedules, and documentation that work meets industry standards and local building codes.
Documenting Damage for Insurance Claims
Documentation must happen immediately before you touch, move, or clean anything. The urge to start fixing things right away is understandable, but improper documentation can reduce your insurance settlement by thousands of dollars or result in claim denials.
Thorough documentation process:
- Photograph and video every affected room from multiple angles including wide shots showing entire rooms and close-ups of specific damage
- Capture clear images of water lines on walls showing flood height. Measure and note the height in inches above the floor
- Document all damaged furniture, appliances, electronics, and personal property with photos showing brand names, model numbers, and damage extent
- Photograph structural damage including foundation cracks, wall damage, ceiling stains, floor buckling, and door or window frame damage
- Record serial numbers and model numbers from all damaged appliances and equipment
- Create a detailed written inventory of all damaged items including purchase dates and approximate replacement values
- Leave all contaminated items on-site in designated areas until the insurance adjuster inspects and grants written approval for disposal
Keep receipts for every flood-related expense. Save documentation for all cleanup supplies, protective equipment, equipment rentals like dehumidifiers and pumps, professional services including electricians or plumbers, and any temporary repairs needed for safety. Track the hours you spend on cleanup work if your policy includes labor reimbursement provisions. Document hotel or temporary housing costs if you’re displaced during cleanup. Save all medical receipts if you or family members sustain injuries during cleanup, even minor ones. Maintain an organized folder, either physical or digital, with copies of all flood-related expenses, correspondence with your insurance company, contractor estimates, and claim documentation.
Schedule your insurance adjuster visit as soon as possible after the flood, but don’t dispose of damaged items until the adjuster grants explicit permission. Adjusters need to see the actual damage, not just photos, to properly assess your claim. Provide your complete documentation package during the inspection including your photo and video evidence, written inventory, receipts, and any professional assessments. Follow up in writing after the adjuster visit, confirming what was discussed, what items were approved for disposal, and the expected timeline for claim processing. Email creates a paper trail that protects you if disputes arise later.
Final Words
You’ve got the roadmap now. Start with safety, work in sections, and take it one step at a time.
Learning how to remove mud from house after flood is overwhelming, but you can do this. Clean before you disinfect. Dry everything completely. Document before you throw anything away.
Call professionals when you’re in over your head. That’s not quitting, that’s smart.
Your home can come back from this. You’re already taking the right steps.
FAQ
Q: How long does it take to dry out a house after a flood?
A: Drying out a house after a flood typically takes 2 to 4 weeks depending on the extent of saturation and environmental conditions. Complete drying requires running dehumidifiers continuously, maintaining proper ventilation, and monitoring humidity levels until they stabilize below 50 percent with no musty odors present.
Q: Do I need to remove drywall after flooding?
A: You need to remove drywall after flooding if it stayed wet for an extended period or shows signs of swelling and deterioration. Cut a horizontal line one foot above visible watermarks, remove a six-inch section at ceiling level for cavity ventilation, and discard wet insulation to prevent mold growth inside walls.
Q: How do you clean up a house after a flood?
A: Cleaning up a house after a flood requires a two-stage process starting with safety assessment and utility shutoff, followed by standing water removal, bulk mud shoveling, detergent cleaning, and bleach disinfection. Complete the process with thorough drying using dehumidifiers for 2 to 4 weeks while monitoring for mold development.
Q: How quickly does mold grow after a flood?
A: Mold grows within 24 to 48 hours after flood exposure in damp conditions, making rapid water removal and thorough drying critical for prevention. Remove all wet porous materials within 24 hours, run dehumidifiers continuously, and apply fungicide to exposed wood surfaces after cleaning and disinfecting to control growth.
Q: What protective gear is required for flood mud removal?
A: Flood mud removal requires tear-resistant work clothes, high-ankle rubber boots with protected toes, waterproof gloves, hard hat, safety goggles, and N95 or N100 respirator mask. Wear a full Tyvek suit when working with sewage contamination or visible mold to protect against bacteria and pathogens in floodwater.
Q: What is the correct bleach solution ratio for flood disinfection?
A: The correct bleach solution for flood disinfection mixes one-half cup ultra chlorine bleach with one gallon of water for general surfaces with 5 to 10 minutes contact time. For mold spots under 10 square feet, use 2 cups bleach per 2 gallons water with a minimum 4-hour contact time before rinsing thoroughly.
Q: Can I use fans immediately after a flood?
A: You cannot use fans immediately after a flood if sewage or visible mold is present because air movement spreads airborne pathogens and mold spores throughout the house. Run fans for air circulation only after completing sewage removal and disinfection, then use them with dehumidifiers to accelerate the drying process.
Q: What items must be thrown away after flood damage?
A: Items made from absorbent or porous materials must be thrown away after flood damage, including carpet, padding, mattresses, upholstered furniture, pressboard and particleboard furniture, and curtains. Keep discarded items on-site until the insurance adjuster photographs and documents them before final disposal for claim reimbursement.
Q: How do you safely pump water from a flooded basement?
A: Safely pump water from a flooded basement gradually at a rate of two feet per day maximum to prevent wall collapse from exterior soil pressure. Pumping too quickly creates a pressure differential because the surrounding soil remains saturated, which can cause foundation walls to bow inward or crack.
Q: When should I hire professional flood restoration services?
A: Hire professional flood restoration services when mold contamination exceeds 10 square feet, structural damage is present, sewage backup occurred, or household members have respiratory conditions or immune disorders. Professionals have commercial-grade equipment and IICRC certification to handle situations that exceed safe DIY capabilities.
Q: Why must I clean before disinfecting after a flood?
A: You must clean with detergent before disinfecting after a flood because organic material and embedded sediment block disinfectant contact with contaminated surfaces. The two-stage process ensures detergent breaks down debris first, then bleach solution eliminates bacteria, viruses, and pathogens during the required 5 to 10 minute contact time.
Q: What surfaces cannot be cleaned with bleach after flooding?
A: Surfaces that cannot be cleaned with bleach after flooding include HVAC systems, metals prone to corrosion, fine woods, and non-colorfast materials because bleach causes damage or discoloration. Use alternative disinfectants like quaternary ammonium compounds or hydrogen peroxide solutions on these surfaces following manufacturer instructions.
Q: How do I prevent mold while drying my house after a flood?
A: Prevent mold while drying your house after a flood by removing wet porous materials within 24 hours, running dehumidifiers continuously, applying fungicide to exposed wood studs, and maintaining humidity below 50 percent. Monitor daily for new growth, address musty odors immediately, and never cover damp surfaces with plastic.
Q: What should I document before starting flood cleanup?
A: Document all damage with photos and video before starting flood cleanup, capturing water lines on walls, damaged items, and structural issues from multiple angles. Photograph serial numbers on appliances, create written inventory with approximate values, and save all contaminated items on-site until the insurance adjuster approves disposal.
Q: How do I remove bulk mud from floors after flooding?
A: Remove bulk mud from floors after flooding by scraping the top layer with a flat shovel held at a 30-degree angle, working in small sections to prevent drying. Scoop loosened mud into buckets or a wheelbarrow, make multiple passes rather than attempting complete removal at once, and stage debris outside in a designated area.