
You want to fix your flooded home fast, but starting in the wrong order can trap mold inside walls, ruin insurance claims, or put you in the hospital. The truth is, cleanup isn’t just about scrubbing floors and tossing soggy furniture. It’s a specific sequence that protects your health, your money, and your home’s structure. This guide walks you through the exact order to clean safely, from the first safety check to the final mold prevention step, so you don’t waste time or make costly mistakes.
Critical Safety Assessment and First Actions
Seeing your home flooded is crushing. You want to rush in and start fixing things right now. But the real first step isn’t cleaning at all. It’s making sure you can enter safely without getting hurt or killed.
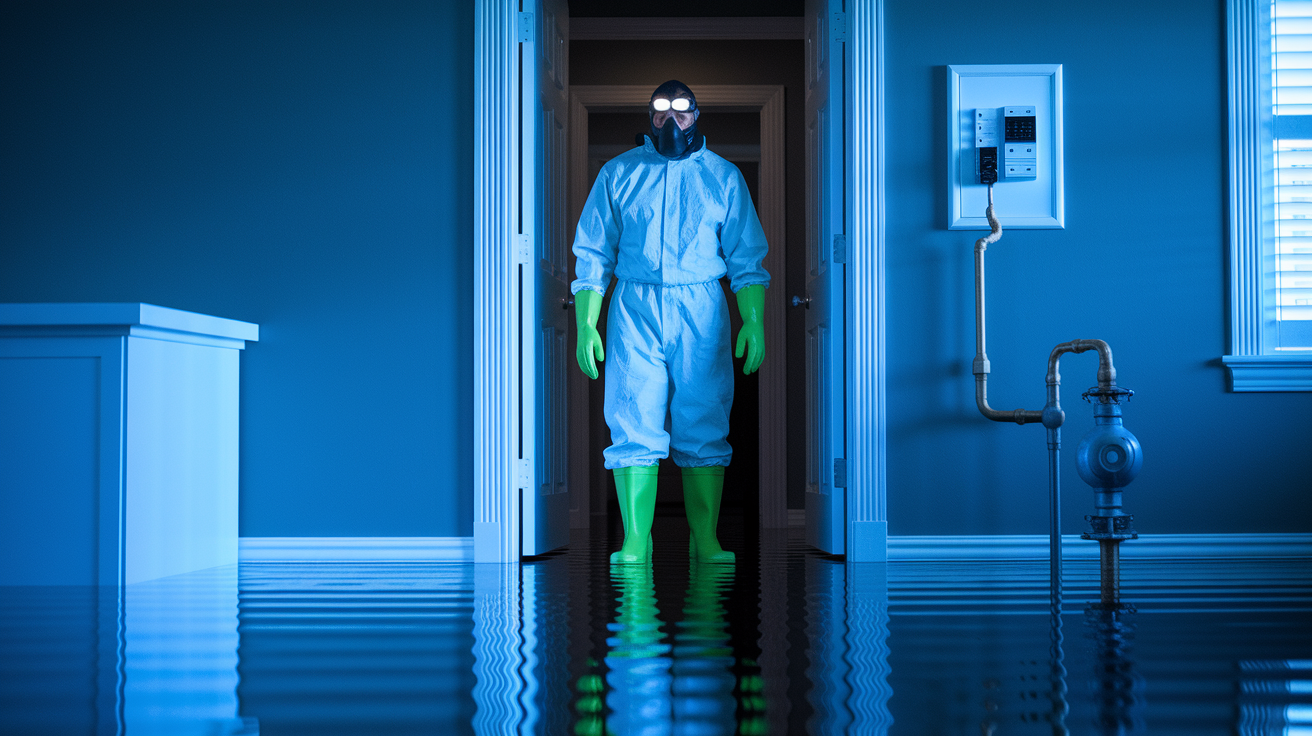
Never step inside an evacuated flood area until local authorities say it’s safe to return. Water hides live electrical wires, ruptured gas lines, and unstable structures. Before you open your front door, turn off electricity at the main breaker and shut off the gas supply at the meter. If you can’t reach the shutoff safely or smell gas, call the utility company and wait outside. Use only battery powered flashlights for lighting during your first walkthrough. Never bring gas powered generators, grills, or any combustion equipment indoors because carbon monoxide kills fast in closed spaces.
Walk slowly through each room and look up, down, and around. Check ceilings for sagging drywall or cracks that signal structural damage. Look at walls for bulging or leaning. If floors feel soft, spongy, or slanted, the foundation or floor joists may be compromised. In those cases, get out and call a structural engineer before you go any further. Floodwater comes in three contamination categories. Clean water from rain or broken pipes is category one. Gray water from washing machines or dishwashers is category two. Black water from sewage backups, rivers, or storm surge is category three and carries bacteria, chemicals, and waste that can make you seriously ill. If you’re dealing with black water, the health risks go way up.
Before you start any cleanup work, put on the right protective gear:
Rubber boots that go above your ankles to keep contaminated water off your skin. Heavy duty waterproof gloves, not the thin kitchen kind. N95 respirator or a mask rated for mold and bacteria, because the air inside isn’t safe to breathe. Eye protection like safety glasses or goggles to keep splashes out of your eyes. Long sleeves and pants made of quick drying or waterproof material. Battery powered headlamp or flashlight so your hands stay free to work.
You’ve got a narrow time window to prevent permanent damage. Most salvageable materials and surfaces start breaking down within 24 hours of getting wet. Mold spores begin growing in 24 to 48 hours. That doesn’t mean you rush in recklessly. It means once you get official clearance and confirm it’s structurally safe to enter, you move fast and stay focused on the priority steps in order.
Documenting Flood Damage for Insurance Claims

Before you move a single piece of furniture or throw anything away, contact your insurance company. Tell them you have flood damage and ask what documentation they need. Most policies require you to document everything before cleanup begins, and if you toss items too early, the insurance assessor can’t verify your claim. That can cost you thousands of dollars in denied coverage.
Walk through your home with your phone and take photos and videos of every damaged room from multiple angles. Capture wide shots that show the whole space, then zoom in on individual items, appliances, and structural damage. Record water line marks on walls because those show how high the water rose. If you have receipts, model numbers, or serial numbers for damaged appliances and electronics, photograph those too. The more evidence you gather now, the smoother your claim process will be. Create a written inventory as you go, listing each damaged item, its approximate age, and its condition before the flood if you can remember.
When you start removing damaged belongings, keep everything on your property until the insurance assessor has seen it. Pile discarded items in your driveway or yard where they’re visible and accessible. The assessor needs to inspect the actual damage, not just photos. If you haul things to the curb or a dump before the inspection, you lose your proof.
Water line heights marked on walls with tape or a marker and photographed clearly. All damaged rooms shot from at least three different corners to show full extent. Individual items including furniture, electronics, appliances, and personal belongings. Serial numbers and brand names on anything with a motor or electronic component. Any receipts, purchase records, or warranty paperwork you can locate quickly. Structural damage details like cracks in foundation, sagging ceilings, or buckled floors. Condition of your HVAC system, water heater, and any built in mechanical systems.
Your insurance company should respond within a few days to schedule an assessor visit. Some insurers send someone within 24 to 48 hours for severe flooding. Until that inspection happens, keep damaged materials in place even if it feels wrong to leave a mess sitting there. Once the assessor clears you to proceed, then you can start hauling things out.
Removing Standing Water From Your Flooded House
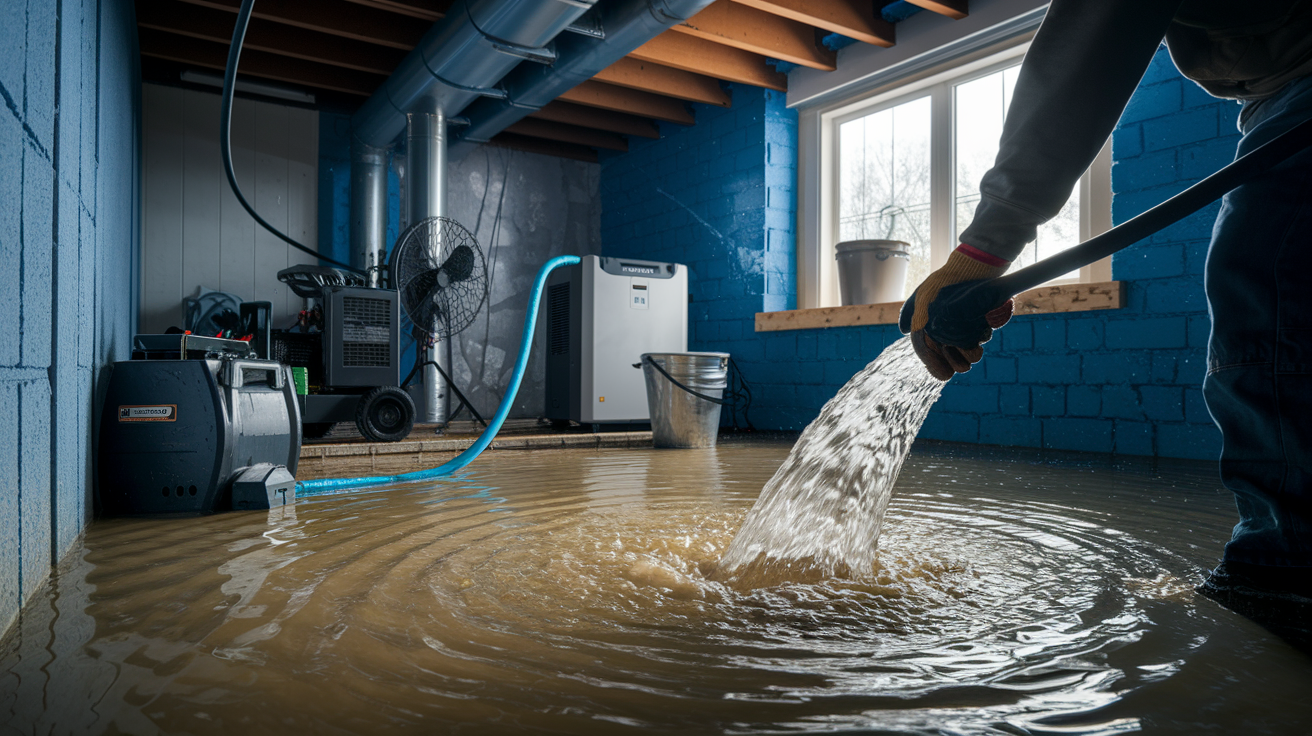
Standing water is priority one. Until you get the water out, nothing else can dry and nothing else can move forward.
For small amounts of water, a wet vacuum works well and gives you control in tight spaces. You can rent a commercial grade wet vac from a hardware store if you don’t own one. For deeper water, a submersible pump or a hand operated bilge pump moves larger volumes faster. If you’ve got no power and no equipment, a bucket and a strong back still gets the job done. It just takes longer. Pump or scoop the water outside and away from your foundation so it doesn’t seep back into the basement or crawl space.
If your basement flooded with more than two feet of water, don’t pump it all out at once. The soil around your foundation is saturated and still pressing inward. If you remove all the water inside too fast, the outside pressure can crack or collapse your foundation walls. Pump out about two feet of water per day and let the surrounding soil drain gradually at the same rate. It feels slow when you want your home back, but a collapsed foundation costs tens of thousands of dollars to repair.
| Water Removal Method | Best For | Safety Considerations |
|---|---|---|
| Wet Vacuum | Shallow water up to a few inches, small rooms, tight corners | Make sure electrical outlets are off and dry before plugging in. Empty the tank frequently. |
| Submersible Pump | Deep basement flooding, large volumes of water | Use only if power is safely restored or run from a generator placed outside. Gradual removal to protect foundation. |
| Hand Bilge Pump | Basements without power, moderate water depth | Labor intensive but safe when electrical systems are compromised. No carbon monoxide or electrical shock risk. |
| Bucket Method | Any situation when no equipment is available | Slow and exhausting but works anywhere. Watch for back strain and take breaks. |
Clearing Debris and Removing Mud After Flooding
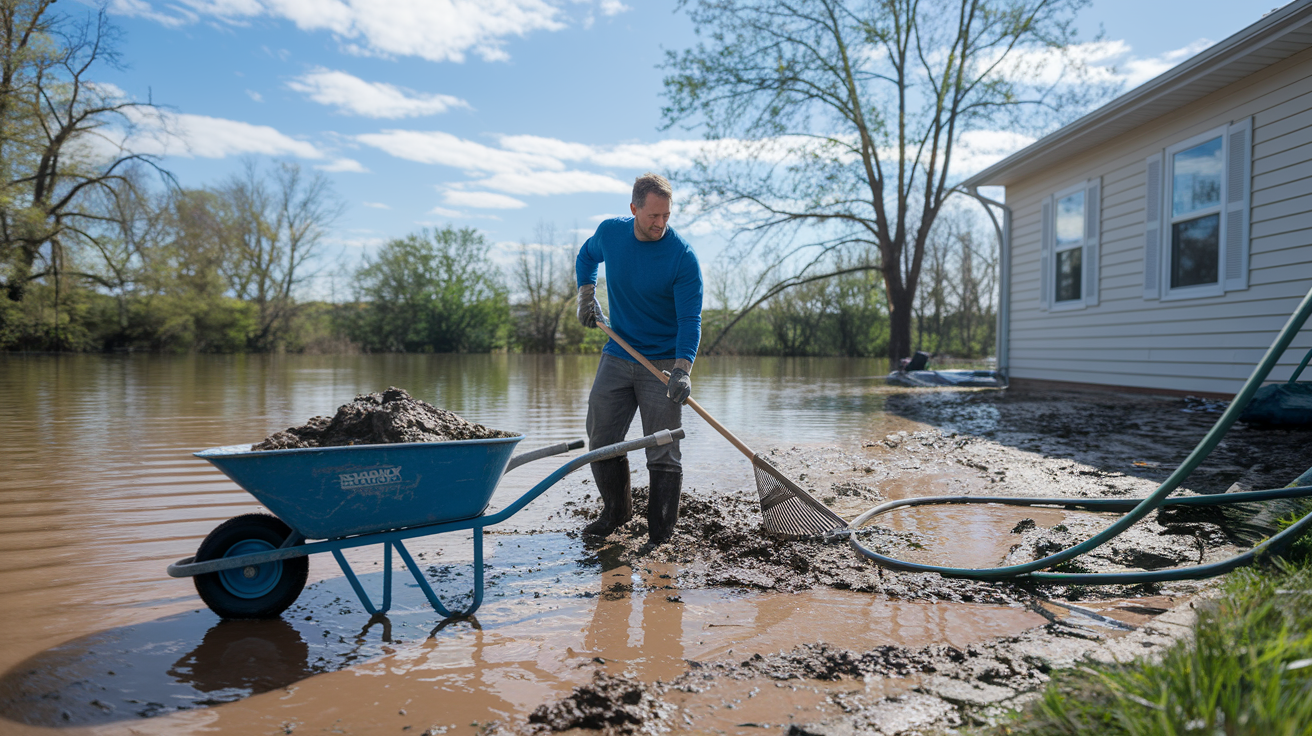
Once the standing water is out, you’ll see what the flood left behind. Mud, silt, leaves, trash, and random debris coat your floors and walls. This layer has to come off before anything can dry properly.
Start outside. Clear debris from around your foundation, gutters, and drainage areas so water can flow away from the house during the drying phase. Rake up mud, branches, and trash from your yard. If you’ve got a driveway or walkway covered in silt, hose it down or sweep it clear so you’re not tracking contamination back inside.
Inside, use a flat shovel or a wide scraper to remove thick mud from floors. Work in sections and scoop the sludge into heavy duty trash bags or a wheelbarrow. For thinner layers of silt and grime, mop with clean water first to loosen it, then scrub with a stiff brush and a bucket of soapy water. You’re not disinfecting yet. You’re just getting the bulk of the contamination off so the next steps work better.
Pressure washing works well on exterior brick walls and concrete foundations. The force removes caked on mud and debris faster than scrubbing by hand. If you’re cleaning porous concrete foundation walls on the interior, plan to follow up with sterilization because concrete soaks up contaminated water and holds it. Brick exterior walls can handle higher pressure. Just be careful around windows, damaged siding, or any area where the structure looks compromised.
Bag up all the contaminated debris and mud in heavy contractor bags. Keep the bags on your property until the insurance assessor has visited, then dispose of them according to local guidelines. Some municipalities offer special flood debris pickup after major events. Others require you to haul it to a designated disposal site. Don’t dump it in storm drains or natural areas because floodwater contamination spreads disease.
Sorting Salvageable Items From Flood Damaged Belongings
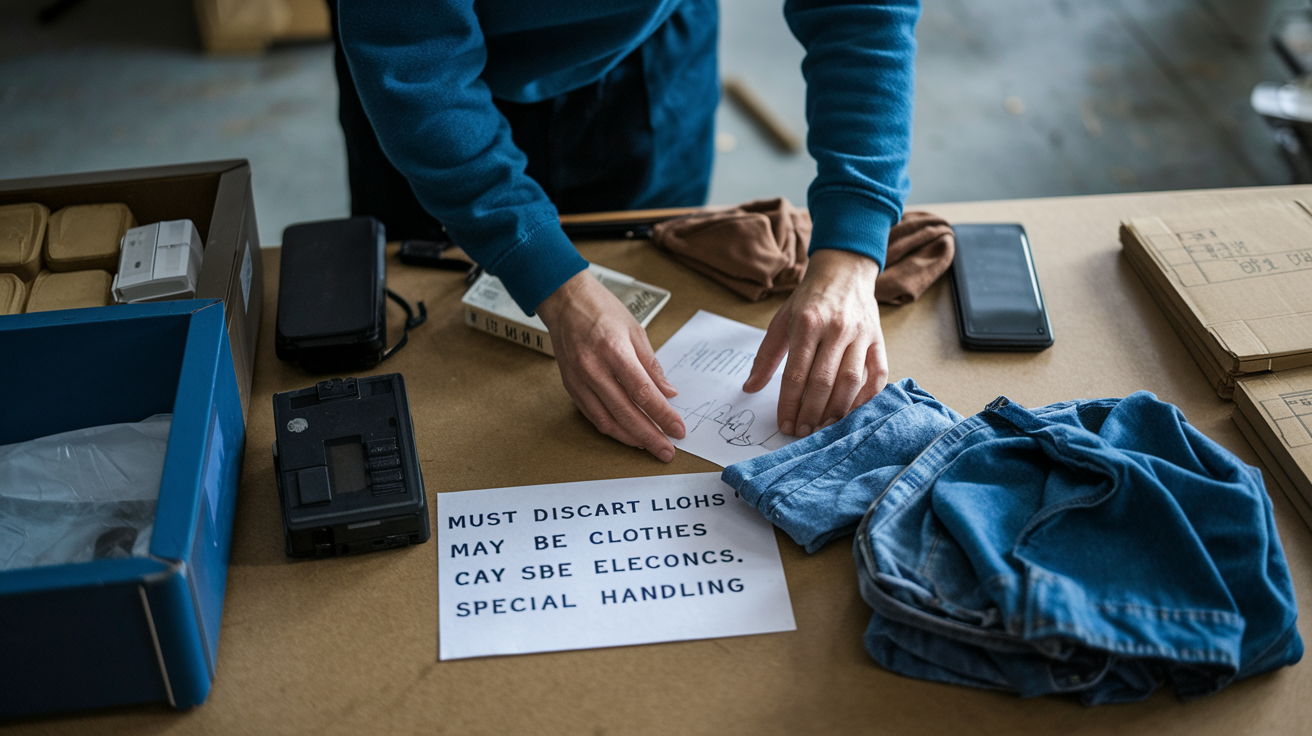
You can’t save everything. The faster you decide what stays and what goes, the less mold and rot you’ll deal with later.
Contamination level matters. Clean rainwater or pipe water is category one. Washing machine overflow or shower drain backup is category two. Sewage, river flooding, or storm surge is category three. If category three water touched it and it’s porous, it goes in the trash. No exceptions. Porous means the material soaks up water like carpet padding, upholstered furniture, mattresses, particle board, or drywall. Even if it looks okay after drying, the contamination is inside where you can’t see or clean it.
| Item Category | Must Discard | May Be Salvageable | Special Handling |
|---|---|---|---|
| Flooring Materials | All carpet and padding. Carpet wet longer than 2 days. Any flooring exposed to category 3 water. | Carpet dried within 1 to 2 days in category 1 water. Tile if subfloor dries properly. Some hardwood if not warped. | Pull up carpet immediately. Inspect subfloor for swelling or rot before reinstalling any finished floor. |
| Furniture | All mattresses and box springs. Upholstered couches, chairs, cushions. Particle board or laminate furniture. | Solid wood, metal, and hard plastic furniture after cleaning and disinfecting. | Remove drawers and doors to allow airflow. Wipe down all surfaces with disinfectant. Dry completely before using. |
| Food Items | All food except commercially sealed cans. Anything in cardboard, paper, or plastic containers. | Undamaged cans with intact seals. Must be cleaned, sanitized, and relabeled with expiration dates. | Wash cans in soapy water, rinse, soak in diluted bleach solution, air dry, and mark contents with permanent marker. |
| Documents and Photos | Anything showing mold growth or severe deterioration. | Most paper items if handled within hours of flood. Important documents and photos can be frozen for later restoration. | Place wet documents and photos in zip top plastic bags and freeze in a frost free freezer. Call a professional restorer when ready. |
| Building Materials | Wet insulation, cardboard boxes, moldy ceiling tiles, air filters. Drywall that stayed wet more than 48 hours. | Studs and framing lumber if dried and treated. Solid wood trim if not rotted. | Remove drywall at least 12 inches above water line. Treat exposed studs with fungicide. Allow wall cavities to dry fully. |
| Electronics | Anything submerged or soaked. Most small appliances. | Items only splashed if dried immediately and professionally tested before plugging in. | Don’t attempt to power on electronics until a professional inspects them. Water and electricity create fire and shock risks. |
If you’ve got important documents, family photos, or irreplaceable paper items that got wet, act fast. Rinse off any mud gently under cool water, blot them with clean towels, and slide them into zip top plastic bags. Put the sealed bags in a frost free freezer. Freezing stops mold growth and buys you time to arrange professional document restoration later when the immediate crisis has calmed down. If items are extremely valuable, like legal papers, heirlooms, or rare photos, call a professional restoration company right away because DIY methods might cause more harm.
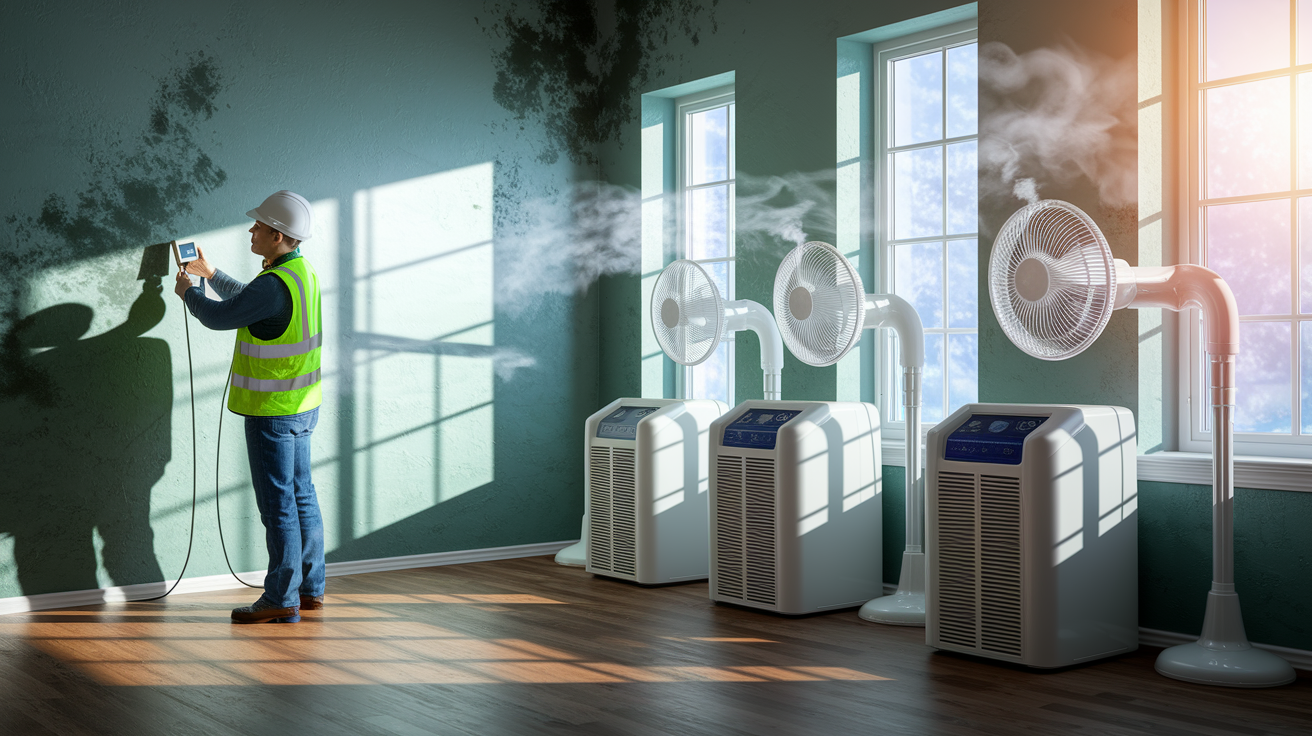
Drying Out Your House After Water Damage

Even after you remove standing water, your house is soaked. Walls, floors, framing, and insulation hold moisture for weeks if you don’t actively dry them out. If you skip this step or rush it, mold takes over and materials rot from the inside.
Turn on a dehumidifier as soon as the standing water is gone. Place it in the most affected room and let it run continuously. If you’ve got a large area or multiple flooded rooms, rent additional commercial grade dehumidifiers. Empty the collection tanks regularly or set them to drain into a sink or sump pump if that option exists. Dehumidifiers pull moisture out of the air, which draws moisture out of walls and floors. The process is slow but essential.
Open every window and door in your house to create cross ventilation. Even in humid weather, airflow helps. Set up fans in doorways and windows to push damp air outside and pull fresh air in. Point fans at wet walls, floors, and any exposed framing. Keep the air moving 24 hours a day. If you’ve got ceiling fans, run those too. Air circulation speeds evaporation and prevents stagnant pockets where mold grows.
Drying takes weeks, not days. Wooden subfloors swell when they stay wet and may take three to four weeks to release all their moisture. Drywall and insulation hold water longer than you expect. Don’t start any repairs, painting, or reinstallation until everything is completely dry. Installing new flooring over a damp subfloor traps moisture underneath and guarantees mold and rot within months.
Monitor the drying process with these checks:
Use a moisture meter to test studs, subfloors, and drywall for moisture content below 15 percent. Run your hand along walls and floors to feel for cool or damp spots that indicate trapped moisture. Look for condensation on windows or walls early in the morning when temps drop. Check dehumidifier output daily and note when collection rate drops significantly. Inspect subfloors and framing for color changes or soft spots that signal ongoing water retention.
Removing Drywall and Insulation After Flooding
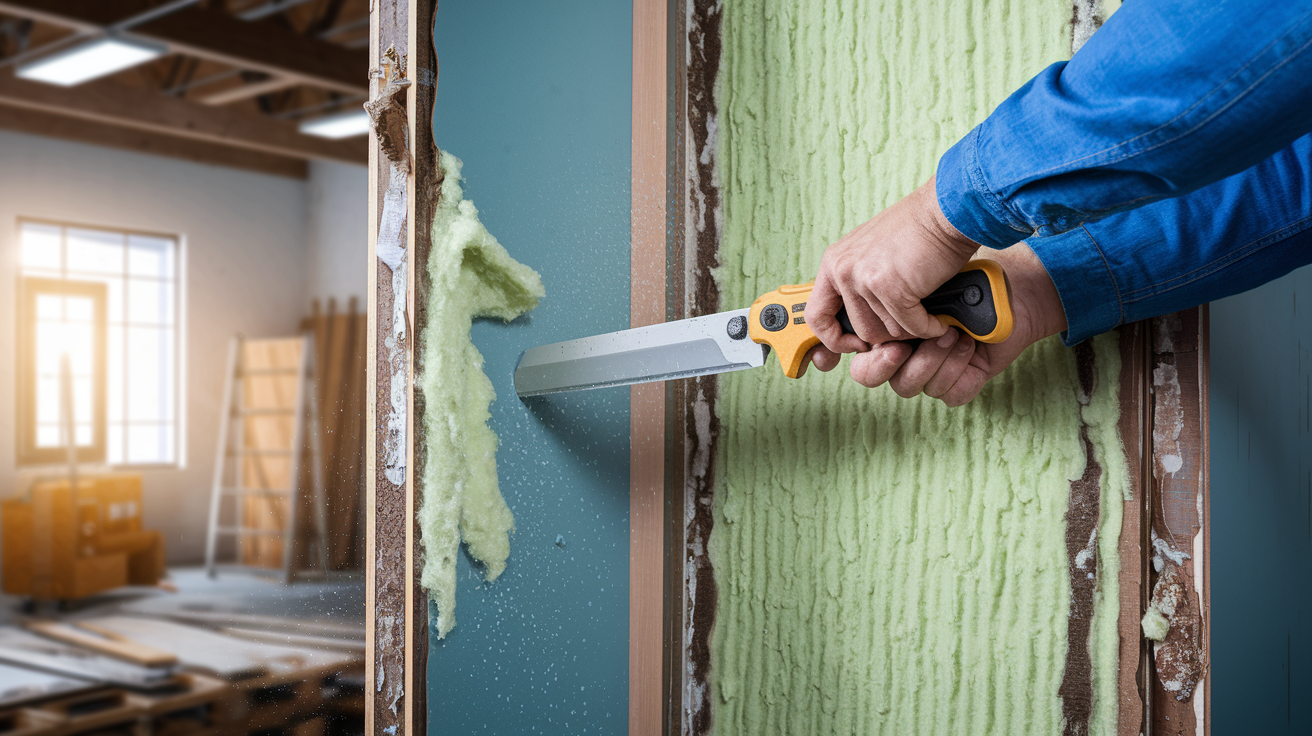
Drywall soaks up water like a sponge and holds it inside the wall cavity where you can’t see it. If you leave wet drywall in place, it grows mold and rots the wooden studs behind it. You’ve got to cut it out.
Cutting Drywall Above Water Lines
Mark the highest point where floodwater touched your walls. Measure 12 inches above that line. Use a utility knife to score the drywall horizontally along that line, then cut through it with a drywall saw. Pull the damaged section off in large pieces and bag it for disposal. Cutting 12 inches above the water line removes all the soaked drywall and gives you a margin to catch any wicking that pulled moisture higher. This cut also exposes the wall cavity so air can reach the studs and any remaining insulation.
At the ceiling level, cut out a horizontal strip of drywall about six inches wide. This opening runs along the top of the wall and allows airflow up into the wall cavity from below. It speeds drying and helps you spot hidden moisture or mold growth behind the walls. Leave these openings uncovered until everything is completely dry.
Removing Contaminated Insulation
Any insulation that got wet has to come out. Fiberglass, cellulose, and foam insulation lose their insulating properties when soaked and become breeding grounds for mold. Reach into the wall cavity and pull out all the wet insulation. Bag it up and dispose of it with the rest of your flood debris. If insulation looks dry but you know water reached that wall, pull it anyway because moisture hides inside the material. You’ll reinstall fresh insulation later, after the wall cavity dries and passes inspection.
Once the drywall and insulation are out, inspect the exposed wall studs for damage, staining, or soft spots. Clean the studs with a stiff brush and soapy water to remove any mud or residue. After they dry, spray them with a fungicide or mold prevention treatment. This step stops mold from growing on the framing while the house finishes drying. Allow the wall cavities to stay open and ventilated for at least two to three weeks before you even think about closing them back up with new drywall.
Disinfecting and Sanitizing Flood Affected Surfaces
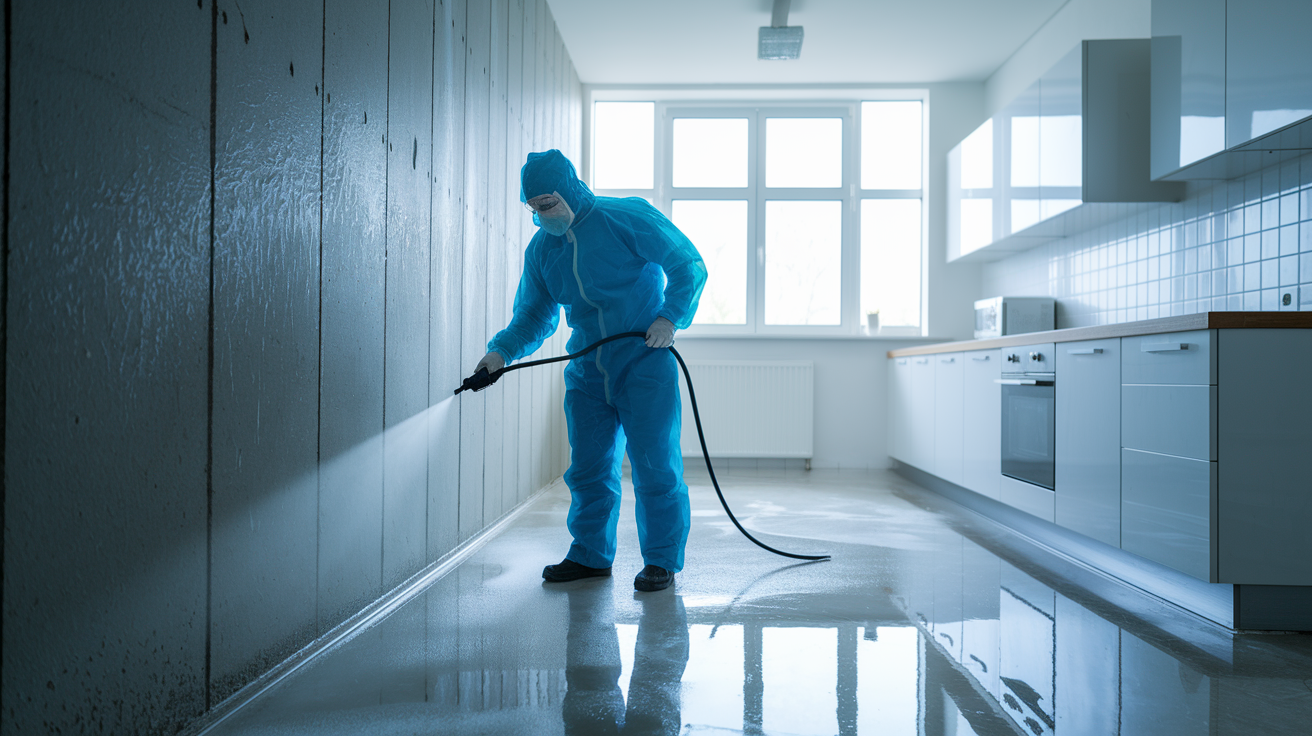
Floodwater carries bacteria, chemicals, sewage, and pathogens that stay behind even after the water dries. You’ve got to disinfect every surface the water touched or you risk serious illness.
Category one water from clean sources needs basic cleaning and disinfection. Category two gray water needs stronger disinfection. Category three black water requires aggressive sanitization with bleach or commercial disinfectants rated for sewage contamination. Know what kind of water flooded your home before you choose your cleaning method.
Different surfaces need specific cleaning protocols:
Concrete floors and foundation walls get scrubbed with hot soapy water, rinsed, then mopped or sprayed with a bleach solution of 1 cup bleach per gallon of water and left to air dry. Exposed wall studs get wiped down with soapy water, allowed to dry, then sprayed with fungicide or mold inhibitor to prevent growth during the drying period. Salvaged hard furniture made of wood, metal, or plastic gets washed on all surfaces with soapy water, rinsed, then wiped down with diluted bleach solution and dried completely before bringing it back inside. Kitchen surfaces including counters, cabinets, and appliances get cleaned with hot soapy water first, then sanitized with a stronger bleach solution or a commercial kitchen disinfectant rated for flood cleanup. Bathroom fixtures like tubs, sinks, and toilets get scrubbed with bathroom cleaner, rinsed, then disinfected with straight bleach or a disinfectant designed for sewage exposure. Exterior walls get pressure washed to remove mud and debris, then sprayed or brushed with a diluted bleach solution if the walls contacted contaminated water.
Mix your bleach solution carefully. For general disinfection, use 1 cup of household bleach per gallon of cool water. For heavily contaminated surfaces or category three black water exposure, increase it to 1.5 cups per gallon. Never mix bleach with ammonia, vinegar, or other cleaning chemicals because the fumes can injure or kill you. Work in a well ventilated area. Open windows and doors and keep fans running to move air while you disinfect. Wear waterproof gloves, eye protection, and an N95 mask because bleach fumes irritate your lungs and skin.
Preventing Mold Growth During House Cleanup
Mold starts growing within 24 to 48 hours of water exposure. Once it takes hold, it spreads fast and damages your health and your home. Stopping it before it starts is a lot easier than removing it later.
Speed is your main defense. The faster you remove water, pull out wet materials, and start drying everything, the less chance mold has to grow. Every hour you delay gives spores more time to settle in. Focus on the priority tasks in order. Get the water out, pull the wet carpet and drywall, set up dehumidifiers and fans, and keep air moving constantly.
Even when you move fast, hidden moisture can linger inside wall cavities, under flooring, or in ceiling spaces. Use a moisture meter to check studs, subfloors, and any materials you plan to keep. Readings above 15 percent mean the material is still too wet and mold can grow. Keep drying until the numbers drop. If you don’t own a moisture meter, rent one from a hardware store or hire a professional to test before you close up walls or install new flooring.
Watch for early signs of mold in the days and weeks after the flood. Check corners, baseboards, ceiling edges, and any area that stayed damp longer than the rest. Mold often appears as black, green, or white fuzzy spots or stains. It smells musty and earthy. If you catch it early while it’s still a small patch, you can treat it yourself with mold remover spray or a bleach solution. Scrub the area, disinfect it, and improve airflow and drying in that spot.
If mold covers more than 10 square feet, grows inside HVAC ducts, or keeps coming back after you clean it, call a professional mold remediation company. Large scale mold requires containment, special equipment, and protective measures that go beyond DIY capability. Breathing mold spores causes respiratory problems, allergic reactions, and long term health issues. Don’t take chances with your lungs or your family’s safety.
When to Call Professional Restoration Companies
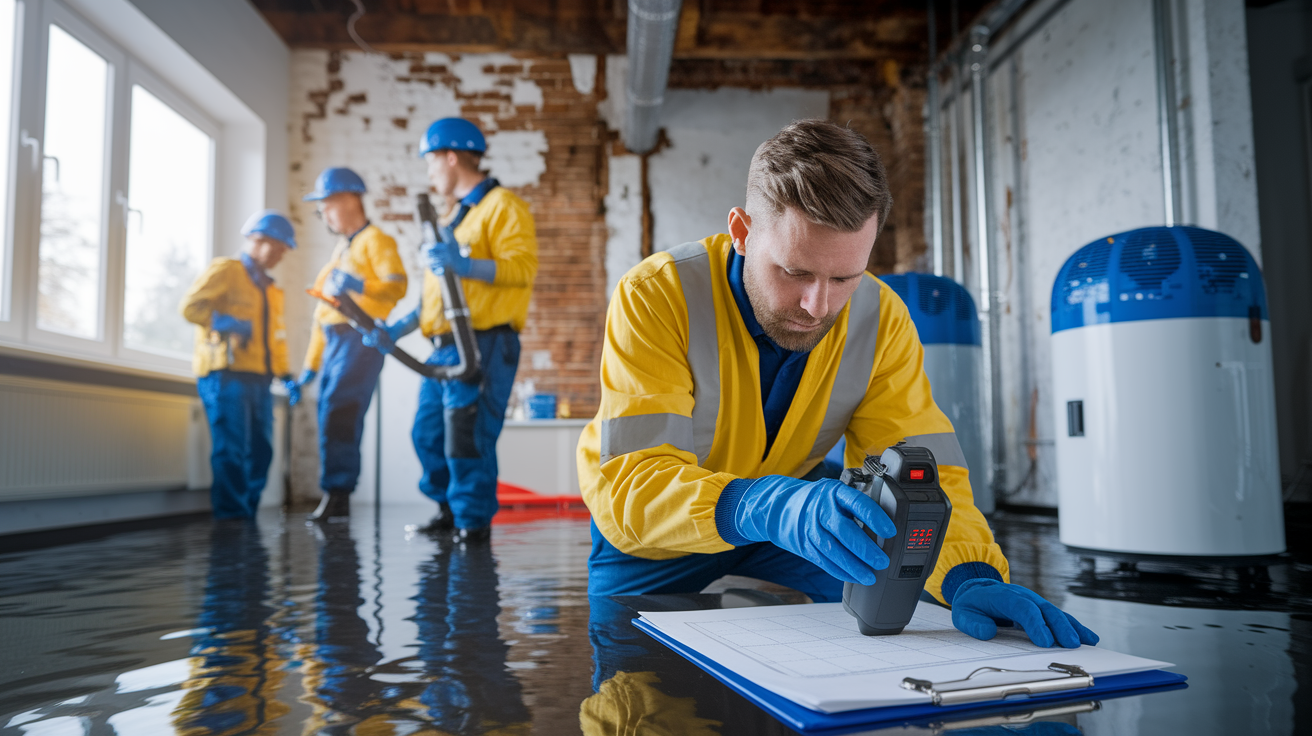
Some flood damage is manageable on your own. Some is not. Knowing when to call for help can save you time, money, and health problems down the road.
You should contact a professional restoration company if you’re dealing with any of these situations:
Category 3 black water contamination from sewage backups, river flooding, or storm surge because the health risks require specialized equipment and training. Structural foundation concerns like cracks, shifting, or instability that need an engineer’s assessment before you proceed with any cleanup. Electrical system damage including submerged breaker panels, soaked wiring, or appliances that were underwater and need professional testing before power restoration. HVAC and ductwork contamination where floodwater entered your heating and cooling system and spread mold spores or bacteria throughout your home. Extensive mold growth covering large areas, inside walls, or recurring despite your cleaning efforts. Valuable document restoration for legal papers, heirlooms, or irreplaceable photos that need freeze drying or specialized recovery methods. Flooded basement structural risks when you’ve got deep water and concerns about foundation integrity during water removal. Hidden moisture detection in wall cavities, under flooring, or in ceiling spaces that you can’t access or verify on your own.
Professionals bring equipment you can’t rent or buy, like thermal imaging cameras that see moisture behind walls, industrial strength dehumidifiers that pull gallons of water per hour, and commercial grade air scrubbers with HEPA filtration that remove mold spores from the air. They also carry certifications in water damage restoration, mold remediation, and structural drying. Their training and experience help them spot problems you might miss and handle dangers safely. If your insurance covers professional restoration, the cost is often worth the peace of mind and the faster, more thorough results.
Cleaning Specific Flooring Types After Flood Damage
Different flooring materials respond to water in different ways. What works for tile doesn’t work for carpet. What saves hardwood might not save laminate. Match your approach to the material.
Carpet and Padding Removal Timeline
Carpet can sometimes be saved if it dries completely within 24 to 48 hours and the water was clean. If flooding lasted longer or the carpet stayed wet for more than two days, it has to come out. Padding underneath always has to go because it stays wet longer than the carpet and grows mold inside where you can’t clean it. Even if the carpet looks fine after drying, contaminated padding ruins it.
Pull up carpet in sections. Cut it with a utility knife, roll it up, and haul it outside. Rip out all the padding and toss it. Inspect the subfloor underneath. If it’s damp, set up fans and dehumidifiers directly on the bare subfloor and let it dry for at least two weeks. If you’re dealing with sewage contamination or category three water, don’t try to save carpet at all. Toss everything and start fresh after the subfloor dries and gets disinfected.
Hardwood and Subfloor Assessment
Hardwood floors swell when they get soaked. Boards cup, warp, or separate at the seams. Sometimes they return to normal after drying. Sometimes they don’t. Pull up any area rugs or furniture and inspect the wood closely. If boards are only slightly swollen and the water wasn’t deep, dry them slowly with fans and dehumidifiers. Fast drying can cause cracking.
If the wood stayed underwater for days or shows severe warping, you’ll probably need to replace sections. Check the subfloor by lifting a few boards in the worst areas. If the subfloor is soft, spongy, or shows dark staining, it has rotted and needs replacement before you reinstall finished flooring. Even if the hardwood looks salvageable on top, a damaged subfloor will cause problems later.
Tile and Vinyl Flooring Evaluation
Tile holds up better than most flooring if the water didn’t get underneath. If your tile stayed intact and the subfloor beneath it dried properly, you can usually keep it. Clean and disinfect the tile surface and grout lines thoroughly. Check for loose tiles or cracked grout that might let moisture underneath.
Vinyl flooring depends on the subfloor. If water got under the vinyl and soaked the subfloor, you’ve got to pull the vinyl up, dry and inspect the subfloor, then decide if you can reinstall the same vinyl or need new material. Peel and stick vinyl tiles are easier to remove and replace than sheet vinyl. If the subfloor dried completely and shows no damage, you can reinstall or replace the vinyl once everything passes a moisture test.
Final Inspection and Reconstruction Phase of Flood Cleanup
You can’t move back in or start repairs until professionals clear your home’s critical systems. Even if everything looks dry and clean, hidden dangers can still hurt you.
Schedule inspections for your water, gas, electrical, and sewer lines before you turn anything back on or use any appliances. A licensed plumber should check for pipe damage, leaks, or contamination in your water supply. A gas technician needs to inspect gas lines for leaks or corrosion. An electrician must test your electrical panel, outlets, and wiring for shorts, damage, or fire risks. If your sewer backed up or you’ve got a septic system, get that inspected too before flushing toilets or running drains.
Once utilities are cleared, focus on rebuilding in the right order. Replace subfloors before you install finished flooring. Install new drywall only after wall cavities have dried completely and studs pass moisture tests. Replace insulation before closing up walls. Repaint only after surfaces are clean, dry, and primed. Skipping steps or rushing the sequence leads to trapped moisture, hidden mold, and repairs that fail within months.
The timeline from flood to full restoration varies based on damage severity, but expect at least four to eight weeks for a moderate flood. Severe flooding can take three to six months. Insurance processing, contractor availability, and permit approvals all add time. Be patient. Rebuilding too fast creates bigger problems than waiting for things to dry properly.
Before you move furniture back in or sleep in the house again, confirm these final safety items:
All utility systems have been professionally inspected and cleared for safe operation. Moisture meter readings throughout the house show levels consistently below 15 percent. Air quality testing confirms no elevated mold spore counts or harmful contaminants in the air. Structural integrity has been verified by an engineer or inspector if there was any foundation or framing concern. All appliances that were flooded have been tested by a technician and certified safe to use or replaced.
Final Words
You’ve got the roadmap now. Start with safety checks and documentation, then tackle standing water. Move through debris, sort your belongings, and keep everything dry with fans and dehumidifiers running.
Rip out wet drywall, disinfect hard surfaces, and watch for mold like a hawk.
Knowing what order to clean house after flood makes the chaos manageable. You’ll move faster, waste less effort, and protect your family from hidden hazards along the way.
Call professionals when you hit structural damage, black water, or anything beyond your skill level. You don’t have to do this perfectly. You just have to keep moving forward, one safe step at a time.
FAQ
How do you clean your house after flooding?
You clean your house after flooding by first ensuring safety, removing standing water, clearing debris, discarding contaminated items, drying completely with dehumidifiers and fans, removing damaged drywall and insulation, then disinfecting all surfaces with proper cleaning solutions before any reconstruction begins.
How long does it take to dry out a house after a flood?
Drying out a house after a flood takes several weeks when using dehumidifiers and fans running continuously. Complete drying depends on water depth, materials affected, ventilation, and humidity levels. Never start repairs until moisture meter readings confirm all structural materials are completely dry.
Can you wash clothes after a flood?
You can wash clothes after a flood only if they contacted clean water and are laundered immediately with hot water and detergent. Discard all clothing exposed to contaminated floodwater, sewage, or black water. Items sitting wet for more than two days typically cannot be salvaged safely.
What is the best disinfectant after a flood?
The best disinfectant after a flood is diluted bleach solution (one cup bleach per gallon of water) for hard surfaces, concrete, and wall studs. Use fungicide spray on exposed wood framing. Always wear protective equipment, ventilate well, and never mix bleach with other chemicals during cleanup.
When should you enter your house after flooding?
You should enter your house after flooding only when local authorities issue an all-clear and you turn off gas and electricity at the main shutoff. Use battery-powered lighting only. Wait for professional inspection if you see structural damage, smell gas, or suspect contaminated water.
What protective equipment do you need for flood cleanup?
You need protective equipment for flood cleanup including rubber boots, waterproof gloves, N95 respirators or masks, eye protection, waterproof clothing, and battery-powered lighting. Never enter flooded areas without proper protection against contaminated water, electrical hazards, and airborne contaminants.
How do you remove standing water from a flooded basement?
You remove standing water from a flooded basement gradually at a rate of two feet per day using submersible pumps, wet vacuums, or hand bilge pumps. Pumping too fast causes foundation collapse from water-saturated soil pressure. Mark water levels daily and never exceed this safe removal rate.
What items must you throw away after flooding?
You must throw away all carpet and padding, mattresses, upholstered furniture, wet insulation, food except sealed cans, cardboard, air filters, and anything contacting sewage after flooding. Porous materials wet for more than two days or exposed to contaminated water cannot be safely salvaged.
How high should you cut drywall after flooding?
You should cut drywall at least 12 inches above the visible water line after flooding to prevent mold growth in wall cavities. Also cut a six-inch section at ceiling level to encourage airflow inside walls. Clean and spray exposed wall studs with fungicide before drying completely.
When do you need professional flood restoration help?
You need professional flood restoration help for black water contamination, structural foundation damage, electrical system problems, extensive mold growth, HVAC contamination, valuable document restoration, and hidden moisture detection. Professionals have thermal imaging, industrial dehumidifiers, and specialized expertise for severe damage.