
You don’t need fancy boots to survive a flood evacuation. You just need the right ones. Most people grab whatever’s by the door when evacuation orders come, which is why emergency rooms treat hundreds of foot injuries after every major flood. The shoes you pack before disaster hits determine whether you walk out safely or become another rescue call. This guide covers the three types of footwear that handle contaminated water, sharp debris, and long-distance walking when your car won’t start and the roads are impassable.
Best Evacuation Footwear for Flooding Emergencies
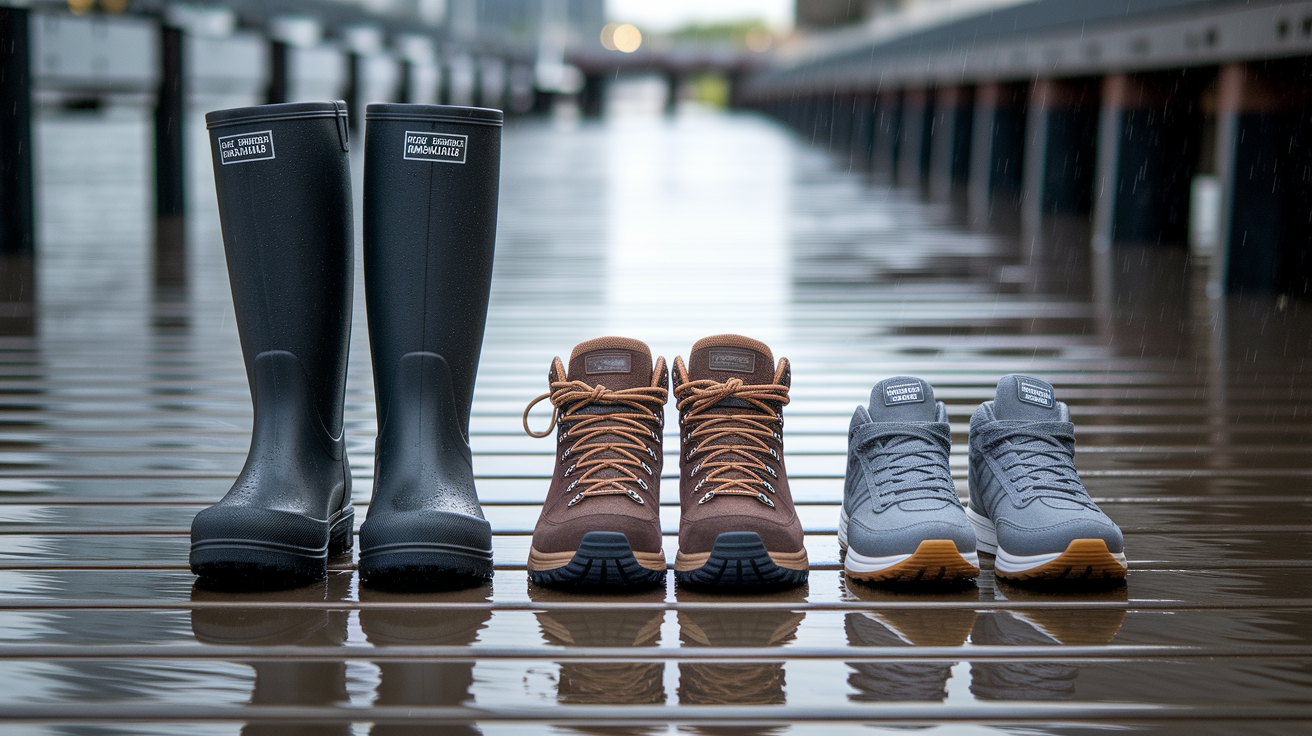
When seconds count during a flood evacuation, your shoes can make the difference between getting out safely and becoming a rescue statistic. You need three types: knee-high waterproof rubber boots for wading through contaminated standing water, closed-toe water-resistant hiking boots for long-distance walking on debris-covered evacuation routes, and backup sturdy sneakers with aggressive tread in case your primary footwear fails or becomes uncomfortable during extended displacement.
Each type handles different evacuation challenges. Rubber boots let you wade through sewage-contaminated floodwater without exposing your feet to chemicals, bacteria, or hidden sharp objects beneath the murky surface. Hiking boots provide the ankle support and cushioning you need when you’re walking miles on roads covered with broken glass, tree branches, and gravel. Backup sneakers become critical if your boots develop leaks, cause blisters during hour three of walking, or simply become too heavy and hot after wearing them all day in a crowded evacuation shelter.
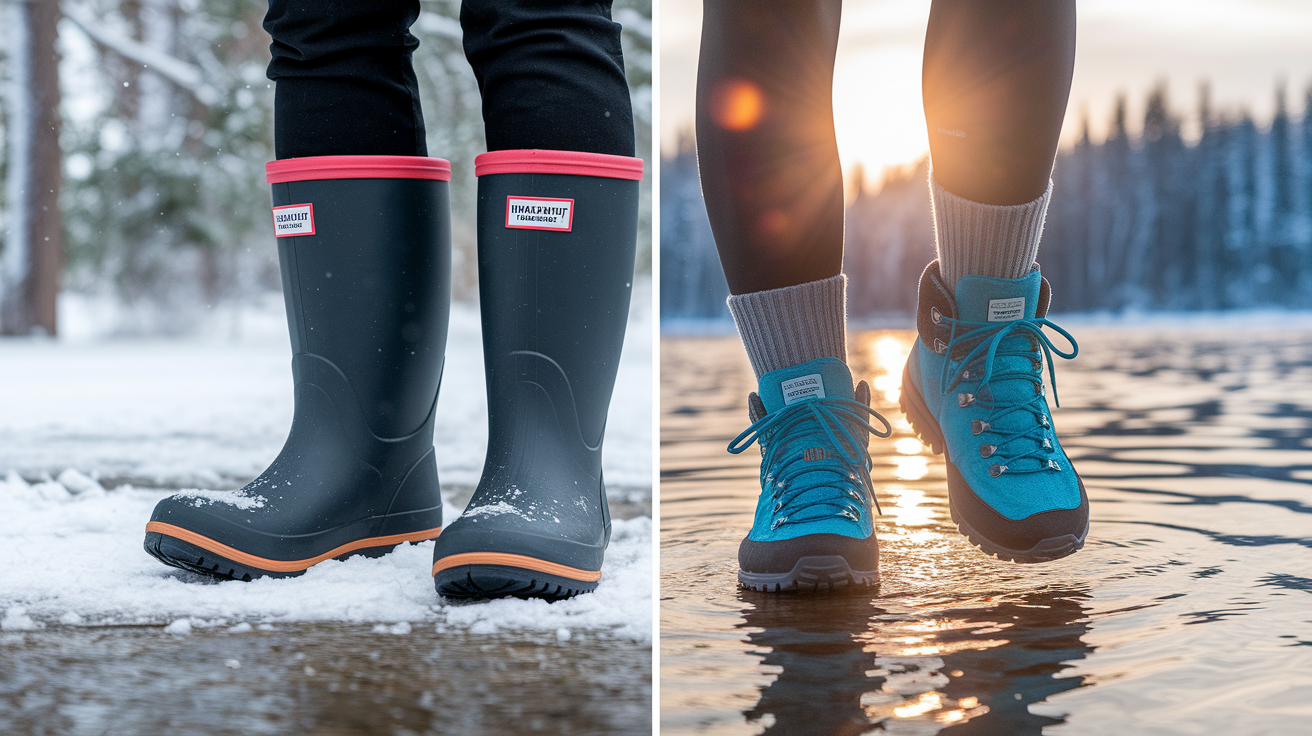
Knee-High Rubber Boots for Deep Water
Wellington boots or muck boots that reach your knees are your first line of defense when floodwater rises above ankle level. The seamless rubber construction keeps out contaminated water that contains sewage, fuel, pesticides, and industrial chemicals that leak from flooded homes and businesses. Because floodwater hides what’s beneath it, you need boots that protect your calves from submerged debris while giving you the confidence to move quickly through water that might be knee-deep in one step and ankle-deep two feet later.
The chemical resistance of solid rubber means you can rinse these boots with bleach solution after walking through floodwater without damaging the material. That matters because contaminated water causes infections through even small cuts on your feet. Full coverage up to your knees also prevents water from pouring in over the top when you step into deeper sections or when small waves from passing rescue vehicles wash over lower-cut boots.
Look for boots with thick soles that won’t flex when you step on a nail or glass shard hidden in the mud. The extra height lets you tuck your pants inside to create a seal that keeps water out and prevents fabric from wicking moisture up your legs during extended periods of wading.
Steel-Toe or Composite-Toe Safety Boots
ASTM-certified work boots with reinforced toe caps handle the dangers that come after the initial flood evacuation, when you’re navigating environments filled with building debris, fallen trees, and shifting wreckage. The steel or composite toe protects your feet when you accidentally kick submerged concrete blocks, step on floating lumber that suddenly tips and drops heavy objects, or when debris shifts unexpectedly in moving water.
Puncture-resistant soles rated to ASTM standards stop nails, metal shards, and sharp sticks from penetrating through the bottom when you’re walking across areas where buildings have collapsed or fences have washed away. This protection matters during both the evacuation itself and the cleanup work that follows, when you’re sorting through damage to retrieve important items or making your property safe.
Safety boots are built to survive the beating that comes from prolonged exposure to water, mud, chemicals, and rough surfaces. While regular boots might separate at the seams or develop cracks after a few days of flood conditions, quality work boots are built to handle months of jobsite abuse and will outlast cheaper alternatives when you need them most.
Water-Resistant Hiking Boots
Lightweight hiking boots with waterproof membranes like Gore-Tex serve as your secondary option when you’re covering serious distance on foot during evacuation. They breathe better than solid rubber boots, which matters when you’re walking five miles to reach an evacuation pickup point on a hot day. Your feet stay drier from sweat, reducing blister formation and preventing the pruning effect that happens when skin stays wet for hours.
The ankle support built into hiking boots prevents rolling injuries when you’re navigating uneven terrain covered with storm debris. Roads buckle during floods, creating unexpected dips and raised sections. Sidewalks crack and shift. Hiking boots stabilize your ankle through these hazards better than low-cut shoes or floppy rubber boots that provide no structural support.
Quality hiking boots also dry faster than rubber boots if they do get wet inside. The combination of moisture-wicking liners and ventilated construction means boots that get soaked in the morning might be wearable again by evening, whereas solid rubber boots trap water inside and take days to dry fully.
Critical Features All Evacuation Footwear Must Have
Waterproof or water-resistant materials keep feet dry during extended exposure to wet conditions and prevent contaminated water from soaking through to your skin. Non-slip soles with deep tread patterns grip wet pavement, mud-covered surfaces, and slippery debris without losing traction when you need to move quickly. Closed-toe design shields your toes from submerged sharp objects, heavy falling items, and impacts from debris you can’t see in murky water.
Ankle support prevents twisting injuries when navigating uneven ground, climbing over obstacles, or walking long distances on buckled roads and cracked pavement. Quick-drying construction with materials that shed water rapidly means boots don’t stay waterlogged for days, allowing them to recover if water does get inside.
Pack at least two pairs to ensure you’re never without functional footwear during extended evacuation that might last days or weeks. If space is extremely limited, prioritize knee-high rubber boots for immediate flood protection through contaminated standing water. But add hiking boots if your bag has room, because the comfort difference during extended evacuation periods is significant. Your feet will thank you when you’re standing in line for six hours at an emergency shelter or walking two miles from the evacuation pickup point to the actual shelter location.
Dangerous Footwear Mistakes That Increase Flood Risk
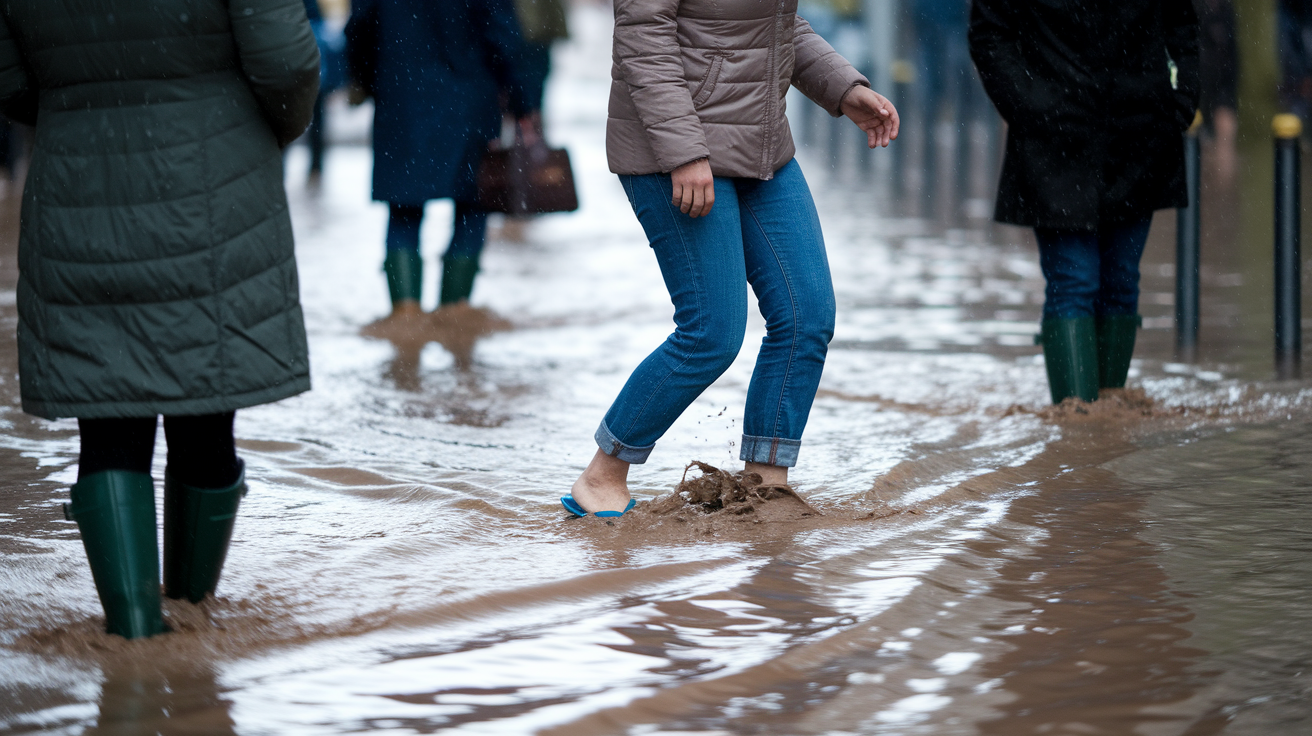
Never pack flip-flops, sandals, Crocs, clogs, canvas sneakers, fashion boots with smooth soles, or any open-toe or mesh-construction shoes in your evacuation kit. Flip-flops and sandals slip off your feet within seconds when you’re walking through moving water or thick mud, leaving you barefoot in contaminated floodwater filled with sharp debris, broken glass, and metal fragments. Crocs and clogs provide zero ankle support and float away in currents, often disappearing before you can grab them. Fashion boots with smooth leather or plastic soles turn into ice skates on wet pavement and offer no grip whatsoever on mud-covered surfaces.
Canvas sneakers and everyday athletic shoes become death traps in flood conditions. They absorb water within minutes, becoming heavy, waterlogged anchors that make every step harder. The fabric loses all structural integrity when saturated, providing zero protection against sharp objects beneath the surface. Wet sneakers lose traction completely, turning slippery surfaces into fall hazards. They also take eight to twelve hours to dry even in good conditions, meaning once they’re soaked, you’re stuck with useless footwear that causes blisters, hypothermia, and foot injuries for the rest of your evacuation.
These inappropriate shoes create specific, documented dangers. Increased drowning risk from slipping in currents when smooth soles can’t grip surfaces and shoes that float away leave you barefoot in fast-moving water. Severe cuts from submerged debris because fabric and foam provide zero protection against glass, metal, and sharp sticks hidden beneath murky water. Infections from contaminated water entering through porous materials that absorb sewage, chemicals, and bacteria directly against your skin through cuts you didn’t know you had.
Twisted ankles from inadequate support when flexible shoes collapse sideways on uneven ground, potentially leaving you unable to walk during evacuation. Hypothermia from prolonged cold water exposure through wet fabric that conducts heat away from your body faster than bare skin would. Lost footwear floating away in moving water when lightweight shoes slip off your feet or currents simply rip them away, leaving you barefoot with miles still to walk.
Contaminated floodwater contains sewage from overwhelmed treatment plants, chemicals from flooded garages and industrial sites, fuel from submerged vehicles, and bacteria that multiply rapidly in warm standing water. When porous materials like canvas, mesh, or cloth soak up this contaminated water, it sits against your skin for hours. Every small cut, scrape, or crack in your skin becomes an infection entry point. These infections can turn serious within days, especially when evacuation shelters are overcrowded and medical care is limited.
Water shoes marketed for kayaking, swimming, or beach activities create false security. They’re designed for recreational water that’s clean, relatively shallow, and free of debris. Most water shoes have thin soles that won’t stop a nail from puncturing through. They lack the toe protection needed when you kick submerged concrete blocks. The mesh drainage design that makes them good for swimming makes them terrible for contaminated floodwater that you want to keep away from your skin, not invite inside.
Critical Safety Features and Materials for Flood Boots
Five critical safety features separate survival footwear from regular shoes: complete waterproofing, aggressive tread design, reinforced toe protection, secure ankle support, and durable construction that survives extended abuse.
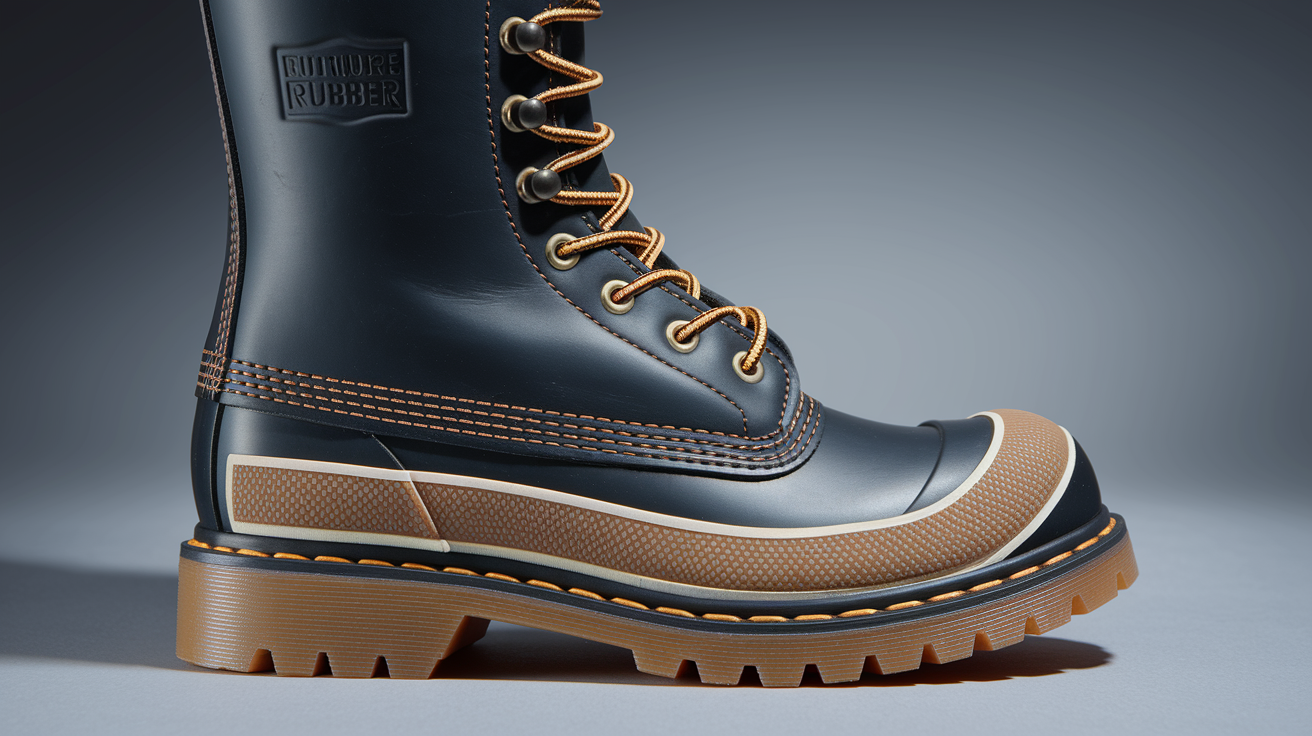
Understanding waterproofing means knowing the difference between waterproof and water-resistant. Waterproof construction uses completely sealed materials like solid rubber or welded synthetic layers that don’t let any water pass through, period. Water-resistant materials are treated with coatings that repel water temporarily but eventually soak through after prolonged exposure. When you’re wading through standing water that reaches your shins, water-resistant won’t cut it. You need true waterproof construction. Rubber boots achieve this through seamless molding. Quality hiking boots use waterproof membranes sealed inside the boot construction, creating a barrier that keeps water out while still allowing some breathability.
Sole technology determines whether you slip and fall or maintain your footing on wet pavement, mud, and debris-covered surfaces. Non-slip tread patterns feature deep grooves that channel water away from the contact surface, creating grip even when standing water covers the ground. Look for multi-directional lug patterns rather than simple parallel lines. Puncture-resistant sole construction puts a layer of steel, composite material, or ultra-dense rubber between your foot and whatever you step on. This stops nails from penetrating through when you step on boards with exposed fasteners. It prevents glass shards from slicing through when you’re walking across areas where windows shattered. The sole should be thick enough that you can’t easily flex it with your hands.
Rubber remains the gold standard for flood footwear because it checks every box. It’s 100% waterproof with no seams where water can seep through. It resists the chemicals found in floodwater, from gasoline to sewage to household cleaners. You can spray it with bleach solution after walking through contaminated water without worrying about damaging the material. Natural rubber provides excellent slip resistance when molded with proper tread patterns. And it’s easy to inspect visually. Cracks and damage are immediately obvious, unlike fabric boots where hidden problems might not show up until water soaks through during actual use.
Alternative materials offer specific advantages. Treated leather with waterproof membranes like Gore-Tex breathes better than solid rubber, reducing sweat buildup during warm-weather evacuations or long-distance walking. But leather requires more maintenance. You need to reapply waterproofing treatments regularly, and the material can crack or separate if not properly cared for. Neoprene construction provides flexibility and insulation, making it ideal for cold-water floods where hypothermia is a concern. The same material used in wetsuits keeps your feet warm even when submerged. Synthetic polymer boots offer lightweight alternatives that reduce fatigue during extended wear. Modern polymers can be nearly as waterproof as rubber while weighing significantly less.
Never pack canvas, mesh, or cloth shoes that absorb water and take hours to dry. Even if they’re marketed as “quick-dry,” they still soak through and stay wet far longer than waterproof boots. The weight of waterlogged fabric makes walking harder, and wet cloth against your skin for hours guarantees blisters.
Construction quality shows up in the details. Vulcanized rubber construction means the sole and upper are fused together in a single piece with no glue joints where water can seep through years down the road. Reinforced stitching on leather boots should be double or triple-stitched with waterproof thread, and all seams should be sealed with waterproof tape or coating. Check that waterproof claims are backed by specific standards like “waterproof to 8 inches” rather than vague marketing language.
| Feature | Why It Matters | Examples |
|---|---|---|
| Waterproofing | Keeps contaminated floodwater away from skin, prevents infections through cuts, maintains warmth in cold conditions | Vulcanized rubber, Gore-Tex membrane, sealed neoprene |
| Traction | Prevents falls on slippery surfaces, maintains footing in mud, enables safe movement on debris-covered ground | Deep lug patterns, multi-directional tread, soft rubber compounds |
| Toe Protection | Shields feet from heavy debris, protects against impacts from submerged objects, prevents crush injuries | Steel toe caps, composite reinforcement, thick rubber toe bumpers |
| Ankle Support | Prevents twisting injuries on uneven terrain, provides stability when carrying heavy loads, reduces fatigue during long walks | High-top design, padded ankle collars, rigid heel counters |
| Quick-Dry Materials | Allows boots to recover if water gets inside, reduces risk of trench foot, maintains comfort during extended wear | Moisture-wicking liners, ventilated insoles, synthetic fabrics |
Proper fit means boots should accommodate thick moisture-wicking socks without being so loose they slip off your heel or allow your foot to slide forward and backward inside. Boots that are too tight restrict circulation, cause pressure points that turn into blisters, and become painful after an hour of wear. Boots that are too loose let your foot move around inside, creating friction that causes blisters just as fast. The heel should stay planted when you walk, lifting only minimally with each step. Your toes should have enough room to wiggle without jamming against the front when you walk downhill.
How Many Pairs of Shoes to Pack for Evacuation
Pack a minimum of two pairs: one primary waterproof option and one backup. Your evacuation bag should sustain you for at least 72 hours, and footwear failure during that window could leave you injured, unable to walk, or stranded in an unsafe location waiting for rescue.
The two-pair strategy puts waterproof rubber boots as your main option for the initial evacuation through flooded areas. These handle the worst conditions. Wading through contaminated standing water, navigating debris fields where sharp objects hide beneath the surface, and moving quickly when currents or rising water create urgent danger. Your backup should be water-resistant hiking boots or sturdy sneakers with aggressive tread. They take over if your primary boots develop leaks, cause blisters during hour three of walking, become too hot and heavy for all-day wear in summer heat, or simply fail mechanically when straps break or soles separate under stress.
For families packing multiple go-bags, each person needs at least one pair of waterproof boots. But backup pairs can be consolidated into a vehicle emergency kit rather than stuffing every individual bag. If you’re evacuating as a family unit by car, keep a tote of backup footwear in your trunk with secondary pairs in various sizes. This saves space in personal bags while still ensuring no one is stuck with single-point-of-failure footwear. If you’re evacuating on foot or by public transportation, each person needs both primary and backup pairs in their individual bag.
Children and elderly family members need properly fitted evacuation footwear that they’ve tested before emergency situations arise. Kids can’t articulate fit problems clearly during high-stress evacuations, so sizing errors that seem minor in the store become major problems when a seven-year-old has blisters after mile two and still has three miles to walk.
Sizing and Fit Considerations for Emergency Footwear
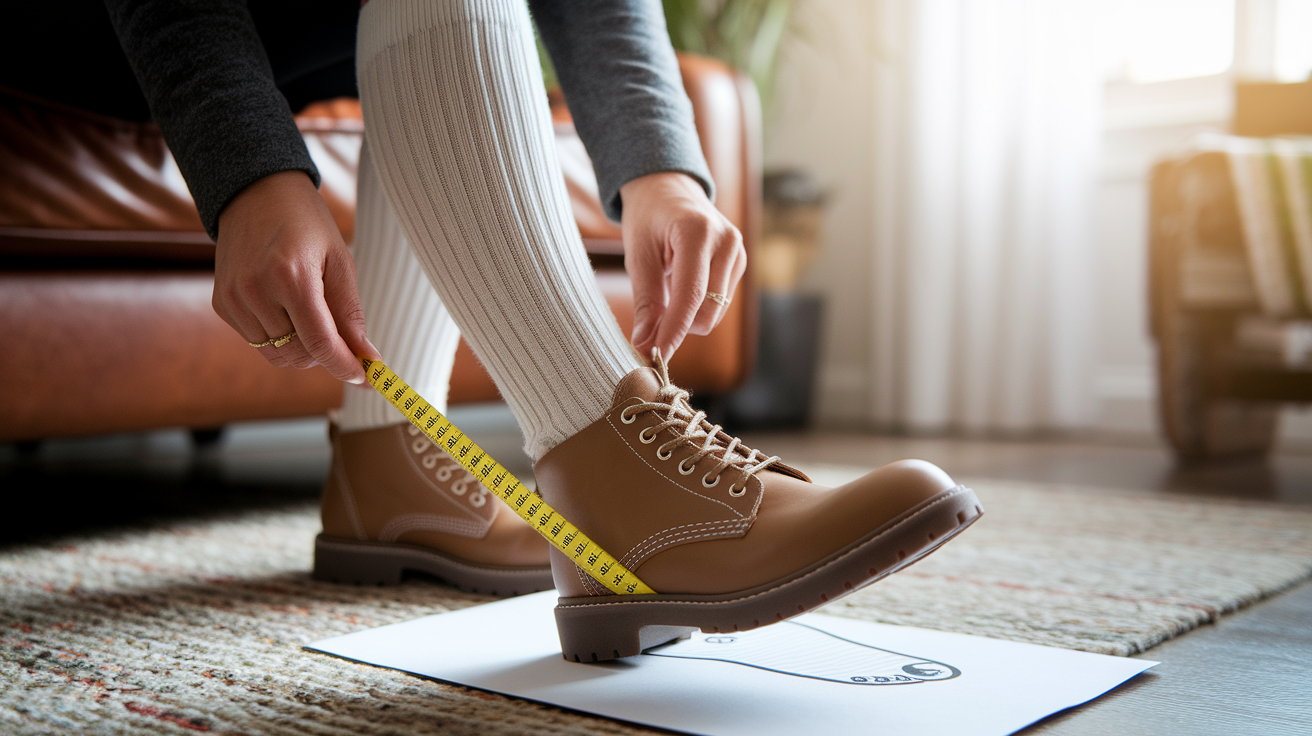
Size evacuation boots one half to full size larger than your normal shoes. This accommodates thick moisture-wicking socks that prevent blisters and wick sweat away from your skin. It allows for foot swelling that happens during long periods of standing or walking. Your feet can swell a full size after walking six or eight hours straight. And it prevents your toes from jamming forward when you’re navigating downhill terrain or stepping down from curbs and debris piles.
Test fit before packing by walking around your house for 30 minutes wearing the boots with the same weight socks you’d pack in your evacuation kit. Check for heel slippage. Your heel should lift minimally with each step, maybe a quarter inch at most. If it’s moving up and down a full inch, the boots are too big and will cause blisters on the back of your ankle. Ensure your toes have wiggle room when standing still and don’t touch the front of the boot when you’re walking downhill or going down stairs. Verify the boots stay secure without being painfully tight across the top of your foot or around your calves.
Never pack brand-new boots that haven’t been worn. The break-in period for stiff boots can take several weeks of gradually increasing wear. During this time, the materials soften, the insole conforms to your foot shape, and pressure points reveal themselves while you still have time to address them. Discovering that your boots cause painful blisters on your achilles tendon during actual flood evacuation is too late. Break in boots gradually over several weeks. Wear them for an hour the first week, two hours the second week, then for longer periods until they feel comfortable for all-day wear.
Seasonal sock considerations affect sizing. Winter evacuations may require insulated socks that are significantly thicker than summer moisture-wicking socks. If you live in a climate with cold winters, test your boots with the thickest socks you might reasonably wear. Make sure there’s still enough room. Some people pack two sizes of boots for this reason. Regular boots for warm-weather flooding and insulated boots sized up another half size for winter flood events.
Packing Your Evacuation Shoes Properly
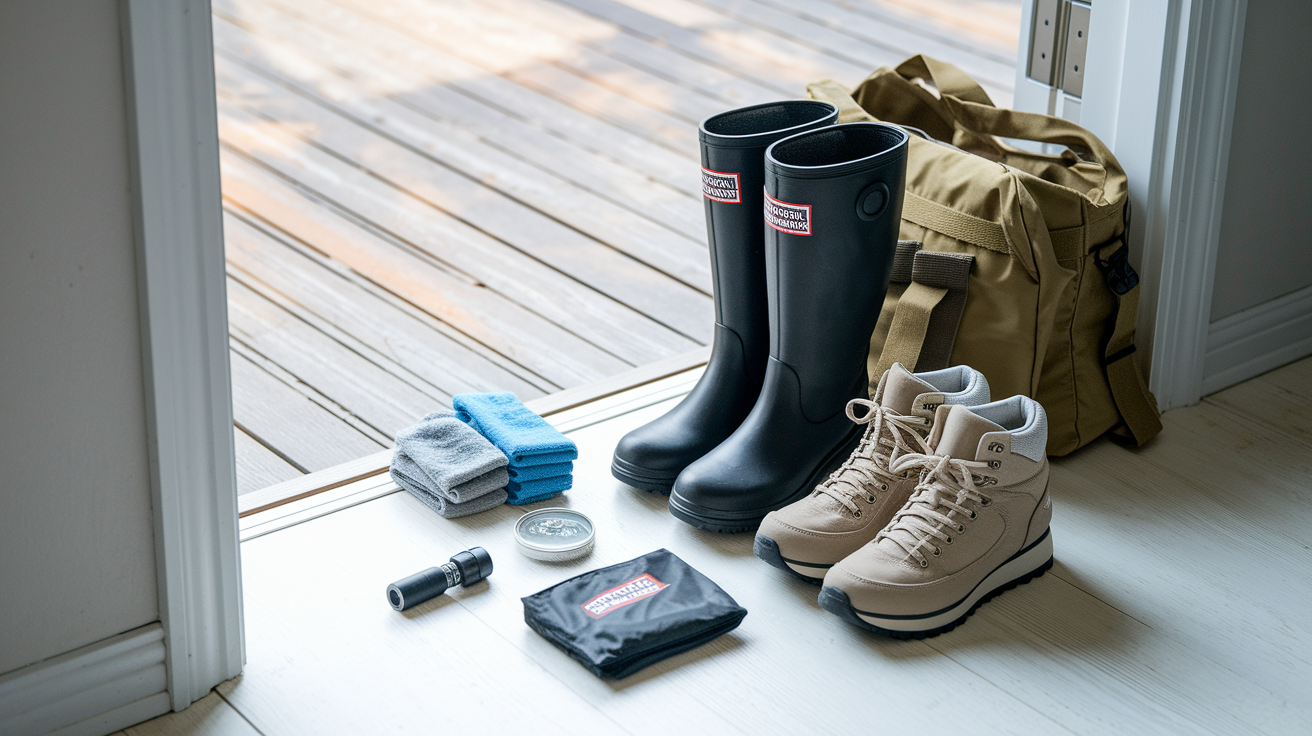
Keep your primary evacuation boots readily accessible rather than buried inside a packed go-bag where you can’t reach them quickly. Store them near your main exit. By the front door, in the garage near your car, or in the vehicle itself if you live in a flood-prone area. When floodwater is rising and you have minutes to leave, you can’t afford to spend time digging through a backpack trying to find boots while water seeps under your door.
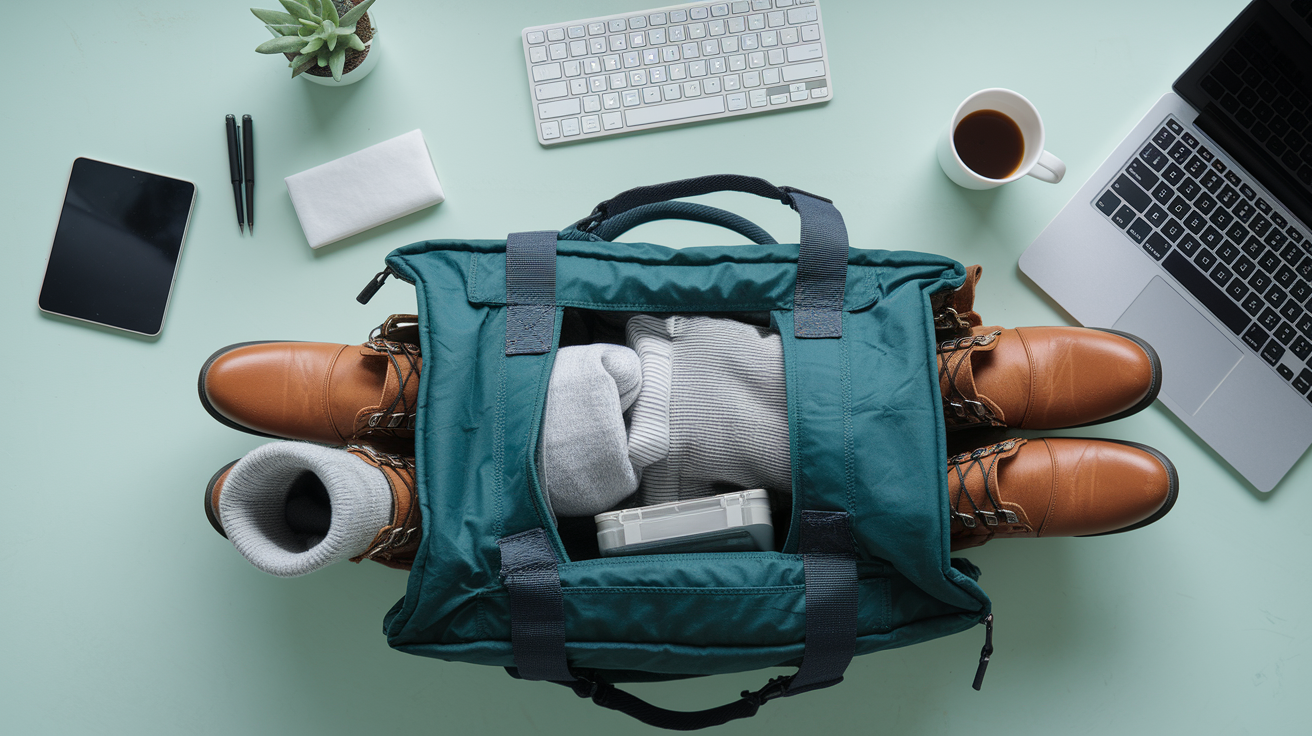
Space-saving techniques help when you’re packing multiple bulky items. Stuff moisture-wicking socks, underwear, and small rolled clothing items inside the boot shafts to use otherwise-wasted space. Attach boots to the outside of backpacks using carabiners clipped through the boot pulls or by running straps through the shafts and securing them to external attachment points. This keeps interior bag space free for items that can’t tolerate being strapped to the outside. Or keep boots in a separate waterproof stuff sack that can grab quickly when leaving. This works well for families where each person has a personal bag but footwear is stored centrally.
Make boots do double duty as storage containers by packing smaller emergency items inside them. First aid supplies in sealed plastic bags, waterproof matches, emergency cash, or backup batteries all fit inside boot shafts and stay protected while maximizing your packing efficiency. Just make sure these items are in sealed bags so they don’t get contaminated if the boots themselves have been worn.
Vehicle storage works well if you live in flood-prone areas and own a car. Keep a dedicated pair of flood boots in your trunk year-round. Add thick socks and maybe backup sneakers in a plastic bin. This ensures you have proper footwear even if you’re away from home when flooding starts, and it saves space in your home go-bag for other essentials. Check out this Emergency Evacuation Kit Essentials guide for how footwear fits into your broader evacuation planning.
Special Footwear Considerations for Family Evacuation

Children’s evacuation footwear requires different priorities than adult boots. Choose adjustable rain boots with buckles or drawstring tops that can accommodate growing feet over at least one season. Kids outgrow boots fast, and replacing evacuation gear every six months gets expensive. Bright colors like red, yellow, or orange increase visibility during rescue situations when you’re trying to keep track of kids in crowded evacuation scenes or if you get separated and rescuers are searching. Make sure boots are comfortable enough that children will actually wear them during stressful evacuations when they’re already scared and resistant to cooperation. And pack backup sizes if kids are between sizes or in a rapid growth phase.
Elderly and mobility-limited family members need footwear modifications based on their specific challenges. Slip-on waterproof boots or boots with side zippers work better than lace-up styles for those with limited flexibility, arthritis, or the inability to bend down to tie shoes. Choose lighter-weight options if arthritis or muscle weakness makes heavy rubber boots difficult to lift with each step. Composite-toe boots weigh significantly less than steel-toe versions while providing similar protection. Ensure excellent tread to prevent falls, which are the primary injury risk for seniors during evacuations. And pack backup sturdy sneakers if boots become too fatiguing during extended evacuation periods that require hours of standing or walking.
Medical considerations affect footwear choices for family members with specific conditions. Individuals with diabetes need extra toe protection because they have reduced sensation in their feet and might not notice cuts or injuries until infections develop. Diabetic foot injuries heal slowly, making prevention critical. Those with circulatory issues should avoid boots that are too tight and restrict blood flow, especially around the calves where tall boots can create constriction bands. Anyone with custom orthotics needs boots with removable insoles so they can swap in their medical devices. This might require sizing up a full size to accommodate the orthotic volume.
Test family footwear together during practice evacuations at least twice a year. Have everyone put on their evacuation boots and walk the planned evacuation route or a similar distance. Kids will tell you if boots hurt, elderly parents will reveal if boots are too heavy, and you’ll identify problems while you still have time to buy replacements or make adjustments.
Maintaining and Inspecting Your Evacuation Footwear

Check evacuation boots every six months for problems that develop during storage. Look for cracks in rubber, especially around flex points where the boot bends when you walk. Inspect seams for separation, checking leather boots carefully where stitching connects different pieces. Examine tread patterns for wear. If the grooves are shallow or smooth spots have developed, traction is compromised and replacement is needed. Test for dry rot by flexing the boot. If rubber cracks or leather develops white powdery residue, the material is degrading. And verify proper fit as family members’ feet change size, especially for growing children and elderly relatives whose feet sometimes spread or swell with age.
Proper storage conditions extend boot life significantly. Keep boots in cool, dry locations away from direct sunlight that degrades rubber compounds and causes cracking over time. Never store boots in hot attics or car trunks during summer. Heat above 120°F damages waterproof membranes and causes adhesives to fail. Stuff boots with crumpled newspaper to maintain shape and absorb moisture. Store them upright or hanging from boot clips to prevent permanent creasing that creates weak points where leaks develop.
Regular maintenance keeps boots functional. Clean boots after any use with mild soap and water to remove dirt, salt, and chemicals that degrade materials over time. Apply rubber conditioner or waterproofing spray annually to maintain water resistance and prevent material from drying out and cracking. Check and replace worn insoles for comfort because compressed insoles lose cushioning and increase fatigue during long walks. Inspect and tighten any buckles or straps to ensure they’ll hold securely during actual use and won’t fail when you need them. Test waterproofing by running water over boots before repacking them in your evacuation kit to verify seals haven’t failed.
Budget-quality rubber boots typically need replacement every 2 to 3 years even without use because rubber degrades over time from oxidation and UV exposure. High-quality boots from reputable manufacturers can last 5 to 7 years with proper maintenance and storage. Signs that replacement is needed include visible cracks, separated seams, worn-through tread, leaks when tested, or material that feels brittle and inflexible.
Seasonal and Climate Adjustments for Flood Footwear
Cold-climate flood considerations require different boot choices than warm-weather events. Insulated rubber boots or neoprene-lined options become necessary for winter flooding or cold-water events where hypothermia is a real danger. Check temperature ratings that match your regional winter lows. Boots rated to 0°F work for northern states, while 20°F ratings suffice in milder climates. Choose waterproof boots tall enough that you can tuck your pants inside to create a seal that prevents cold water from pouring in over the top when you’re wading through standing water. The seal also prevents pants from wicking water up your legs through capillary action.
Warm-climate priorities shift toward ventilation and weight reduction. Look for boots with ventilation features like perforated insoles or breathable waterproof membranes that reduce foot overheating during summer evacuations in southern states. Choose lighter-weight boot options that won’t cause heat exhaustion when you’re wearing them all day in 95°F heat and high humidity. Mesh or perforated insoles improve airflow inside the boot, reducing sweat buildup. And antimicrobial treatments prevent the odor that develops rapidly during extended wear in heat, which matters when you’re sharing close quarters in evacuation shelters.
Hurricane season timing means coastal residents should inspect and refresh evacuation footwear before peak hurricane months from June through November in Atlantic and Gulf Coast regions. Check boots in May, replace anything that’s degraded over winter, and ensure everyone’s footwear still fits before the season starts.
Rapid temperature changes during disasters make layering strategies valuable if you have storage space for both insulated and standard boots. A hurricane that hits in October might bring cold rain, while summer flooding creates heat hazards. Having both options ensures you’re prepared for whatever temperature conditions accompany the water.
Budget-Friendly Versus Investment Footwear for Evacuation Kits
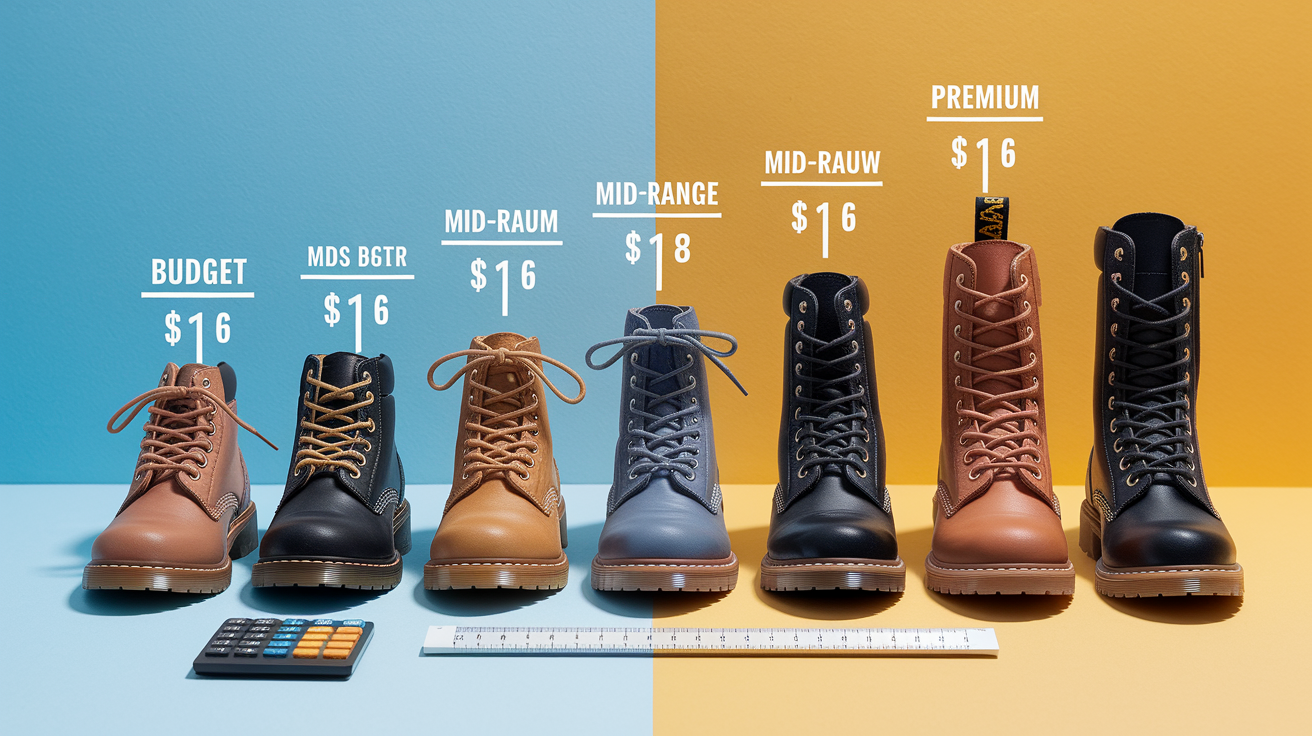
Not everyone can afford premium boots, but functional flood footwear exists at multiple price points. The goal is finding boots that meet minimum safety standards within your budget constraints.
Budget-friendly options in the $30 to $60 range include basic rubber rain boots from farm supply stores like Tractor Supply or Rural King. These lack comfort features but provide adequate waterproofing and decent tread for short-term evacuation needs. Department store waterproof work boots from brands sold at Walmart or Target offer acceptable protection without premium features. And children’s boots in this price range give adequate protection. Kids outgrow boots faster than they wear them out anyway. Focus budget dollars on proper waterproofing and decent tread rather than brand names or comfort features. A $40 pair of boots that keeps your feet dry and prevents slipping is infinitely better than $150 boots you can’t afford.
Mid-range investment in the $60 to $120 range gets you quality rubber boots with reinforced toes, improved comfort, and better durability. Name-brand waterproof hiking boots from companies like Merrell, Columbia, or Keen have proven track records and include comfort features that matter during extended wear. Cushioned insoles that reduce fatigue, moisture-wicking liners that prevent blisters, and better arch support. These boots balance cost with performance and typically last longer than budget options.
Premium options in the $120+ range include ASTM-certified safety boots with steel or composite toes that meet industrial workplace standards for impact resistance. Specialized flood rescue boots designed for emergency responders offer maximum protection and durability. And boots designed for commercial or industrial water work exceed consumer-grade protection across every metric. These make sense if you live in high-risk flood zones, have previous flood evacuation experience, or work in industries where boots do double duty for both work and emergency preparedness.
The cost-per-use perspective changes the math. Investing $100 in boots that last seven years means roughly $14 per year for footwear that could save your life. Replacing $30 boots every year because they crack, leak, or fall apart costs $210 over seven years, and you risk having boots fail during the actual emergency when you need them most.
Testing Your Evacuation Footwear Before Emergency Strikes
Incorporate footwear testing into evacuation drills conducted twice yearly. Have the entire family wear their packed boots, walk your planned evacuation routes while wearing them, carry your full go-bag to simulate real conditions, and time how long you can walk comfortably before fatigue or discomfort sets in. This reveals problems like boots that seem fine for 20 minutes but cause blisters after an hour, or boots that feel lightweight until you’ve carried a 30-pound bag for two miles.
Conduct specific performance tests that simulate flood conditions. Walk through shallow water in a kiddie pool or after heavy rain to verify waterproofing holds and no leaks develop around seams. Navigate slippery wet surfaces like wet tile, muddy grass, or wet pavement to test whether traction actually works. Climb stairs and navigate uneven ground to check if ankle support prevents wobbling or rolling. Have each family member report comfort issues or fit problems while there’s still time to exchange boots or adjust sizing.
The mental preparedness benefit matters as much as physical testing. Wearing evacuation boots during practice drills reduces panic and uncertainty during real emergencies because family members already know how the boots feel and perform. Kids who’ve practiced walking in their boots won’t resist putting them on during actual evacuation. Elderly parents know whether boots are manageable or if they need to switch to lighter alternatives.
Update your evacuation plan based on test results. If boots cause foot fatigue after two miles, identify rest points along your evacuation route. If certain footwear makes specific terrain impassable, like rubber boots that are too floppy for climbing over a fence on your evacuation path, plan alternate routes or adjust what you pack. Check out this Complete Flood Evacuation Planning Guide for incorporating footwear testing into broader preparedness practices.
Final Words
Your evacuation footwear can make the difference between safe escape and dangerous injuries when floodwater rises.
Pack knee-high rubber boots as your primary defense, add water-resistant hiking boots for backup, and test both pairs before you need them.
Avoid flip-flops, canvas sneakers, and anything with open toes—those choices put you at serious risk in contaminated water filled with hidden debris.
Check your boots twice a year, replace them before they fail, and make sure every family member has properly fitted footwear they’ve actually walked in.
Knowing what shoes to pack for flood evacuation means you’re ready to move fast when minutes matter, with your feet protected and your family safer.
FAQ
Q: What is the 3 shoe rule?
A: The 3 shoe rule means packing three types of evacuation footwear: knee-high waterproof rubber boots for wading through floodwater, water-resistant hiking boots for walking long distances on debris-covered ground, and backup sturdy sneakers with good tread in case your primary footwear fails during extended evacuation.
Q: What shoes should you pack for flood evacuation?
A: You should pack knee-high waterproof rubber boots as your primary choice, plus water-resistant hiking boots with ankle support for long-distance walking, and backup sturdy sneakers with deep tread. These three options cover wading through contaminated water, navigating debris-covered terrain, and replacing footwear that fails.
Q: Are there shoes that let you walk on water?
A: No shoes let you walk on water. Waterproof rubber boots with non-slip soles keep your feet dry and provide traction while wading through standing floodwater up to knee height, but you’re still walking through water, not on top of it. Always avoid walking through moving floodwater regardless of footwear.
Q: What are 10 items in an emergency go bag?
A: An emergency go bag should include waterproof boots, sturdy backup shoes, three days of water and food, first aid supplies, flashlight with extra batteries, important documents in waterproof bags, medications, change of clothes with moisture-wicking socks, phone charger, and emergency cash. Pack items you can grab in 30 seconds.
Q: Why can’t you wear regular sneakers during flood evacuation?
A: Regular sneakers absorb water within minutes, lose all traction on wet surfaces, provide zero protection against sharp debris hidden in murky floodwater, and become waterlogged and heavy. More than 50 percent of flood deaths result from walking in floodwaters, often due to inadequate footwear that slips or fails.
Q: What footwear should you absolutely avoid during floods?
A: Avoid flip-flops and sandals that slip off easily, Crocs and clogs with poor ankle support, canvas sneakers that absorb water, fashion boots with smooth soles, and any open-toe or mesh shoes. These options increase drowning risk from slipping, cause severe cuts from debris, and provide no contamination protection.
Q: Do waterproof boots need steel toes for flood evacuation?
A: Steel-toe or composite-toe boots provide maximum protection against heavy debris, rocks, and sharp objects hidden in floodwater, but they’re not required for basic evacuation. Prioritize knee-high waterproof rubber boots first, then add reinforced toe protection if your budget and space allow for debris-heavy cleanup activities.
Q: How many pairs of shoes should you pack for evacuation?
A: Pack at least two pairs: waterproof rubber boots as your main option for evacuating through flooded areas, plus water-resistant hiking boots or sturdy sneakers as backup. If space is extremely limited, prioritize knee-high rubber boots for immediate flood protection over backup pairs.
Q: Should evacuation boots be a size larger than normal shoes?
A: Evacuation boots should be one half to full size larger than your normal shoes to accommodate thick moisture-wicking socks, allow for foot swelling during long walks, and prevent toes from jamming forward on uneven terrain. Test the fit by walking 30 minutes before packing them.
Q: Where should you store evacuation boots in your home?
A: Store evacuation boots near your main exit or in your vehicle rather than buried inside a packed go-bag. This lets you grab them quickly during rushed evacuations. If you live in flood-prone areas, keep a dedicated pair in your car trunk year-round.
Q: How often should you replace evacuation boots?
A: Replace budget-quality rubber boots every 2 to 3 years even without use, while high-quality boots can last 5 to 7 years with proper maintenance. Inspect boots every six months for cracks in rubber, separated seams, worn tread, and dry rot from storage.
Q: What boot features matter most for walking through floodwater?
A: The most critical features are waterproof materials that seal completely, non-slip soles with deep tread for grip on wet surfaces, closed-toe design for debris protection, ankle support to prevent twisting injuries, and puncture-resistant soles to protect against nails and glass hidden underwater.
Q: Can children wear regular rain boots for flood evacuation?
A: Children can wear adjustable rain boots that fit properly and have non-slip soles with good tread. Choose bright colors for visibility during rescue situations, ensure boots are comfortable enough that kids will actually wear them during stressful evacuations, and pack backup sizes if they’re growing rapidly.
Q: Do you need insulated boots for flood evacuation?
A: You need insulated boots if you live in cold climates or face winter flooding risks. Choose insulated rubber boots or neoprene-lined options with temperature ratings that match your regional winter lows. Warm-climate residents should prioritize lighter-weight ventilated options to prevent heat exhaustion.
Q: How do you test evacuation boots before an emergency?
A: Test evacuation boots by walking your planned evacuation routes twice yearly while carrying your full go-bag, walking through shallow water to verify waterproofing, navigating slippery wet surfaces to check traction, and having each family member report comfort issues while there’s time to make adjustments.