
Most people think one gallon per person per day is enough for emergencies, but that’s only true if everything goes exactly as planned. The reality is messier. If you’re caring for a toddler, pregnant, taking blood pressure meds, or dealing with heat, that standard gallon falls short fast. Your actual water needs depend on who’s in your household, what conditions you’re facing, and how long you’ll be without running water. This guide breaks down the real numbers so you can calculate exactly how much water to store instead of guessing and hoping it’s enough when the taps run dry.
The Standard Water Amount for Emergency Kits: Official Guidelines
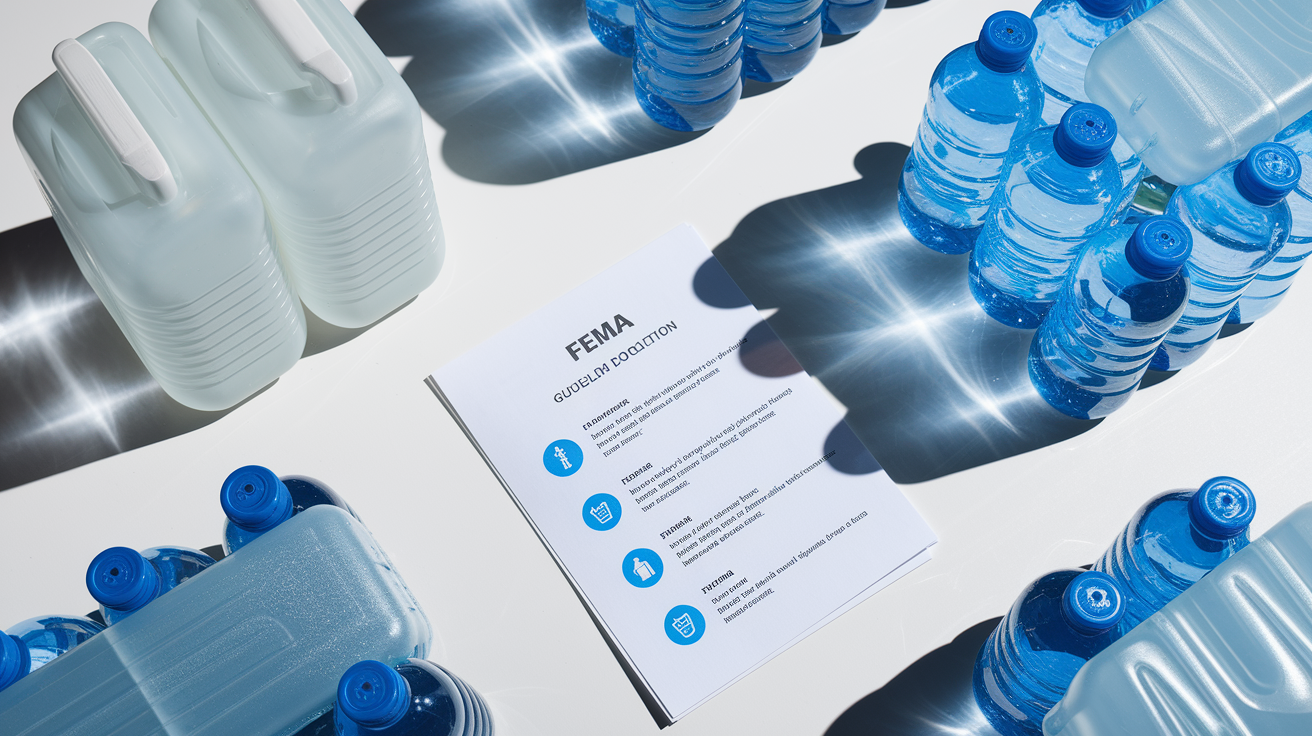
The foundational rule for emergency water storage is at least 1 gallon of water per person per day. FEMA and the American Red Cross both recommend this baseline. It’s not arbitrary. This minimum keeps you alive and maintains basic health when municipal water systems fail or become contaminated.
That daily gallon splits in half: 64 ounces for drinking and 64 ounces for cooking and basic cleaning. The drinking portion covers hydration throughout the day. The other half handles food prep, hand washing, minimal dish cleaning, and basic hygiene. You’ll reduce water use significantly compared to normal life, where the average person burns through 80 to 100 gallons daily.
Storage duration recommendations vary, but three minimum standards have emerged. A 3 day supply (3 gallons per person) meets the bare minimum for short term emergencies like brief power outages or minor storms. A 7 day supply (7 gallons per person) better prepares you for extended disruptions common in major flooding or winter storms. A 14 day supply (14 gallons per person) represents the gold standard recommended by utilities like Eugene Water & Electric Board. It accounts for situations where rescue or restoration takes longer than expected.
| Duration | Water Per Person | Family of 4 |
|---|---|---|
| 3 days | 3 gallons | 12 gallons |
| 7 days | 7 gallons | 28 gallons |
| 14 days | 14 gallons | 56 gallons |
Water Requirements for Special Populations and Conditions
Infants and young children require adjustments to the standard 1 gallon baseline, primarily because formula preparation demands clean water in specific quantities. A formula fed infant needs about 2 ounces of water per pound of body weight daily. That can add up to an extra half gallon per day for newborns. Toddlers and young children also have higher metabolic rates relative to their size, meaning they lose fluids faster through respiration and activity. For households with children under age 5, plan an additional half gallon per child per day beyond the standard calculation. If you’re mixing powdered formula, keep extra water on hand specifically for that purpose. You can’t substitute the drinking water your older kids need.
Pregnant and nursing mothers need significantly more water than the baseline. During pregnancy, increased blood volume and amniotic fluid production raise hydration needs by roughly 50 percent. That translates to an additional half gallon daily (1.5 gallons total per day). Nursing mothers require even more because breast milk production is water intensive, typically needing an extra gallon daily (2 gallons total per day). Dehydration during lactation reduces milk supply quickly, putting infants at risk when formula preparation may already be compromised during a disaster. Store the additional amounts separately and label them clearly so household members understand the allocation during rationing.
Elderly individuals face unique hydration challenges that increase their water storage needs. Many older adults take medications that act as diuretics, increasing fluid loss through urination. Others experience reduced thirst sensation. They won’t feel the early warning signs of dehydration. Chronic conditions common in seniors, like kidney disease or heart failure, often require careful fluid management that becomes harder when clean water is scarce. Plan an additional half gallon per day for household members over 65, and more if they take multiple prescription medications. Keep a written list of their prescriptions near your water storage so you remember which medications increase dehydration risk.
Medical conditions that cause fluid loss or require extra hydration add another layer to your water calculations. Diabetes increases urination frequency, especially when blood sugar runs high during the stress of a disaster. Kidney disease, diarrhea, vomiting, and fever all accelerate fluid loss beyond normal rates. Prescriptions including blood pressure medications, antidepressants, and antihistamines can cause dehydration as a side effect. For each household member with these conditions, add at least half a gallon per day to your baseline storage. If someone in your home uses a medical device that requires water, like a CPAP humidifier or wound irrigation system, calculate those needs separately and store distilled water if required by the equipment.
Environmental Factors That Increase Water Storage Needs

Hot climate conditions demand an immediate doubling of baseline water storage to 2 gallons per person per day. High temperatures and humidity increase fluid loss through sweating, even when you’re sitting still indoors without air conditioning. Desert environments and tropical regions both accelerate dehydration, though for different reasons. Dry heat pulls moisture from your body rapidly. Humid heat prevents sweat from evaporating efficiently, forcing your body to produce more sweat to cool down. If you live in areas where summer temperatures regularly exceed 85°F and you lose power during a disaster, double your stored water calculations. That 14 day supply for one person jumps from 14 gallons to 28 gallons when heat becomes a factor.
Physical activity during disaster scenarios increases water needs substantially beyond what you’d drink sitting at home. Clearing debris, moving furniture to upper floors ahead of rising water, carrying supplies, or walking to evacuation points all elevate your heart rate and body temperature. Heavy exertion in an emergency can increase water needs to 3 or even 4 gallons per person per day. The unpredictable nature of disasters means you can’t always plan for activity levels in advance. But if your emergency plan includes physically demanding tasks like sandbagging or manual water pumping, increase your storage amounts to account for the work.
Cold weather and high altitude create less obvious but equally important hydration demands. Breathing cold, dry air increases fluid loss through respiration, especially if you’re working outdoors in winter conditions. High elevation environments amplify this effect because the air holds less moisture at altitude. You lose water vapor with every breath, even though you’re not sweating. In mountain regions or during winter storms, plan an additional half gallon per person per day. The cold makes you feel less thirsty, which is dangerous because dehydration still progresses even when you don’t notice it.
Scenarios requiring additional water storage beyond baseline amounts:
- Working outdoors in heat above 85°F (add 1 gallon per person daily)
- Strenuous physical activity like debris clearing or sandbagging (add 2 gallons per person daily)
- Illness causing fever, vomiting, or diarrhea (add 1 gallon per person daily)
- High altitude locations above 5,000 feet elevation (add half gallon per person daily)
- Extended power outages during summer preventing air conditioning use (add 1 gallon per person daily)
Calculating Total Water Storage for Your Household
Accurate water storage planning requires walking through your specific household situation rather than relying on generic recommendations. Each home has a different mix of people, ages, health conditions, and pets. Your neighbor’s 14 gallon stockpile might leave your family short or your setup might require double what works for theirs. The math is straightforward once you break it into steps. The time spent on this calculation pays off when you know exactly what you need instead of guessing.
Step by step calculation method:
- Count all household members by category (adults, children under 12, infants, elderly over 65, pregnant or nursing women)
- Assess special needs for each person (medical conditions, medications that increase dehydration, physical limitations)
- Determine your duration goal based on local disaster patterns (3 days minimum, 7 days better, 14 days ideal)
- Calculate base amount using 1 gallon per adult per day, adjusting for children, medical needs, and environmental factors
- Add 20 percent buffer for unpredictable circumstances like extra physical exertion or someone getting sick during the emergency
Here’s how the calculation works for a real household. Family of 4 with 2 adults, 1 teenager (age 15), 1 child (age 4), and 1 medium sized dog (40 pounds). They’re planning a 7 day supply in a region with hot summers. Adult 1: 1 gallon daily times 7 days equals 7 gallons. Adult 2: 1 gallon daily times 7 days equals 7 gallons. Teenager: 1 gallon daily times 7 days equals 7 gallons. Child age 4: 1.5 gallons daily (baseline plus half gallon for young age) times 7 days equals 10.5 gallons. Dog: half gallon daily times 7 days equals 3.5 gallons. Base total equals 35 gallons. Add 20 percent buffer (7 gallons) for final storage target of 42 gallons for one week.
Reassess your household water calculations every 6 months or whenever someone moves in, moves out, starts new medications, or develops a medical condition. A college student returning home for summer break changes your numbers. So does a grandparent moving in or a new baby arriving. The buffer amount built into your storage helps cover small changes, but major household shifts require recalculating from scratch to avoid dangerous shortfalls when you actually need the water.
Pet Water Requirements in Emergency Kits
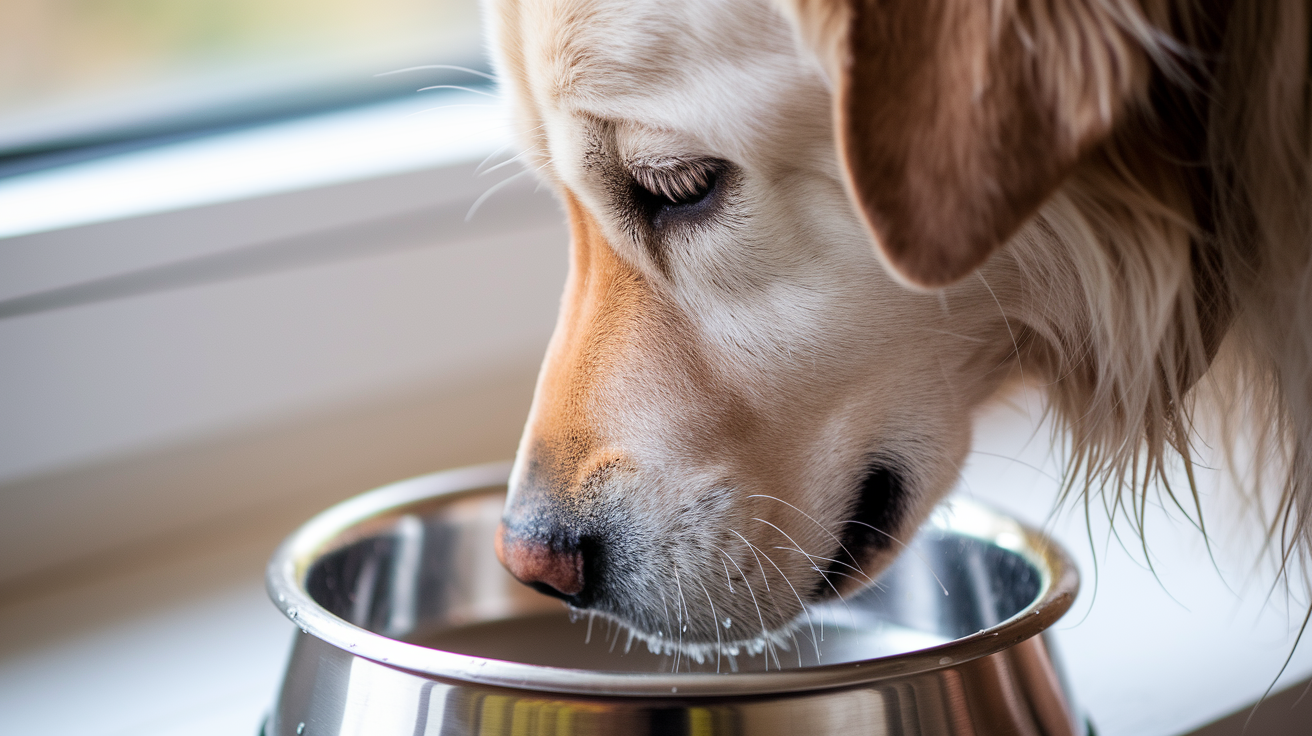
Pets are household members who depend entirely on you for water access during disasters. They can’t tell you when they’re dangerously dehydrated until it’s too late. Dogs and cats make up most household pets in the United States, but their water needs vary significantly by size and activity level. A small dog weighing 10 pounds drinks roughly 1 cup (8 ounces) of water daily, while a large dog weighing 80 pounds needs about 2 quarts (64 ounces) daily. Cats typically drink less than dogs, averaging 4 to 6 ounces per day for an average sized cat, though this increases if they eat dry food rather than wet food.
The stress of a disaster often increases pet water consumption beyond normal amounts, especially if animals are panting from heat or anxiety. Dogs pant to cool down, which increases fluid loss rapidly. Cats may hide and refuse to eat, but they still need water even when their food intake drops. Store water specifically designated for pets so you don’t find yourself choosing between human and animal needs during rationing. Like people, pets need access to clean water for both drinking and basic hygiene, though you can use non-potable water for cleaning purposes if necessary.
| Pet Type/Size | Daily Water Amount | 3-Day Supply |
|---|---|---|
| Small dog (under 20 lbs) | 8-16 oz (1-2 cups) | 0.5 gallon |
| Medium dog (20-50 lbs) | 16-32 oz (2-4 cups) | 1 gallon |
| Large dog (over 50 lbs) | 32-64 oz (4-8 cups) | 2 gallons |
| Cat (average size) | 4-6 oz | 0.25 gallon |
| Other considerations | Varies by species | Consult vet guidelines for birds, reptiles, small mammals |
Comprehensive Water Storage: Containers, Locations, and Distribution Strategy
Effective water storage relies on three interconnected elements that work together to keep your emergency supply safe, accessible, and distributed in ways that match how disasters actually unfold. The container you choose affects how long water stays fresh, where you can place it, and whether you can move it when evacuation becomes necessary. Storage conditions determine whether your water develops algae, absorbs chemical odors, or remains drinkable after months on a shelf. Strategic placement throughout multiple locations prevents the catastrophic scenario where all your water sits in one spot that becomes unreachable when you need it most.
Selecting Safe Water Storage Containers
Food grade plastic marked with recycling codes HDPE #2 or PETE #1 provides the safest option for long term water storage because these plastics resist chemical leaching and bacterial growth. BPA free containers matter because bisphenol A can leach into water over time, especially when stored in warm conditions or sunlight. Commercially bottled water comes in food grade containers already filled and sealed under sanitary conditions, making it the easiest choice if you have storage space and budget. DIY containers require more work upfront but cost less and let you customize storage amounts for specific locations.
Safe container options for emergency water storage:
- Commercial bottled water in factory sealed plastic bottles (easiest option with built in expiration dates)
- 2 liter soda bottles thoroughly cleaned and sanitized (good for distributed storage in small spaces)
- 5 gallon water jugs with handles (balance between portability and capacity for under sink storage)
- 55 gallon drums with spigots (bulk storage for basements or garages if you have floor space and weight capacity)
- Water bricks and stackable containers (modular storage that fits odd spaces and moves easily)
- Collapsible water bags and bladders (space efficient when empty, useful for vehicles and go bags)
Never use milk jugs, juice containers, or any non-food grade plastic for water storage because milk and juice leave behind proteins and sugars that promote bacterial growth even after washing. The plastic in milk jugs is also thinner and degrades faster than soda bottles, increasing the risk of leaks and chemical leaching. Glass containers work for water storage but add significant weight and breakage risk during earthquakes or if you need to move them quickly. Remember that water weighs 8.3 pounds per gallon, so a 5 gallon jug weighs over 40 pounds when full. Factor this weight into your storage location planning, especially for upper shelves or areas where you’ll need to lift containers down in an emergency.
Optimal Storage Conditions and Locations
Store water in cool, dark spaces between 50°F and 70°F to maximize shelf life and prevent algae growth. Light triggers photosynthesis in any algae spores present in the water, even treated water, turning your clear emergency supply green and undrinkable. Darkness also slows the breakdown of plastic containers, reducing the risk of chemicals leaching into the water over months or years. Temperature matters because heat accelerates both plastic degradation and bacterial growth, while freezing can burst containers and damage seals.
Keep water away from gasoline, paint, pesticides, herbicides, cleaning products, and anything else with a strong odor or chemical content. Plastic containers are somewhat permeable over time, meaning chemical vapors can migrate through the container walls and contaminate the water inside. If your water starts tasting or smelling like the gasoline can sitting next to it in the garage, that’s vapor permeation at work, and the water is no longer safe to drink. This contamination risk is why you can’t just shove water anywhere there’s space.
Recommended storage locations throughout your home:
- Under beds in low profile containers that slide in and out easily
- Under bathroom and kitchen sinks where plumbing already exists (but away from chemical cleaners)
- In cabinets and closets throughout the house to distribute weight and access points
- In climate controlled sections of garages, avoiding areas near vehicles or chemical storage
- In storage sheds if they stay relatively cool and aren’t filled with gasoline or fertilizer
- Behind bookshelves or furniture where space goes unused but remains accessible
- In freezers as ice jugs that provide cooling for food and drinkable water once melted
Multi-Location Distribution Strategy
Storing all your water in one location creates a single point of failure that puts your entire emergency supply at risk. A fire in the garage destroys water stored only there. Structural damage to one side of the house makes water in that area unreachable until rescue. Floodwater rising from the basement eliminates ground floor storage if that’s where everything sits. Distribution means thinking through disaster scenarios and spreading water to match different types of emergencies and access limitations.
Vehicle emergency kits require smaller quantities and face unique temperature challenges because cars parked in summer sun can reach 150°F inside, degrading plastic bottles rapidly. Commercially sealed water pouches designed for emergency kits handle temperature extremes better than standard bottles. Store 1 to 2 gallons per person in vehicles, replacing it every 6 months if you live in hot climates. Workplace and office emergency supplies depend on personal responsibility since most employers don’t provide individual water storage. Keep 3 days worth in a locker or desk drawer using smaller bottles that fit available space.
| Location | Recommended Amount | Container Type |
|---|---|---|
| Home base storage | Majority of 14-day supply | 5-gallon jugs, 2-liter bottles, 55-gallon drums |
| Vehicle | 1-2 gallons per person | Commercial pouches, small sealed bottles |
| Workplace | 3 gallons per person (3-day) | 2-liter bottles, commercial bottled water |
| Go-bag/evacuation kit | 1 gallon per person | Collapsible bags, small bottles, pouches |
Distributed storage also accounts for the reality that you won’t always be home when disaster strikes. Water in your car helps if you’re stuck in traffic during an evacuation. Water at work keeps you hydrated if you can’t get home. Water in a pre-packed go bag near the door means you can grab it in 30 seconds and leave. The strategy is redundancy, spreading your water supply across multiple containers and locations so that losing access to one stash doesn’t leave you with nothing.
Water Shelf Life and Rotation Schedules
Water itself doesn’t expire or go bad in the way food does, but the containers holding it degrade over time, and chemical treatments added during storage lose effectiveness after several months. Commercially bottled water includes a use by date printed on the label, which typically falls 1 to 2 years after the bottling date. This date reflects the manufacturer’s estimate of how long the plastic bottle will maintain its integrity and the water will stay fresh without developing off tastes from the container. Replace commercially bottled water once it reaches or passes that use by date, rotating the old bottles into regular household use rather than dumping them.
| Storage Type | Shelf Life | Rotation Schedule |
|---|---|---|
| Commercially bottled water (factory sealed) | 1-2 years | Replace at printed use-by date |
| DIY treated containers (bleach added) | 6 months | Empty, clean, refill, and re-treat every 6 months |
| Emergency water pouches (Datrex, Aqua Blox) | 5 years | Replace at printed expiration date, check annually for leaks |
| Untreated tap water in containers | 1-2 weeks | Not recommended for long-term storage without treatment |
Track rotation dates using a simple labeling system written directly on containers with permanent marker. Write the fill date or the replacement due date in month/year format where you’ll see it when accessing your storage. Set calendar reminders on your phone for rotation deadlines so you don’t rely on memory alone. Organize your water storage using first in first out placement, putting newly filled or purchased containers in the back and older containers in front where you’ll use them first. This rotation system prevents waste while maintaining a constantly refreshed emergency supply that’s ready when you need it.
Water Treatment and Purification: Storage Preparation and Emergency Backup Methods
Comprehensive water preparedness requires two separate but related capabilities. Treating water properly before storing it so it stays safe for months. And having backup purification methods ready for when stored water runs out or when you must use contaminated sources. The first ensures your primary stockpile remains drinkable during storage. The second keeps you alive when the situation extends beyond your stored supply or when disasters force you to use questionable water from streams, water heaters, or flooded areas.
Preparing Water for Long Term Storage
Clean and sanitize containers thoroughly before filling them with water for storage. Mix 1 teaspoon of non-scented liquid chlorine bleach with 1 quart of water, then use this solution to scrub the inside of your storage container. Let the bleach solution sit in the container for 30 seconds to 1 minute to kill bacteria and mold, then rinse completely with clean tap water until you can’t smell bleach anymore. This step matters because any bacterial contamination or organic residue left in the container will multiply over months, turning stored water unsafe.
After filling sanitized containers with fresh tap water from your municipal supply, add 2 drops of non-scented liquid household chlorine bleach per bottle to prevent bacterial growth during storage. Use standard bleach with 5 to 6 percent sodium hypochlorite as the only active ingredient. Nothing with added scents, surfactants, or “splash less” formulas that change the chemistry. The tiny amount of chlorine in those 2 drops kills bacteria and prevents algae formation without making the water taste strongly of bleach. Seal containers tightly immediately after adding bleach and filling them to the top, leaving minimal air space that could encourage contamination.
Emergency Backup Purification Methods
Backup purification becomes critical when you exhaust your stored water supply before help arrives, when contamination forces you to abandon stored water, or when evacuation leaves you relying on streams and ponds for survival. Each purification method has strengths and limitations depending on your situation, available tools, and the contaminants you’re facing. Boiling works universally but requires fuel and time. Chemical treatments are lightweight and simple but taste bad and have wait times. Filters remove particles and bacteria but not viruses or chemicals. Having multiple methods on hand covers more scenarios.
Boiling is the most reliable emergency purification method because it kills all bacteria, viruses, and parasites without special equipment. Bring water to a rolling boil for 1 minute at elevations below 6,500 feet. At elevations above 6,500 feet, boil for 3 minutes because water boils at lower temperatures where air pressure is lower, requiring extra time to reach killing temperatures for all pathogens. Let boiled water cool completely before drinking, and pour it back and forth between clean containers a few times to reintroduce oxygen and improve the flat taste that boiling produces.
Chemical treatment using household bleach provides a backup when you can’t boil. Add 8 drops of bleach per gallon of clear water, or 16 drops per gallon if the water is cloudy or discolored. Stir thoroughly and let the treated water sit for 30 minutes before drinking. You should smell a slight chlorine odor after the waiting period. If you don’t smell chlorine, repeat the dose and wait another 15 minutes. Water purification tablets containing chlorine dioxide or iodine work similarly but include premeasured doses that are easier to use correctly under stress.
Emergency purification method comparison:
- Boiling: kills all pathogens, requires fuel and time, adds no chemical taste, doesn’t remove particles or chemical contaminants
- Bleach treatment: lightweight and cheap, kills most pathogens, adds chlorine taste, requires 30 minute wait, doesn’t remove particles or chemical contamination
- Purification tablets: premeasured doses prevent mistakes, kills most pathogens, adds chemical taste, requires wait time, doesn’t remove particles or chemical contamination
- Portable filters: removes bacteria and parasites, improves taste, works immediately, does not kill viruses, filters clog with sediment and need replacement
- UV sterilization devices: kills all pathogens in seconds, requires batteries or charging, only works in clear water, doesn’t remove particles or chemical contamination
Keep purification supplies and backup tools stored with your water containers so you can find them quickly in an emergency. A portable camping filter, bottle of bleach, packet of purification tablets, and matches for boiling take up minimal space but extend your water security by weeks or months when disaster drags on longer than expected.
Beyond Drinking: Water Allocation for Sanitation and Hygiene
The baseline 1 gallon per person per day already accounts for the 50/50 split between drinking (half gallon) and cooking plus basic cleaning (half gallon). This allocation assumes you’re drastically reducing water use compared to normal life, where showers, laundry, and toilet flushing consume most of the 80 to 100 gallons per person that flows through a typical household daily. During short term emergencies lasting 3 to 7 days, the half gallon for cooking and cleaning per person usually covers boiling pasta, rinsing a few dishes, and washing hands.
Extended outages stretching past one week raise different sanitation challenges that the baseline allocation doesn’t fully address. Without running water, toilets stop flushing, creating waste management problems that require additional non-potable water. Personal hygiene beyond hand washing becomes difficult, increasing infection risks from minor cuts and scrapes. Cleaning dishes and cooking surfaces thoroughly matters more during disasters when stomach bugs spread easily in crowded shelters or homes without power for refrigeration. If your emergency plan includes staying home through a 14 day municipal water outage, consider storing extra non-potable water specifically for sanitation rather than diverting your drinking water supply.
Alternative non-potable water sources meet sanitation needs without consuming your carefully stored drinking water. Your home water heater contains 30 to 80 gallons of water that’s safe for cleaning, flushing waste, and washing dishes even though you wouldn’t drink it without boiling or treatment first. Drain water from the tank through the spigot near the bottom, letting the first few gallons run off to flush out sediment before collecting the cleaner water from the middle of the tank. A WaterBOB is a large plastic bladder that fits inside your bathtub and holds up to 100 gallons of water filled from the tap before a storm hits, providing a massive sanitation reserve if you have advance warning. Collected rainwater from downspouts and barrels works for outdoor cleaning and waste disposal but requires treatment before drinking because roofing materials and bird droppings contaminate runoff.
Emergency Water Supply Checklist: Quick Reference Guide
Use this checklist to audit your current emergency water preparedness and identify gaps before disaster strikes. Walk through your home with the list in hand, checking each item physically rather than assuming you have something that actually ran out months ago or got moved to the garage where it’s now buried under camping gear and holiday decorations.
Complete water preparedness checklist:
- Water quantity calculated for all household members (adults, children, infants, elderly, pregnant or nursing women)
- Special needs assessed and additional amounts added (medical conditions, medications, high activity)
- Pet water quantities calculated and included in total storage plan
- Storage duration goal selected and quantities matched (3 day, 7 day, or 14 day supply)
- Food grade containers acquired and inspected for damage (no cracks, working seals, proper caps)
- Water treatment supplies on hand (non-scented bleach, measuring spoons, labels, permanent markers)
- Stored water properly treated before sealing (containers sanitized, 2 drops bleach per bottle added)
- Multiple storage locations used throughout home, vehicle, workplace (not all in one place)
- Storage conditions meet safety requirements (cool, dark, away from chemicals, 50 to 70°F)
- Rotation dates marked clearly on all containers (fill date or replacement due date visible)
- Rotation schedule set with calendar reminders (every 6 months for DIY, use by dates for commercial)
- Purification backup methods stored and ready (portable filter, bleach, tablets, pot for boiling)
- Go bag includes portable water supply (1 gallon per person in collapsible bags or pouches)
- Vehicle emergency kit stocked with water (1 to 2 gallons per person, rotated every 6 months)
- Workplace water supply established (3 gallons per person for 3 day supply at desk or locker)
- Water heater location and drain valve identified for emergency access (know where it is before crisis)
- Documentation printed and stored with supplies (household water calculation, purification instructions, emergency contact numbers for municipal water department)
Final Words
You’ve got the numbers now. One gallon per person per day is your baseline, but your household reality might push that higher.
Add up your people, count your pets, factor in medications and climate. Then store more than you think you need, spread across multiple spots so you can grab it fast.
Check those dates every six months and keep treatment supplies on hand.
When you know exactly how much water per person in emergency kit your family needs, the guesswork drops away. You’ll have one less thing to panic about when alerts start rolling in.
Print that checklist. Fill those containers. You’re covered.
FAQ
How much water should be in an emergency survival kit?
An emergency survival kit should contain at least 1 gallon of water per person per day, with a minimum 3-day supply (3 gallons per person). FEMA recommends storing a 14-day supply (14 gallons per person) for better preparedness during extended disasters when help may be delayed.
How long will 100 gallons of water last for one person?
100 gallons of water will last one person approximately 100 days when following the emergency baseline of 1 gallon per person per day. In hot climates or during high physical activity, 100 gallons provides about 50 days when doubled water needs apply.
How much water per person per day during an emergency?
Water needs during an emergency are at least 1 gallon per person per day, split between half a gallon for drinking and half a gallon for cooking and sanitation. Hot weather, physical activity, pregnancy, nursing, illness, and medications can increase this amount significantly.
How many gallons of water per person for emergency preparedness?
Emergency preparedness requires a minimum of 3 gallons per person for a 3-day supply, though 7 gallons (one week) is better and 14 gallons (two weeks) is ideal. Special populations like children, pregnant women, nursing mothers, and people with medical conditions need additional amounts beyond these baselines.
Do children need more water than adults in emergency kits?
Children require more water per pound of body weight than adults due to higher metabolic rates and activity levels. Infants need extra clean water specifically for formula preparation, which can add 1 to 2 additional quarts per day to household water storage requirements.
How do you calculate emergency water for a family of four?
To calculate emergency water for a family of four, multiply 1 gallon by 4 people by the number of days you want to prepare for, then add 20% as a safety buffer. For a 7-day supply, that’s 4 × 7 = 28 gallons, plus 5.6 gallons buffer, totaling approximately 34 gallons.
Does hot weather change emergency water storage amounts?
Hot weather doubles emergency water storage needs from 1 gallon to 2 gallons per person per day. Desert climates, tropical conditions, and heat waves increase fluid loss through sweating, making additional hydration critical to prevent heat exhaustion and dehydration during disaster response activities.
What containers are safe for storing emergency water?
Safe emergency water containers include food-grade plastics marked HDPE #2 or PETE #1, commercially bottled water, clean 2-liter soda bottles, 5-gallon jugs, and BPA-free water storage products. Never use milk or juice containers because residue promotes dangerous bacterial growth even after cleaning.
How often should you replace stored emergency water?
Commercially bottled water should be replaced by its use-by date, typically 1 to 2 years. Water stored in DIY containers should be replaced every 6 months. Emergency water pouches and specialized products like Aqua Blox offer 5-year shelf lives when stored properly.
Where should you store emergency water at home?
Store emergency water in cool, dark locations between 50 to 70 degrees Fahrenheit, away from chemicals, gasoline, and cleaning products. Good spots include under beds and sinks, in cabinets and closets, garages, storage sheds, behind bookshelves, and some in the freezer as ice jugs.
How much water do pets need in emergency kits?
Small dogs and cats need approximately 1 cup per day, medium dogs require 2 to 4 cups daily, and large dogs need 4 to 8 cups per day for emergency supplies. Calculate a 3-day minimum supply per pet and add this amount to your household total.
Should you store all emergency water in one location?
Never store all emergency water in one location because fire, structural damage, or blocked access during different disaster types could make it unreachable. Distribute water between your home base storage, vehicle, workplace, and evacuation go-bag for maximum emergency readiness and accessibility.
How do you treat water for long term emergency storage?
Treat water for long-term storage by sanitizing containers with 1 teaspoon non-scented bleach per 1 quart of water, then adding 2 drops of non-scented liquid chlorine bleach (5 to 6% sodium hypochlorite) per bottle when filling. This treatment prevents bacterial growth during storage.
What backup water purification methods work during emergencies?
Backup water purification methods include boiling water at a rolling boil for 1 minute (3 minutes above 6,500 feet), using chlorine or iodine tablets, portable filters, and UV sterilization devices. Keep multiple purification options on hand because stored water may run out during extended disasters.
Does emergency water need to cover sanitation and hygiene?
Emergency water must cover sanitation and hygiene, allocated at half a gallon per person per day within the 1-gallon baseline. During extended outages without municipal water, consider accessing your water heater’s 30 to 80 gallons for non-drinking sanitation needs like washing and waste management.