
When seconds count and floodwater’s rising, most people don’t realize the route they pick in the next few minutes decides whether they make it out safely or end up trapped in their car. Your evacuation route isn’t just the fastest way out of town. It’s the difference between reaching high ground before roads close and getting stuck in water you can’t cross. This guide walks you through how to choose routes that avoid the spots where floodwater hits first, use real flood zone data to plan smarter paths, and build backup options that work when your first choice gets cut off.
Essential Criteria for Selecting Your Flood Evacuation Route

The most important rule when picking a flood evacuation route? Go up, stay dry, don’t mess with moving water. Your route needs to get you to higher ground fast while keeping you away from anywhere water goes when things get bad. Elevation is what keeps you safe. Every foot of height you gain between yourself and flood zones increases your odds of making it out without running into roads you can’t pass.
When you’re choosing your evacuation route, these are the things that matter:
- Pick routes that take you uphill – Roads that climb away from valleys, riverbanks, and coastal zones where water gathers.
- Skip low spots and underpasses – They flood first and trap cars, often faster than you can react.
- Don’t use bridges over fast water – Even bridges that look solid wash out when rivers surge past their banks.
- Make sure the road’s actually usable – Confirm your route stays open during heavy rain and that the roads are maintained and won’t fall apart.
- Go around official flood zones – Use flood maps to avoid areas marked high risk.
- Think about how far you need to go – Long enough to reach actual safety, short enough to finish before everything gets worse.
- Consider what it looks like at night – Routes with decent lighting, clear signs, and landmarks you recognize work better if you leave after dark.
- Avoid streets with lousy drainage – Roads that pool water in regular rainstorms turn into rivers during floods.
- Stay away from rivers and streams – Water can rise and spread past normal banks scary fast.
- Keep clear of downed power lines – Flooded areas hide electrical dangers under murky water.
- Don’t go through debris zones – Floodwater carries tree limbs, trash, cars, and building materials that block roads or wreck yours.
- Skip roads with a history of washing out – If it failed before, it’ll fail again under the same conditions.
Knowing water depth thresholds saves lives. Just 6 inches of moving water knocks a person down. Twelve inches sweeps away small cars. Two feet moves SUVs. These numbers define when a route becomes impossible. If you see water covering a road and can’t confirm it’s less than six inches deep and still, turn around right now. Water hides the road surface, washed out pavement, sinkholes, and missing guardrails.
Fast water creates problems beyond just depth. Moving floodwater hauls debris that hits vehicles and buildings like battering rams. Current shoves stalled cars sideways off the road into deeper channels. Contaminated floodwater contains sewage, chemicals, fuel, and bacteria that make you sick if you touch it. Never walk or drive through floodwater if there’s any other option. If you absolutely must evacuate on foot through shallow standing water, use a stick to test ahead for solid ground and hidden drops.
Using FEMA Flood Maps and Topography for Route Planning

FEMA flood maps show you where water goes and which routes stay clear. These official maps identify flood zones using decades of data, marking where water went before and where it’ll go again.
To use FEMA flood maps for planning, find your property and check its flood zone label. Zones A, AE, AO, AH, and V are high risk areas where flooding happens most. Zones B, C, and X mean moderate to low risk. Your route should get you out of high risk zones fast and avoid passing through other high risk areas on the way. Pay attention to Special Flood Hazard Areas marked on maps. These are spots where flood insurance gets required and where flooding happens regularly. Don’t plan routes through them, especially near rivers, creeks, floodplains, and coasts.
Topography and elevation data help you see how water flows across the ground. Water follows gravity. Low points collect floodwater while ridges and hills stay dry. Use topographic maps or online elevation tools to trace your route and make sure it climbs to higher ground instead of dipping into valleys or crossing drainage paths. Look for routes that stay on ridgelines, travel along higher elevation roads, and avoid crossing stream beds even when they look safe during dry weather. Elevation gain is your friend.
Researching past flood data adds real context to official maps. Check local news archives, emergency management sites, and community records to learn which roads flooded during earlier storms. Roads that went underwater before will flood again when conditions repeat. Ask people who’ve lived there a while which areas become impassable first. Note their warnings when you plan.
Planning Primary and Alternate Routes with Road Condition Assessment

You need multiple evacuation routes because flood conditions change crazy fast. A clear road becomes impassable in minutes. Planning just one route traps you if that path floods, gets blocked by debris, or fills with stalled traffic.
Your primary route should be the most direct path from home to safety that skips flood zones and low areas. Pick a route you’ve driven before with good road conditions, clear signs, and not too many turns. Mark this route on a real paper map with a highlighter. Note the travel time under normal conditions and the distance in miles. Identify landmarks along the way like schools, fire stations, shopping centers, or buildings that stand out so you can navigate even if street signs are missing or you can’t see well.
Alternate routes need to take totally different paths to the same safe spot or to a different safe location. If your primary route goes west, pick an alternate that heads north or south before turning toward your destination. That way a single flooded area or traffic jam doesn’t block everything. Plan at least two alternates. Drive each route when the weather’s calm so you know every turn, stoplight, and potential trouble spot. Look for routes that avoid bridges, low water crossings, underpasses, and areas near rivers or streams.
Here’s how to map your routes properly:
- Get physical maps of your area – Don’t rely only on GPS. Keep paper maps in your car and at home.
- Mark your primary route clearly – Use one color highlighter and write “Primary Route” next to it.
- Identify at least two alternates – Use different color highlighters and label them “Alternate 1” and “Alternate 2.”
- Note landmarks on each route – Write down the names of key intersections, buildings, or features you’ll pass.
- Store maps in waterproof containers – Keep them handy in your vehicle and emergency kit.
Traffic congestion turns a 20 minute drive into a three hour crawl during evacuations. Guess travel times by assuming roads move at half speed or slower once evacuation orders go out. If your normal commute is 15 minutes, plan for 45 minutes or more during an evacuation. Account for delays at intersections where multiple routes merge, near highway on ramps, and at bridges where traffic naturally bottlenecks.
| Route Factor | Normal Conditions | Emergency Conditions |
|---|---|---|
| Travel Speed | 45-60 mph | 15-30 mph |
| Expected Delays | 5-10 minutes | 30-90 minutes |
| Fuel Consumption | Normal rate | Double due to idling and stop-and-go traffic |
| Alternative Access | Multiple options available | Limited to open routes only |
Match your planned routes with official evacuation guidance from local authorities. Emergency managers pick specific evacuation routes based on traffic capacity, road conditions, and shelter locations. If officials announce routes that differ from yours, follow their guidance. They have real time information about closures, hazards, and the safest paths. Calculate whether your vehicle has enough fuel to reach your destination with margin for detours and delays. Keep your tank above half full during flood season.
Creating a Family Communication Plan for Your Evacuation Route

Communication planning stops families from scattering in different directions during evacuations. When everyone knows the route, the meeting point, and how to reach each other, you skip the panic of searching for missing family while danger closes in.
Pick a family meeting place that sits well outside any evacuation zone on high ground. This could be a relative’s home in another town, a specific hotel, a designated emergency shelter, or a landmark everyone can find easily. Make sure it’s far enough from flood zones that it stays accessible no matter which route you take. If your primary meeting place becomes unreachable, pick a secondary location in a different direction as backup.
An out of area contact person acts as your family’s communication hub when local networks fail or family members evacuate separately. Pick someone who lives in another state or region, someone the same flood won’t affect. Share this person’s name and phone number with every family member. Make sure the contact knows they might get calls or texts asking where other family members are. During an evacuation, each family member should check in with this contact to report location and status. The contact can then relay messages between family members who can’t reach each other directly.
Share your evacuation plan this way:
- Share the planned evacuation route with everyone – Show everyone the primary and alternate routes on a map. Drive the routes together if you can.
- Exchange cellphone numbers – Make sure every family member has every other member’s number saved in their phone and written on a card in their wallet.
- Pick primary and secondary meeting locations – Write down the addresses and directions. Make sure everyone knows how to get there from different starting points.
- Identify out of area emergency contact – Give everyone the contact’s name, phone number, and relationship to your family.
- Plan for text messaging when calls fail – Explain that texts often get through even when voice calls don’t. Agree to send brief status updates via text.
- Make sure everyone knows the destination shelter – If evacuating to an official shelter, share the name, address, and estimated distance from home.
For more strategies on coordinating family communication and planning, check out this resource on Flood Evacuation Plans: What Every Family Should Do.
Keep contact info accessible by storing it in multiple places. Put a laminated card with all family phone numbers and the out of area contact in each person’s wallet, car glove box, and emergency kit.
Preparing Your Vehicle and Emergency Supplies for the Evacuation Route
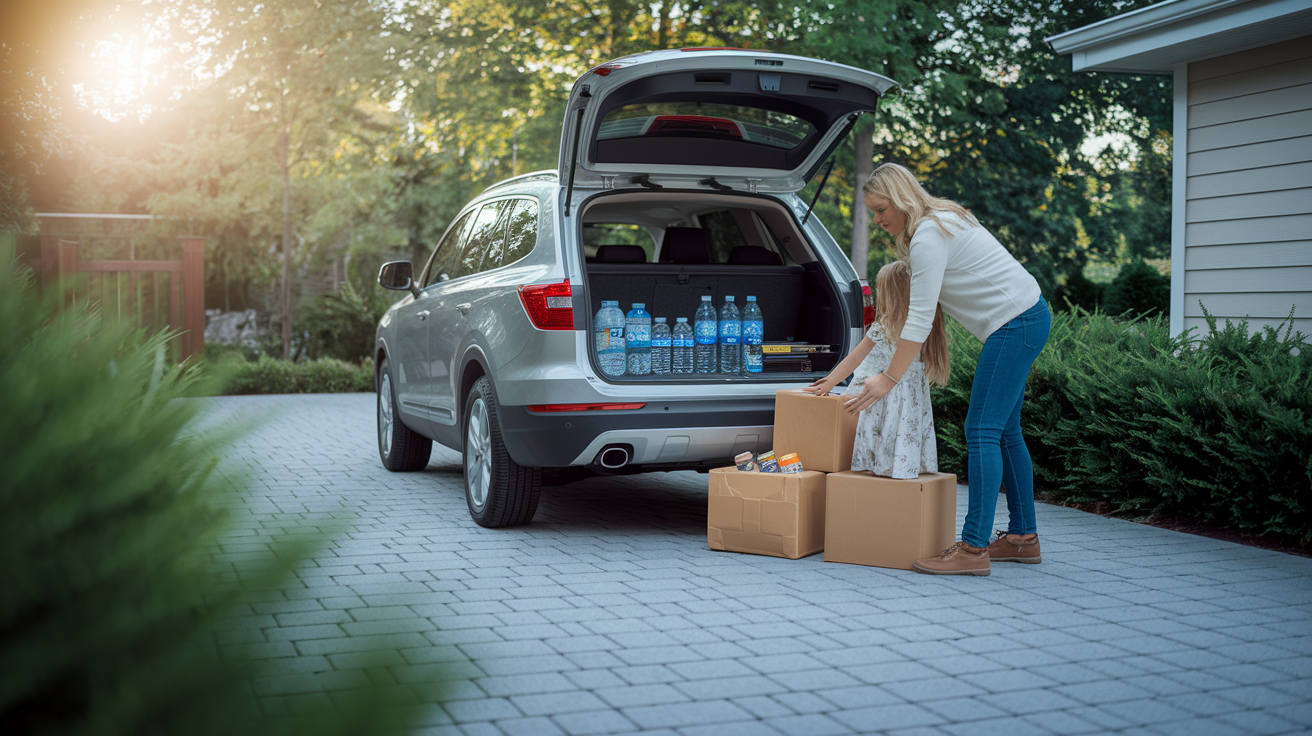
Your vehicle becomes a lifeline during evacuations, so keep it ready all the time. Keep at least a half tank of fuel throughout flood season. Gas stations lose power during storms and run out of fuel fast once evacuations start. A full tank gives you the range to take alternate routes, sit in traffic jams, and reach distant shelters without refueling. Check tire pressure, fluid levels, and battery condition regularly so mechanical problems don’t strand you halfway out.
Pack these supplies and keep them in your vehicle:
- 72 hour water supply (one gallon per person per day minimum)
- Non perishable food like energy bars, canned goods, and dried fruit
- First aid kit with bandages, antiseptic, pain relievers, and any specialized medical supplies
- Prescription medications with at least a week’s supply for each family member
- Important documents in waterproof containers, including insurance policies, ID, medical records, and bank account information
- Battery powered or hand crank radio for weather updates and emergency broadcasts
- Mobile phone charging cables and portable battery packs or solar chargers
- Flashlights with extra batteries, plus a headlamp for hands free use
- Basic tools including a multi tool, duct tape, and a tire repair kit
Waterproof storage protects documents and electronics from rain, splashing water, and humidity. Use heavy duty zip top bags, waterproof document pouches, or small waterproof containers for passports, insurance papers, cash, and medical records. Store medications in their original bottles inside a larger waterproof bag. Keep a complete change of dry clothes for each family member in sealed plastic bags.
Emergency kits should stay in your vehicle from the start of flood season through the end. Don’t wait for a storm forecast to pack supplies. Keep kits in the trunk or back seat where they stay accessible if you need to evacuate on foot. Rotate food and medications before they expire. Check batteries every few months.
Navigation Tools and Real-Time Monitoring for Evacuation Routes
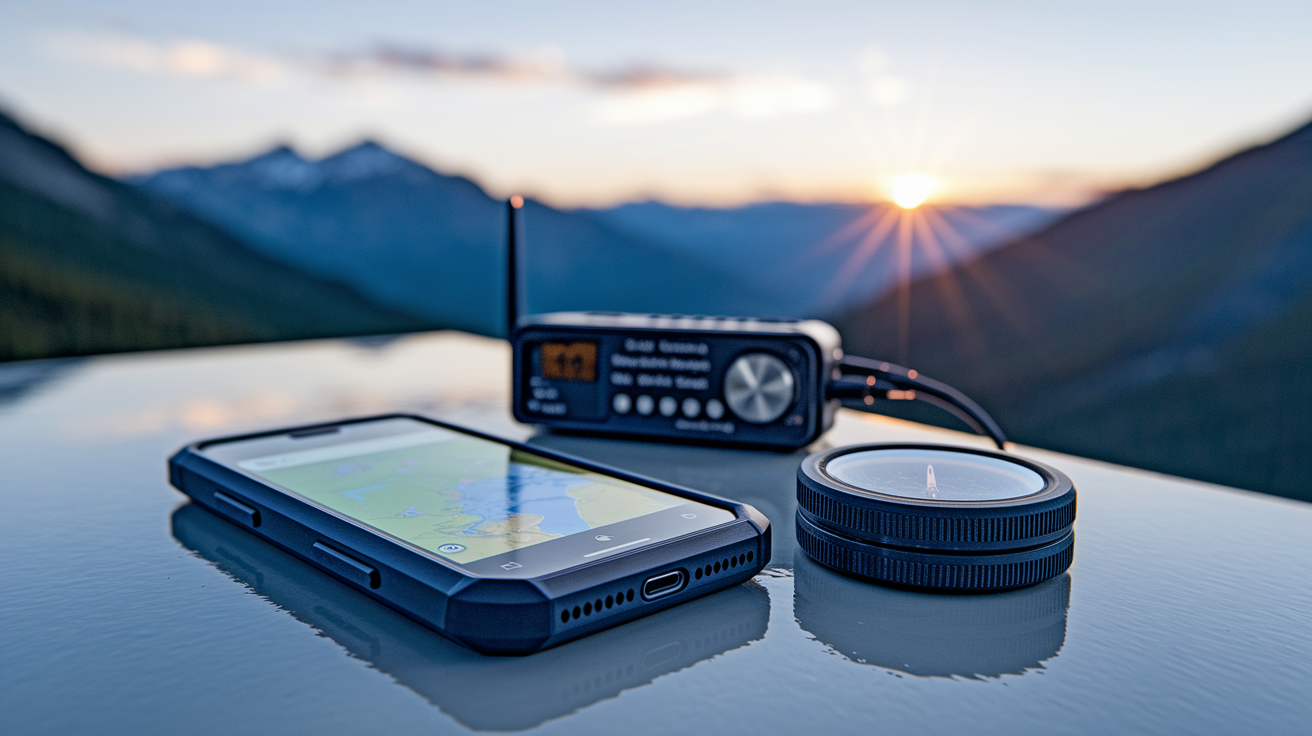
GPS helps until it doesn’t. During flood emergencies cell networks fail, satellites lose signal in heavy storms, and traffic apps give dangerously outdated information. Flash floods develop in minutes, requiring immediate action with almost no warning. The gap between a clear road and an impassable torrent closes in under ten minutes during intense rain.
Download offline maps of your area before flood season starts. Most smartphone map apps let you save map data for use without internet. Download maps covering your home, your planned evacuation routes, and the regions around your meeting places. Test the offline maps to confirm they give turn by turn directions without cell service. Update the downloaded data every few months to catch road changes and new construction.
Physical landmarks provide navigation backup when electronic tools fail. Drive your evacuation routes when the weather’s calm and note distinctive landmarks at key decision points. “Turn left at the red brick church” or “Take the second right after the water tower.” Write these landmarks on your paper map next to the turns. Landmarks stay visible when street signs blow down, power outages darken intersections, and GPS screens go black.
Continuous monitoring becomes critical once you see flood risk increasing. Flash floods give little warning. Conditions shift from safe to deadly while you hesitate. Monitor weather developments hourly as storms approach. Watch for rapid changes in rainfall intensity, river levels, and official warnings. The decision to evacuate should happen early, before roads flood and options disappear.
Sign up for emergency alerts through every channel you can. Most counties and cities offer opt in text and email alerts that notify you of evacuation orders, flood warnings, road closures, and shelter openings. Register your cell number and email with your local emergency management agency. Enable Wireless Emergency Alerts on your smartphone so you get government broadcasts automatically. These systems send critical information straight to your phone even when you’re not actively checking the news.
Use these tools and methods during flood threats:
- Download area maps offline before storms arrive
- Mark routes with physical landmarks and decision points
- Note alternate turn points if main roads get blocked
- Identify emergency services locations along routes like hospitals, fire stations, and police departments
- Keep paper map backups in waterproof storage
- Monitor NOAA Weather Radio on battery powered receivers
- Track local emergency management alerts via text and email
- Follow news media broadcasts on radio and TV
- Check social media official accounts from police, fire, and emergency management
- Use traffic monitoring apps to identify congestion and closures in real time
Battery powered radios stay your most reliable information source when power fails and cell towers go down. NOAA Weather Radio broadcasts continuous weather updates, warnings, and emergency instructions on dedicated frequencies. Keep a radio in your emergency kit with fresh batteries. Tune it to your local NOAA station as conditions worsen. Backup power sources like portable battery packs, car chargers, and solar panels keep phones and radios running when outlets stop working.
Know these evacuation triggers and act right away when you see them:
- Mandatory evacuation orders from local authorities
- Voluntary evacuation advisories, especially if you have mobility limitations, pets, or elderly family members
- Rapidly rising water near your home or along your planned route
- Flash flood warnings issued by the National Weather Service
- Loss of safe passage when water starts covering your evacuation route
Adapt your route in real time based on official guidance from local authorities. Emergency managers direct traffic to open roads and away from hazards as situations develop. If officials announce a specific evacuation route, follow it even if it differs from your plan. Never wait until the last minute to evacuate. Delays create danger. Water rises faster than you expect, traffic slows more than you think, and the window for safe departure closes suddenly.
Special Considerations for Evacuation Routes with Pets and Vulnerable Family Members

Pets and family members with mobility limitations need extra planning because they can’t evacuate as quickly or flexibly as healthy adults. Routes that work for a solo driver might fail completely for a family with three dogs, an elderly parent using a walker, and a wheelchair user.
Pick evacuation routes with rest stops, accessible facilities, and space to manage pets safely. Longer routes might be necessary if they include pet friendly hotels, rest areas with sidewalks for walking dogs, and gas stations with accessible restrooms. Skip routes that require climbing stairs, crossing footbridges, or navigating obstacles that block wheelchairs and walkers. Check whether your planned route includes hospitals or urgent care facilities in case medical needs come up during the drive.
Find pet friendly shelters and hotels along and at the end of your evacuation routes before emergencies happen. Many emergency shelters don’t accept pets, so you need a backup plan. Research hotels that allow animals, confirm their pet policies, and save their phone numbers and addresses. Some communities run pet friendly evacuation shelters during disasters, so check with your local animal control or emergency management office to learn what’s available. Pack a separate pet emergency kit with food, water, bowls, leashes, carriers, medications, vaccination records, and a recent photo of each pet in case you get separated.
Routes that work for wheelchairs and medical equipment must avoid stairs, steep curbs, narrow doorways, and uneven terrain. If a family member can’t transfer from a wheelchair to a vehicle without help, your route must lead to a shelter or facility equipped with accessible transportation and entry. Plan rest stops at locations with accessible parking and restrooms. Make sure your vehicle has space for mobility devices, oxygen tanks, or other necessary equipment.
| Consideration | Route Impact | Planning Action |
|---|---|---|
| Pets | Requires pet-friendly accommodations and rest stops | Identify pet-friendly shelters and hotels; pack pet emergency kits with carriers and supplies |
| Elderly Family Members | Slower travel, more frequent rest stops, proximity to medical facilities | Plan routes with accessible rest areas; keep medication lists and medical history in emergency kit |
| Disabilities | Need for wheelchair-accessible routes, facilities, and vehicles | Confirm shelters and rest stops have accessible parking, ramps, and restrooms |
| Medical Equipment | Requires power sources, space in vehicle, backup supplies | Pack backup batteries, ensure vehicle has charging capacity, identify hospitals along route |
Secondary meeting locations become especially important for families with special needs because the primary site might lack accessible facilities or pet accommodations. Pick at least two meeting points. Confirm both offer the accessibility features, pet policies, and medical support your family needs.
Conducting Practice Drills and Reconnaissance of Your Evacuation Route

Practice turns a theoretical evacuation plan into muscle memory. When an emergency hits, you respond automatically instead of freezing in confusion. Families that rehearse their evacuation routes know exactly where to turn, how long the drive takes, and where problems might show up.
Route reconnaissance means driving your planned evacuation routes when the weather’s calm to spot potential hazards, confirm directions, and measure travel times. Take your whole family on this drive so everyone sees the route firsthand. Point out landmarks, decision points, and alternate turn options as you drive. Note areas where the road narrows, bridges that might flood, low sections prone to standing water, and intersections where traffic merges from multiple directions.
Schedule family evacuation drills at different times of day to understand how traffic patterns, visibility, and road conditions change. A route that feels safe at noon on a Saturday might become chaotic at 5 p.m. on a weekday when commuters fill the roads. Try driving the route at night to see how well it’s lit and whether landmarks stay visible. Practice during light rain to watch how water drains from the road surface and where puddles form.
Include these things in your practice drills:
- Drive the complete route from start to finish without shortcuts or detours
- Note travel time using a stopwatch or phone timer to set a baseline
- Identify potential bottlenecks like narrow bridges, one lane sections, or high traffic intersections
- Check alternate route access points by driving the first mile of each alternate to confirm the turn is easy to find
- Locate landmarks and photograph them so family members can recognize key turns
- Test family communication procedures by having family members text each other updates from different points along the route
Update your evacuation routes based on what you find during reconnaissance and as seasons change. If you discover a low water crossing that floods even in light rain, remove that route from your plan and pick a different path. If road construction blocks a key intersection, adjust your route to skip the delay. Check routes again after major storms to see if flooding or damage changed road conditions.
Adapting Your Evacuation Route Based on Different Flood Types
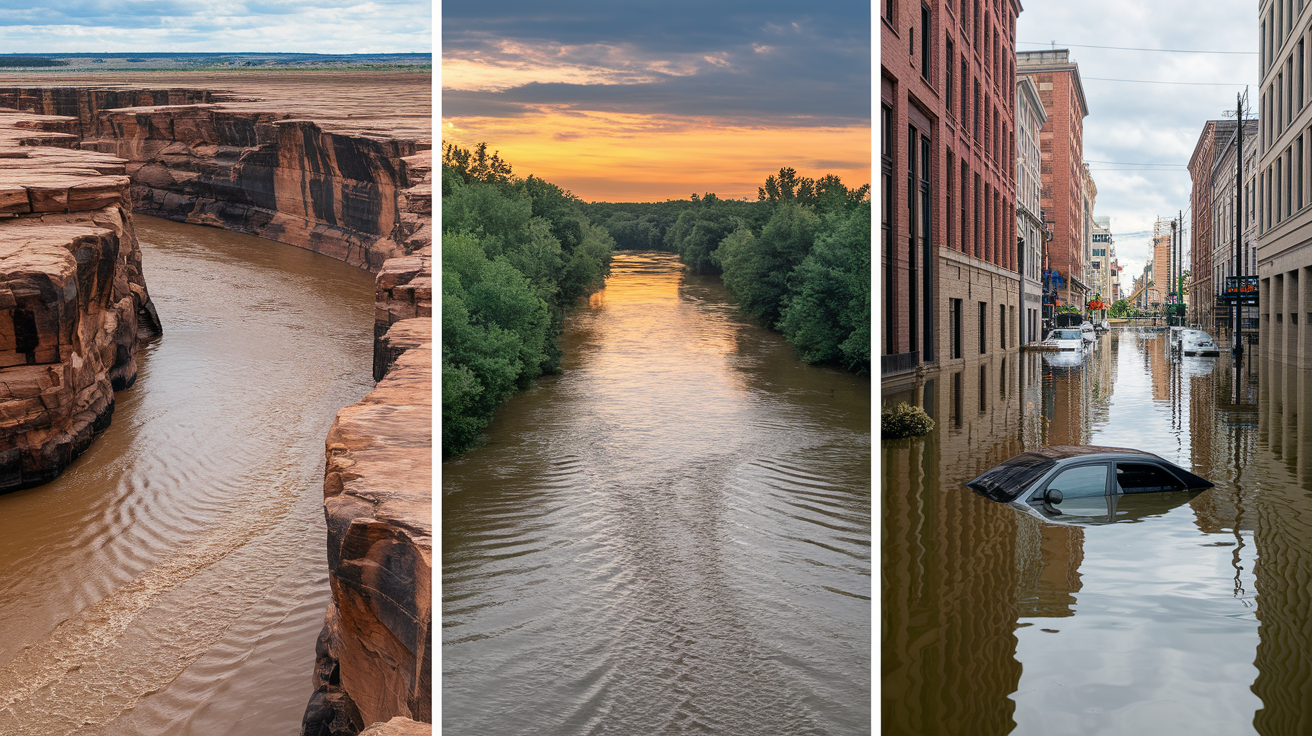
Different flood types need different evacuation strategies because water behaves differently depending on the source, speed, and geography. Flash floods strike with little warning and tremendous force. Riverine floods rise slowly over days. Coastal floods push saltwater inland with storm surges. Urban flooding overwhelms drainage systems in low neighborhoods. Understanding which flood type threatens your area helps you pick the evacuation route that keeps you ahead of the danger.
Flash floods develop in minutes during intense rainstorms, dam failures, or ice jams, often in areas that seem safe under normal conditions. Riverine floods result from prolonged rainfall that fills rivers and streams beyond their banks, spreading water across floodplains in a more predictable pattern. Coastal flooding happens when hurricanes or strong storms push ocean water onto land, sometimes miles inland. Urban flooding occurs when pavement, buildings, and drainage systems can’t absorb or channel heavy rain, creating deep pools on streets and in underpasses.
Flash Flood Evacuation Routes
Flash floods demand immediate departure with no time for hesitation. Your evacuation route must avoid canyons, dry washes, creek beds, arroyos, and any low area where water funnels and accelerates. Don’t camp, park, or live in these zones during flood season. Flash floods can turn a dry streambed into a 10 foot wall of water in under five minutes.
Pick routes that stay on high ground and ridges, well above drainage channels. Skip routes that cross normally dry creek beds even if bridges exist, because flash floods wash out bridges and submerge crossings instantly. Move perpendicular to drainages rather than following them downstream. If you live in mountainous or desert terrain where flash floods are common, find routes that climb away from valleys immediately and stay on elevated terrain until you reach a safe community on stable ground.
Riverine and Coastal Flood Routes
Riverine and coastal floods develop more slowly, giving you hours or sometimes days to evacuate, but they spread across wider areas and stick around longer. Your evacuation route should move perpendicular to rivers, creeks, and coastlines, heading inland and uphill as quickly as possible. Don’t plan routes that follow rivers downstream or parallel the coast, because these paths keep you in the flood zone longer and increase the chance of hitting blocked roads.
For riverine flooding, find routes that cross rivers at higher elevation bridges far from the main flood zone, or better yet, routes that skip river crossings entirely. Avoid floodplains, low farmland near rivers, and areas marked as wetlands. For coastal flooding and storm surge, pick routes that head directly inland, away from the ocean, bays, and tidal zones. Storm surge can push water miles inland along flat coastal plains, so distance from the coast matters more than elevation in some regions. Plan routes that gain both elevation and distance from the water source.
Urban Flooding Route Selection
Urban flooding creates unique hazards because water pools in streets, parking lots, and underpasses where drainage systems fail. Your evacuation route must avoid underground passages, low highways, tunnels, and any road section that dips below the surrounding grade. Water flows to the lowest point. In cities, that point is often a highway underpass or a parking garage entrance.
Pick routes that stay on elevated streets and avoid areas known to flood during heavy rain. Ask local residents which intersections become impassable first. Plan around those trouble spots. Skip routes through downtown areas with aging infrastructure and limited drainage capacity. If possible, use highways and major roads that sit on elevated roadbeds, but watch for low points where water collects. Urban areas also have the advantage of more alternate routes, so plan multiple options and be ready to shift paths based on real time conditions.
Monitor weather patterns and official forecasts to anticipate which flood type you’re likely to face. Flash flood warnings suggest intense rain and rapid water rise. River flood warnings indicate sustained rainfall upstream and rising river levels. Hurricane and storm surge warnings signal coastal flooding. Urban flood advisories point to overwhelmed drainage systems. Each warning type should trigger a specific pre planned route variation that accounts for the expected water behavior, speed, and extent.
Final Words
Knowing how to choose a flood evacuation route means the difference between reaching safety and facing dangerous conditions.
Your primary route should stick to high ground and avoid low-lying areas, bridges over fast water, and roads with flooding history. Your alternates give you options when the unexpected happens.
Use FEMA flood maps, practice your routes, and keep your vehicle ready with a full tank and emergency supplies.
Share the complete plan with everyone in your household, including where to meet and how to stay in contact.
When warnings come, don’t wait. The route you planned today is the one that gets you out tomorrow.
FAQ
How do you plan an evacuation route?
You plan an evacuation route by identifying paths to high ground that avoid flood zones, bridges over fast-moving water, and low-lying roads. Map a primary route and at least two alternates using FEMA flood maps and local topography. Drive each route during normal conditions, note travel times and landmarks, and share the complete plan with all family members before an emergency occurs.
What are the 5 P’s of evacuation?
The 5 P’s of evacuation are People, Prescriptions, Papers, Personal needs, and Priceless items. This framework helps you remember to gather family members, grab vital medications, secure important documents in waterproof containers, pack essential supplies like water and food, and protect irreplaceable belongings before leaving. Use this checklist to pack quickly when evacuation orders come.
How do you establish evacuation routes?
You establish evacuation routes by using FEMA flood maps to identify high-risk zones to avoid, then selecting paths on higher ground that lead away from rivers, streams, and flood-prone areas. Download offline maps, mark primary and alternate routes with physical landmarks, and drive each path to confirm accessibility. Store paper copies in waterproof containers and share routes with every family member.
Which route should you use to evacuate?
You should use your primary evacuation route unless road conditions, rising water, or official guidance make it unsafe or impassable. In those cases, switch immediately to your pre-planned alternate route that takes a different path to safety. Monitor real-time alerts from local authorities and adapt your route based on current flooding conditions, not outdated information.