
When seconds count and floodwater is rising, will you waste 20 minutes searching for your passport, your medication, or cash? Most people realize they need an evacuation bag only when it’s too late to pack one properly. A flood evacuation bag gives you three days of survival supplies ready to grab, which means you can leave immediately when warnings come instead of scrambling through closets while water creeps toward your door. This checklist covers every item you actually need, organized by priority so you can build your bag step by step without forgetting anything that matters.
Essential Items for Your Flood Evacuation Bag
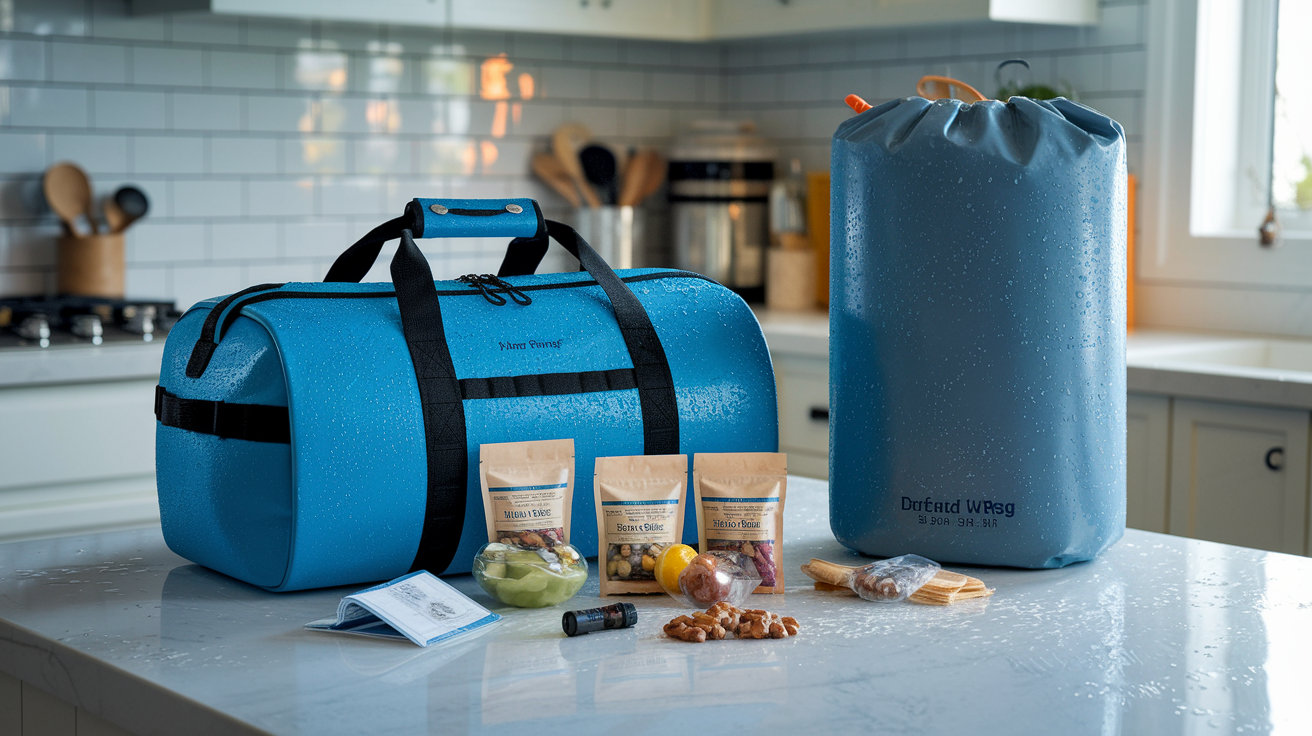
When floods force you to leave fast, you need a 72-hour supply ready to grab. Each family member needs their own go bag with at least three days of essentials. Floods destroy more than other disasters because water soaks everything. Your flood evacuation bag needs extra waterproofing steps that regular emergency kits skip.
Use waterproof duffel bags, dry bags with 60 to 100 liter capacity, or waterproof backpacks that seal completely. You might need two or more bags per person to fit all your supplies. Store them in high, dry locations like upper floor closets. Never in basements where rising water traps them. Make sure bags are light enough to carry when full, because you might need to move them quickly or walk a distance to reach safety.
Priority Category 1: Water and Food Supplies
Water is the first thing your body needs. Pack 3 gallons per person, which breaks down to 1 gallon per day for 3 days. Store it in sealed portable containers you can carry. If you have pets, add 1 gallon per animal per day for 3 days.
Non-perishable food covers your 3 day requirement per person. Choose energy bars, canned goods with pop top lids, dried fruits, nuts, ready to eat meals, and peanut butter. Skip cans that need openers unless you pack a manual can opener separately. Add disposable plates, cups, and utensils so you can eat without washing dishes. For pets, pack 3 days of their regular food in a waterproof container so it stays dry and they’ll actually eat it.
Priority Category 2: Critical Documents and Identification
All documents go inside waterproof containers or sealed plastic bags. Wet paperwork becomes useless paste.
Start with identification: driver’s license copies, passport copies, and birth certificates. Add health insurance cards, social security cards, and medical consent forms for any minors. Financial documents include bank account information with routing numbers, credit and debit card details, government benefits documentation, retirement and investment account statements, and the last 2 years of tax returns. Property records need copies of your deed or lease agreement, vehicle registration and title, marriage or divorce papers, and a will with power of attorney paperwork.
Insurance policies covering home, auto, life, and flood protection all need copies in your bag. Pack emergency cash in $200 to $500 worth of small bills, because ATMs lose power during floods. Store a USB drive with scanned copies of everything and include important keys for your home, vehicle, and safe deposit box.
Priority Category 3: Medical Supplies and Medications
Your first aid kit needs adhesive bandages in various sizes, sterile gauze pads, medical tape, antibiotic ointment, pain relievers like ibuprofen and acetaminophen, antiseptic wipes, scissors, tweezers, and a thermometer. Add 3 pairs of medical gloves for treating injuries safely.
Pack 3 to 7 days of prescription medications at minimum, with copies of the prescriptions themselves. Write a list of medications with exact dosages and the names of prescribing doctors. If you wear contacts, include solution and a case. Extra eyeglasses go in a hard case, and if you use hearing aids, pack extra batteries. Document your blood type and allergy information on a card. Medical consent forms for minors let others get them treatment if you’re separated.
COVID-19 and contamination protection includes N95 masks or respirators, hand sanitizer with 60 to 90 percent alcohol concentration, and anti-bacterial wipes for surfaces.
Priority Category 4: Communication and Power Equipment
Your cell phone charger needs both wall and car adapters, because you don’t know where power will be available. A portable power bank with 10,000 mAh or higher capacity keeps devices running when outlets are underwater. Keep the power bank charged at all times so it’s ready when you grab the bag. Pack extra charging cables in case one breaks.
A battery-powered or hand-crank weather radio with NOAA alerts tells you what’s happening when cell towers fail. Add a flashlight with extra batteries, choosing LED models that last longer. A headlamp gives you hands-free lighting for tasks like changing a tire or helping others. Pack extra batteries in various sizes.
Write an emergency contact list on waterproof paper and include at least one out-of-state contact who won’t be affected by the same disaster. A whistle signals rescue teams if you’re trapped. Solar chargers work as optional backups when batteries run out.
Priority Category 5: Clothing and Personal Protection
Pack 1 to 2 complete outfits per person including underwear and socks. A poncho or rain jacket keeps you dry during evacuation. Seasonal clothing matters, because power loss means no heating or cooling. Warm layers work for cold weather, while light loose-fitting clothes help in heat. Each person needs 1 emergency thermal blanket and 3 12-hour body warmers.
Waterproof boots with slip and puncture resistance protect your feet from contaminated floodwater and hidden debris. Work gloves that are waterproof and cut-resistant let you move objects safely. Safety goggles without ventilation holes keep contaminated water out of your eyes. Add a hat and bandana for sun protection and dust filtering. Everyone needs sturdy closed-toe shoes even if you packed boots, in case boots get damaged.
Priority Category 6: Hygiene and Sanitation
Travel-size hand sanitizer with 60 to 90 percent alcohol cleans hands when water is contaminated. Small bottles of soap and shampoo, a travel pack of toilet paper, and wet wipes or moist towelettes handle basic cleaning. Pack a toothbrush, toothpaste, feminine hygiene products, tissues, and deodorant. A quick-dry towel takes up less space than regular towels.
A portable toilet kit or waste bags solves bathroom problems when plumbing fails. Plastic bags for waste disposal need 3 10-gallon bags and 1 30-gallon bag per person. Floods make regular toilets unsafe to use, so these supplies become essential fast.
Priority Category 7: Tools and Utility Items
A multi-tool or knife handles dozens of tasks in one compact item. Duct tape fixes leaks, secures tarps, and repairs gear. Rope or paracord at 50 feet gives you options for securing items or creating makeshift repairs. Waterproof matches or a lighter start fires for warmth or cooking. A manual can opener opens food when electric openers are useless.
Pack a wrench or pliers for shutting off utilities like gas and water to prevent additional damage. Scissors, plastic sheeting, heavy-duty trash bags, and a permanent marker round out your basic tools. These items weigh little but solve major problems during evacuations.
Special Needs Additions
Families with infants need formula or milk for 3 days, bottles, baby food, and diapers calculated at 8 to 10 per day. Add wipes, diaper rash cream, and pacifiers. For children, pack comfort toys, games, age-appropriate snacks, and medical consent forms that allow others to get them treatment. Elderly family members may need mobility aids, adult hygiene products, and extra medication supplies.
Pet supplies include a leash, carrier, food and water bowls, litter box with litter, vaccination records, and recent photos in case you’re separated. Recent photos help others identify and return lost pets.
Waterproofing everything properly means storing all paper documents in waterproof containers or sealed ziplock bags first. Use dry bags or waterproof duffel bags as outer containers. Place electronics and cash in separate waterproof pouches so if one fails, everything isn’t ruined. Double-bag items that water will destroy completely, like medications and documents.
How to Waterproof Your Critical Documents and Electronics
Floodwater destroys paper and electronics in seconds, which turns proving your identity into a nightmare. You’ll need those documents to file insurance claims, access financial accounts, prove property ownership, and replace lost items. Without protected copies, you might wait weeks or months for replacements while trying to rebuild your life.
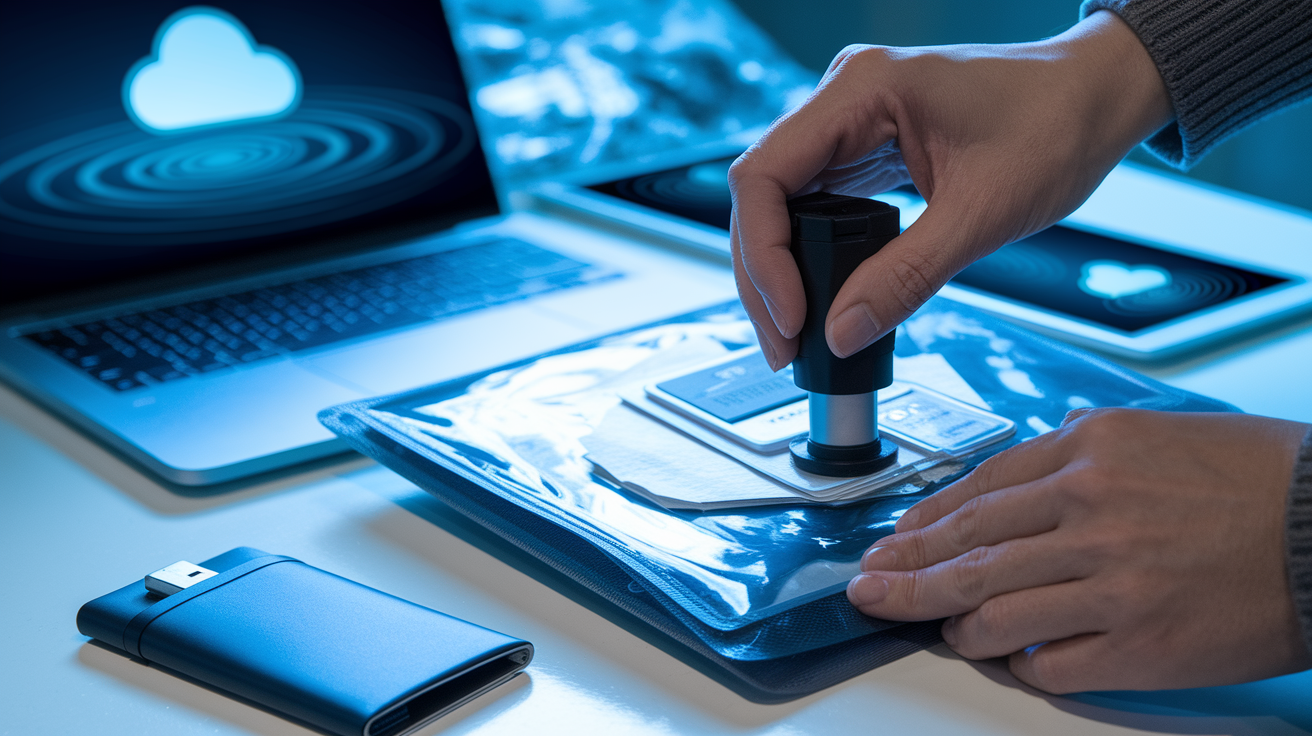
Physical waterproofing starts with waterproof document holders that have sealed edges, not just water-resistant folders. Heavy-duty ziplock bags work when you double-bag everything, putting sealed documents in one bag inside another. Vacuum-sealed bags provide long-term storage for documents you rarely need to access. Waterproof pouches designed specifically for cash and cards keep your emergency money dry and ready to use. Consider laminating critical one-page documents like insurance cards and emergency contact lists, though this only works for items that won’t need updating.
Digital backup strategies give you access to documents even when physical copies wash away. Scan every important document to a USB drive and store that drive in a waterproof case inside your evacuation bag. Upload copies to cloud storage services like Google Drive or Dropbox so you can access them from any location with internet. Email copies to yourself as attachments, because email accounts stay accessible when you lose everything else. Store digital copies on password-protected devices and include digital photos of your home’s contents for insurance documentation.
The layered protection approach combines methods for maximum safety. Put documents in sealed bags, then inside waterproof containers, then inside your waterproof duffel bag. Test seals before an emergency by sealing a paper towel in the container and submerging it in a sink for 10 minutes. Keep emergency cash in a separate waterproof pouch from documents, because if one seal fails, you haven’t lost everything at once.
Creating and Practicing Your Family Flood Evacuation Plan

Your packed evacuation bags sit useless if your family doesn’t know the plan. Everyone needs to understand exactly what to do, where to go, and how to communicate if you get separated during the chaos of a flood evacuation.
Plan essentials start with mapping two evacuation routes from your home and neighborhood, because floods often block the obvious path. Identify two meeting locations: one near home like a specific intersection or parking lot for minor emergencies, and one outside your neighborhood like a relative’s house or community center for major disasters when you can’t return home. Assign clear responsibilities to each family member, deciding who grabs which bags, who helps children or elderly family members, and who secures pets in carriers. Establish how you’ll communicate if someone is separated, since cell networks often fail during disasters. Determine exactly where bags are stored and make sure everyone who might need to grab them can reach that location.
Your complete evacuation plan includes these components:
- Primary and alternate evacuation routes mapped on paper and digitally
- Two predetermined meeting locations with full addresses
- Emergency contact list with local and out-of-state contacts
- Designated responsibilities for each family member
- Location of utility shut-offs for gas, water, and electricity
- Plan for pets and livestock including carriers and transport
- Arrangements for reaching family members at work or school
- Special considerations for family members with disabilities
Practice evacuation drills twice per year minimum. Time how long it actually takes to gather bags and leave, because you’ll discover problems during practice instead of during a real emergency. Update your plan when circumstances change, like new family members arriving, address changes, or different jobs and schools. Make sure all family members including children know the meeting locations and emergency contact numbers by memory, because phones die and paper gets lost.
Optimal Storage Locations for Your Flood Evacuation Bag
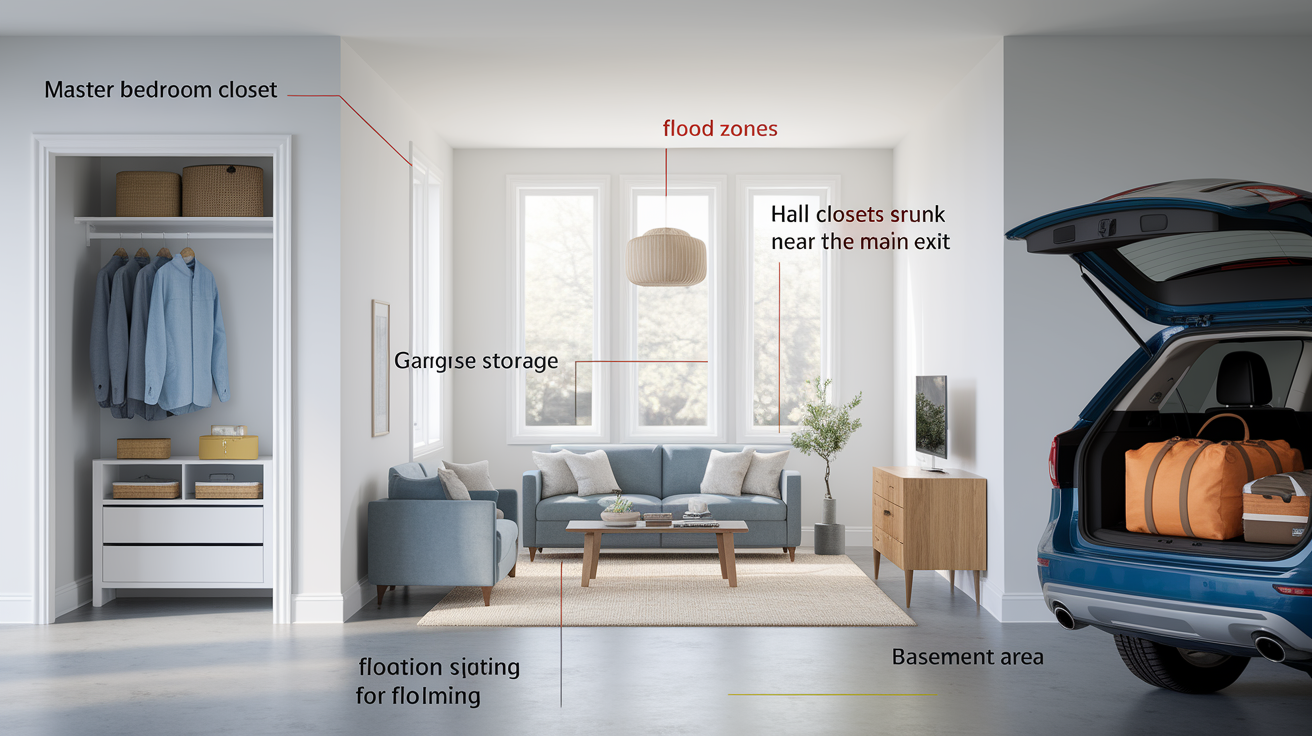
Where you store evacuation bags determines whether you can actually grab them when water rises. Bags need high and dry locations on upper floors or elevated shelves. Never in basements or ground-level storage where floodwater reaches first. Place them near primary exit routes so you don’t waste time searching. All family members who might need to grab the bags must be able to reach the storage location easily. Protect contents from extreme temperatures in attics or garages that could damage medications, batteries, and food.
Multiple storage strategies improve your chances of having supplies when you need them. Keep primary bags near your most-used exit, usually a front door or garage door. Store vehicle kits in cars parked on higher ground rather than low-lying garages. Consider keeping workplace emergency kits if you spend significant time away from home. Inform all household members of exact storage locations using specific descriptions, not vague ones like “in the closet.”
Accessibility matters as much as location. Avoid locked storage unless all family members have keys or know combinations. Keep bags visible as reminders to maintain them and update contents. Ensure other items don’t block bags, because moving boxes during an evacuation wastes critical minutes. Consider mobility limitations of family members who need to carry bags, storing their lighter bags within easier reach.
| Storage Location | Advantages | Disadvantages | Best For |
|---|---|---|---|
| Master bedroom closet upper shelf | Protected from temperature extremes, private, accessible at night | May require stool to reach, not near exit | Primary family bags, medications, documents |
| Hall closet near main exit | Quick grab location, easy access for all family members, near evacuation route | May lack space for multiple bags, higher traffic area | Grab and go bags, children’s bags, pet supplies |
| Garage upper storage | Large capacity, near vehicle, out of daily living space | Temperature extremes, may flood in severe events, requires ladder | Seasonal gear rotation, bulk supplies, tools |
| Vehicle trunk | Already mobile, immediate access if leaving from work, always with you | Temperature damage risk, theft risk, limited if vehicle unusable | Car emergency kit, work evacuation supplies, backup bag |
| Home office | Documents nearby, climate controlled, accessible during work hours | May be far from bedrooms, not ideal for nighttime evacuation | Document backups, electronics, work-related evacuation needs |
| Basement or ground floor | None for flood preparedness | First area to flood, bags become inaccessible or destroyed | Never use for flood evacuation bags |
Maintenance Schedule and Bag Inspection Checklist
Packed bags become useless when food expires, batteries die, medications lose potency, documents go out of date, or clothing no longer fits. Regular maintenance keeps your emergency supplies functional instead of providing false security. A well-stocked bag from five years ago might contain expired everything. You’re no better off than having no bag at all.
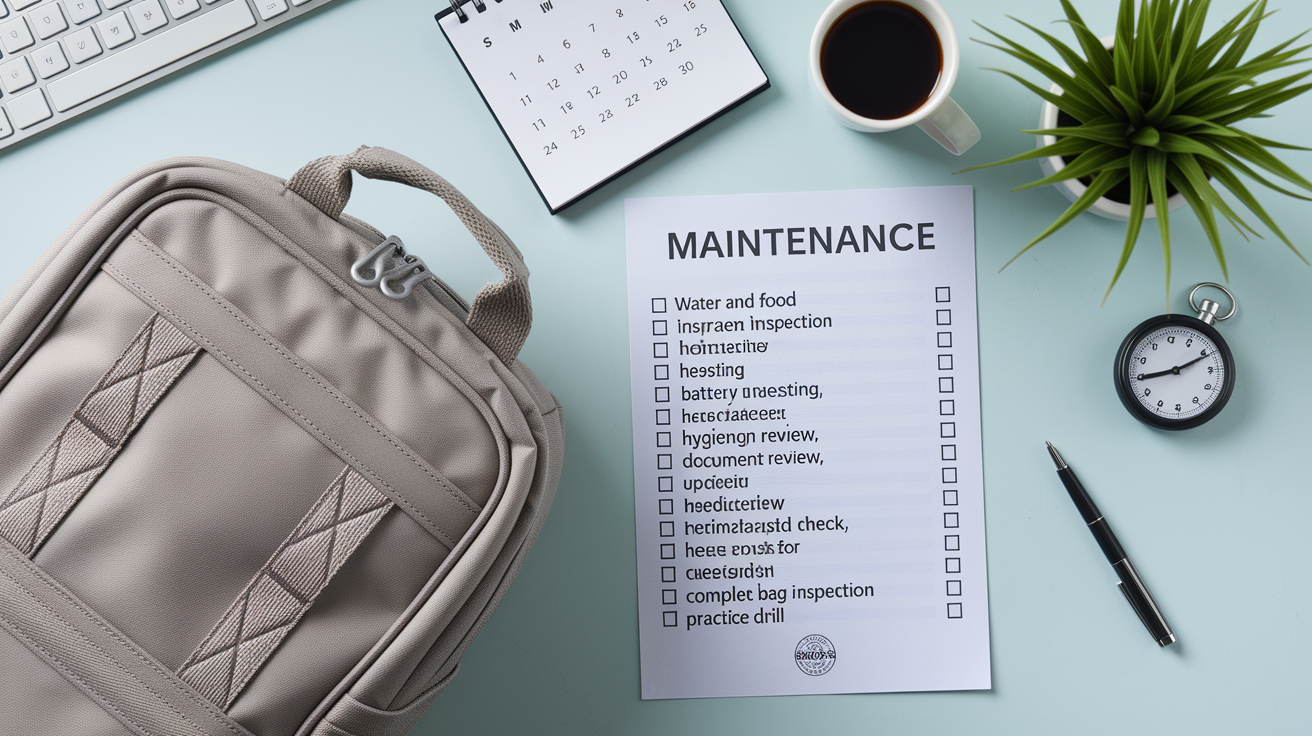
Set recurring calendar reminders tied to memorable dates you won’t forget. Daylight saving time changes happen twice yearly and make natural maintenance triggers. New Year’s Day works for annual reviews. Birthday months remind you to check if children’s clothing still fits. Conduct systematic inspections using a printed checklist and document the last inspection date on a tag attached to the bag exterior.
| Maintenance Task | Frequency | Specific Actions |
|---|---|---|
| Water and food inspection | Every 6 months | Check expiration dates, replace expired items, rotate stock to use oldest first |
| Battery testing | Quarterly | Test flashlight and radio batteries under load, replace weak batteries, check power bank charge level |
| Medication review | Every 3 months | Verify prescriptions haven’t expired, update dosages if changed by doctor, replace 3 to 7 day supply |
| Clothing updates | Seasonally in Spring and Fall | Swap winter and summer gear, check if children’s clothes still fit, replace worn items |
| Document review | Annually | Update insurance policies, refresh contact information, verify ID copies are current, check for address changes |
| Hygiene product check | Every 6 months | Replace dried-out items, check hand sanitizer expiration, refresh first aid supplies |
| Complete bag inspection | Annually | Dump entire contents, clean bag interior, verify all items present per checklist, test zippers and waterproofing seals |
| Practice drill | Twice yearly | Time actual evacuation, ensure all family members can carry their bags, verify everyone knows the plan |
Set specific dates right now for your first maintenance check. Use your phone’s calendar app with repeating alerts so you don’t rely on memory. Assign maintenance responsibility to a specific family member who will actually do it, not just whoever remembers. Keep a simple log of maintenance dates either on a card inside the bag or in a digital note. Think of maintenance as ongoing preparedness rather than a one-time task you check off and forget.
Final Words
Your flood evacuation bag checklist is only useful if you can grab it fast and everything inside actually works.
Set your first maintenance check date right now, before you close this page. Put it in your phone calendar with a repeat alert.
Store your bags high and dry where everyone in your household knows exactly where to find them.
Run a quick practice drill this week. Time it. See what slows you down, then fix it.
When flooding threatens your area, you’ll have one less thing to worry about because your bags are ready, your plan is clear, and your family knows what to do next.
FAQ
What would you put in an emergency bag for a flood?
An emergency bag for a flood should contain a 3-day supply of water (3 gallons per person), non-perishable food, critical documents in waterproof containers, prescription medications, first aid supplies, flashlight with batteries, weather radio, cell phone charger, change of clothing, and emergency cash in small bills.
What should be included in an evacuation bag?
An evacuation bag should include water and food for 3 days, identification and insurance documents in waterproof storage, prescription medications, first aid kit, flashlight, battery-powered radio, cell phone charger, emergency contacts list, clothing change, personal hygiene items, and sturdy waterproof boots for protection.
What are the 10 essential survival kit items?
The 10 essential survival kit items are 3 gallons of water per person, 3-day food supply, first aid kit with medications, flashlight with extra batteries, weather radio, cell phone with charger, waterproof document container with ID and insurance, emergency cash, change of clothes, and emergency contact list.
What are the 5 P’s of evacuation?
The 5 P’s of evacuation are People and pets (family members and animals), Papers (identification, insurance, deeds in waterproof storage), Prescriptions (medications and medical supplies), Pictures (irreplaceable photos and keepsakes), and Personal computer or phone (with chargers and important digital files backed up).
How much water should I pack per person for flood evacuation?
You should pack 3 gallons of water per person for flood evacuation, based on 1 gallon per person per day for a minimum 3-day supply. Store water in sealed portable containers and pack an additional 1 gallon per pet per day for 3 days.
Where should I store my flood evacuation bag at home?
Store your flood evacuation bag in a high and dry location on upper floors, never in basements or ground-level storage. Keep bags near primary exit routes on elevated shelves or in upper closets where all family members can quickly access them during an emergency.
How often should I update my flood evacuation bag?
You should inspect your flood evacuation bag every 6 months to check water and food expiration dates, test batteries quarterly, review medications every 3 months, and update clothing seasonally. Conduct a complete bag inspection annually and practice evacuation drills twice yearly.
What documents need to be in my evacuation bag?
Your evacuation bag needs copies of driver’s license, passport, health insurance cards, birth certificates, social security cards, vehicle registration, bank account information, insurance policies (home, auto, flood), property deed or lease, recent tax returns, and emergency cash, all stored in waterproof containers.
How do I waterproof documents in my evacuation bag?
Waterproof your documents by placing them in heavy-duty ziplock bags with double-bagging, then storing them inside waterproof document holders or dry bags. Create digital backups on USB drives in waterproof cases and upload scanned copies to cloud storage for access from any location.
What type of bag works best for flood evacuation?
A waterproof duffel bag or dry bag with 60-100 liter capacity works best for flood evacuation. Choose bags that are easily portable with comfortable handles or straps. You may need two or more bags per person to carry all essential supplies.
What medications should I pack in my flood kit?
Pack a 3-7 day supply of all prescription medications with copies of prescriptions, pain relievers, first aid supplies, contact lens solution, extra eyeglasses, and any life-saving medications. Include a medication list with dosages, prescribing doctors, and allergy information in waterproof storage.
How do I prepare evacuation bags for children?
Prepare evacuation bags for children with properly sized clothing changes, age-appropriate snacks, comfort toys or games, medical consent forms, and any special medications. Ensure children’s items are packed in bags small enough for kids to carry themselves if old enough.
What food should I pack for a 3-day flood evacuation?
Pack non-perishable food including energy bars, canned goods with pop-top lids, dried fruits, nuts, peanut butter, and ready-to-eat meals. Include a manual can opener, disposable plates and utensils, and ensure food requires no refrigeration or cooking during the evacuation period.
Should each family member have their own evacuation bag?
Each family member should have their own evacuation bag containing personal essentials like clothing, medications, and comfort items. Adults can carry shared family supplies like water, food, and documents distributed across multiple bags to balance weight and ensure critical items aren’t lost together.
What tools should I include in my flood evacuation bag?
Include a multi-tool or knife, duct tape, rope or paracord, waterproof matches, manual can opener, wrench for shutting off utilities, scissors, plastic sheeting, heavy-duty trash bags, and a permanent marker. These tools help with emergency repairs and utility shut-offs.
How do I protect electronics in my evacuation bag from water damage?
Protect electronics by placing cell phones, chargers, power banks, and USB drives in separate waterproof pouches or sealed ziplock bags. Store them inside waterproof outer bags as a second layer of protection and test seals before emergencies to ensure waterproofing works.
What should I pack for pets in a flood evacuation?
Pack a 3-day supply of pet food and water (1 gallon per pet per day), leash and carrier, collapsible food and water bowls, litter box with litter for cats, vaccination records, current photos of pets, and any medications your pet needs regularly.
How can I make my evacuation bag easier to carry during a flood?
Make your evacuation bag easier to carry by using a waterproof backpack or duffel with padded straps, distributing weight across multiple smaller bags instead of one heavy bag, and ensuring total weight doesn’t exceed what you can comfortably carry for extended periods.
What hygiene items are essential for flood evacuation?
Essential hygiene items include hand sanitizer with 60-90% alcohol, travel-size soap and shampoo, toilet paper, wet wipes, toothbrush and toothpaste, feminine hygiene products, deodorant, and quick-dry towel. Pack portable toilet kits or waste bags for sanitation when facilities aren’t available.
When should I practice using my flood evacuation plan?
Practice your flood evacuation plan twice yearly by timing how long it takes to gather bags and leave, ensuring all family members know meeting locations and emergency contacts, and verifying everyone can carry their assigned bags. Update the plan whenever circumstances change.