
You just finished pumping water out of your living room, and now you’re staring at soaked carpet, dripping walls, and that weird smell starting in the corner. What happens in the next 48 hours will either save your home or cost you thousands in mold damage and rotted structure. Drying out after a flood isn’t just pointing fans at wet stuff and hoping for the best. You need the right sequence, the right equipment, and you need to move fast because mold starts growing within 24 to 48 hours. This guide walks you through safe water removal, contamination risks, when to call pros, and the exact equipment setup that actually dries materials instead of just pushing moisture around.
Immediate Water Removal and Safety Assessment
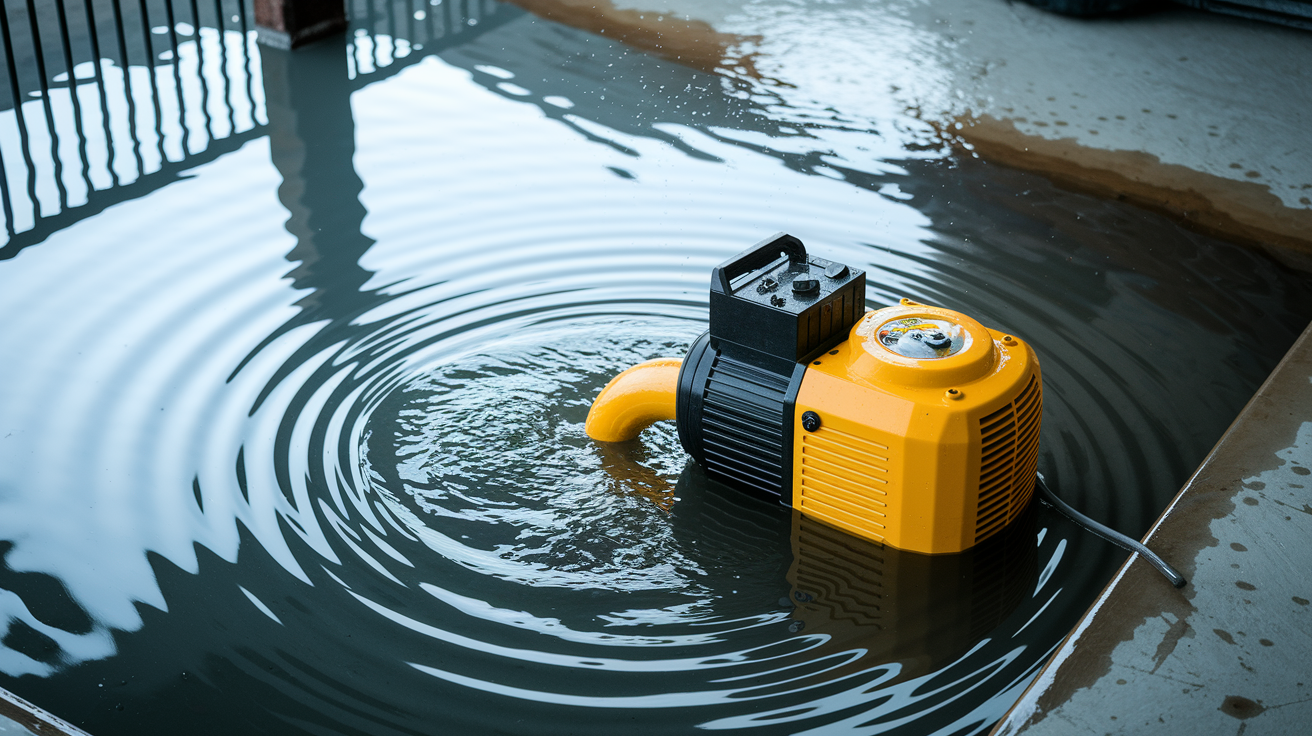
Start pumping standing water deeper than 2 inches with a submersible pump. Use a wet/dry shop vacuum for whatever’s left and any surface moisture. Get moving right now. Every hour you wait makes this worse.
Before you touch anything, shut off power at the main breaker panel. Check for gas leaks by smell and listen for hissing sounds near gas lines. Look up at ceilings for sagging. Step carefully on floors that feel soft or unstable. Water and electricity will kill you, and damaged structure can collapse without warning. If water reached your electric meter during flooding, don’t restore power until a licensed electrician inspects and approves the system. Energizing a house that’s not ready can cause fires and serious injuries.
You’ve got 24 to 48 hours before mold starts growing in wet materials. Items dried within this window have way higher salvage potential compared to stuff that stays wet longer. Mold spores activate fast in moisture and organic materials like drywall, insulation, and wood.
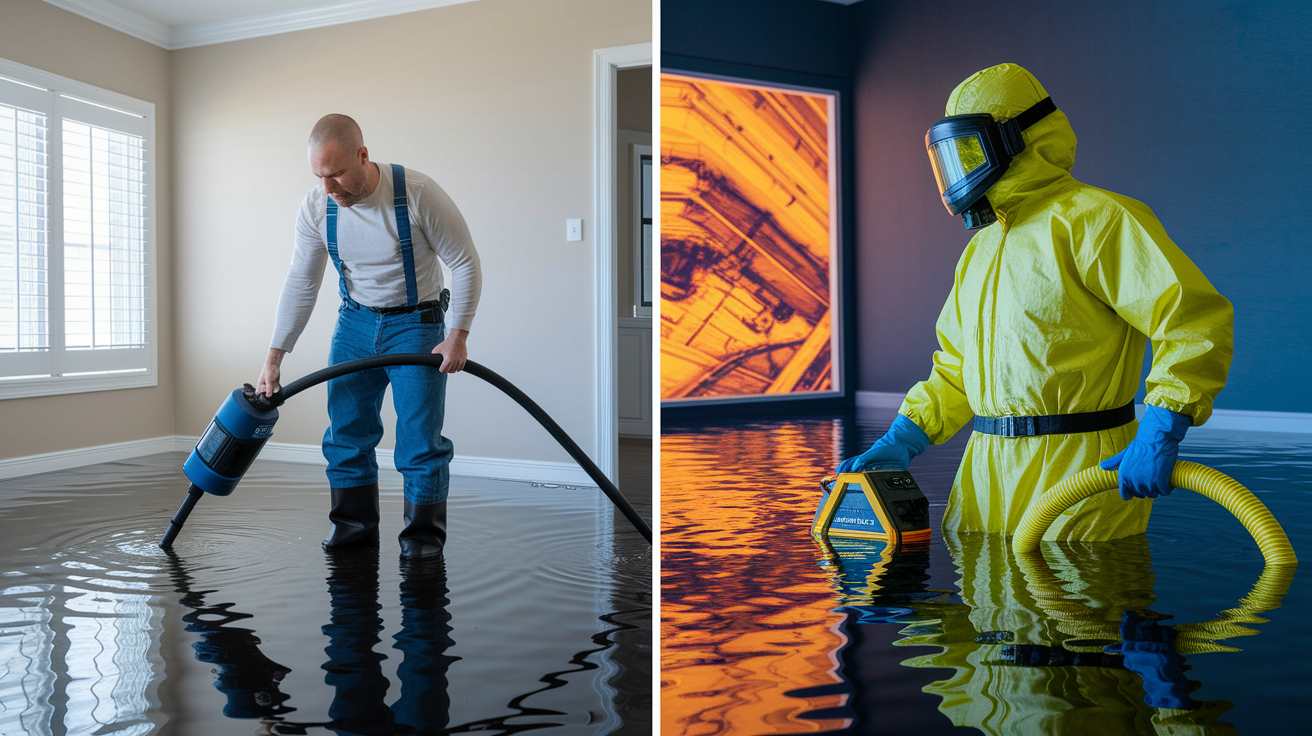
Essential protective equipment based on contamination level:
Clean water (broken pipe, rain): rubber gloves, waterproof boots, safety glasses
Gray water (washing machine, dishwasher): add N95 respirator mask, long sleeves, pants
Black water (sewage, flooding): upgrade to N99 or P100 respirator, full body protective clothing, face shield
Any category: rubber gloves that extend past wrists, boots rated for standing water
Sewage contact: dispose of all clothing after cleanup, shower immediately with antibacterial soap
Chemical exposure: check material safety data sheets and add appropriate respirator cartridges
Follow this sequence for complete flood recovery. First, complete your safety assessment and gather protective equipment. Second, remove standing water with pumps and vacuums. Third, extract moisture from carpets and porous materials. Fourth, position fans to create airflow patterns pushing moisture outside. Fifth, run dehumidifiers in closed spaces to capture airborne moisture. Finally, monitor humidity levels and moisture readings until materials return to normal ranges.
Understanding Water Contamination Categories Before Home Drying

Water contamination level determines whether you can safely dry your home yourself or if professionals with specialized training must handle the work. Category 1 water is relatively safe for homeowner cleanup. Category 2 and 3 water contain bacteria, chemicals, and pathogens requiring professional restoration services with proper protective equipment and disinfection protocols.
Water contamination categories and examples:
Category 1 (Clean Water): Broken supply lines, sink overflows, rainwater through roof leaks, melting snow, toilet tank leaks (no bowl contact). This water doesn’t contain sewage or chemical contaminants when it first contacts your home.
Category 2 (Gray Water): Washing machine discharge, dishwasher leaks, toilet bowl water without feces, aquarium spills, waterbed punctures. Contains biological or chemical contaminants that can cause discomfort or illness if contacted or consumed.
Category 3 (Black Water): Sewage backup, flooding from rivers or streams, toilet overflow with feces, stagnant Category 1 or 2 water that’s been sitting more than 48 hours. Grossly contaminated with bacteria, fungi, viruses, and may contain pesticides, heavy metals, or toxic organic substances.
Category 1 water allows DIY drying with basic safety equipment like rubber gloves and boots. Category 2 water requires N95 respirators, protective clothing, and proper disinfection of all contacted surfaces using EPA registered antimicrobial solutions. Category 3 water demands professional restoration services because the health risks from bacteria exposure, chemical contact, and airborne pathogens exceed safe DIY thresholds. All porous materials contacted by Category 3 water, including drywall, insulation, carpet, and padding, must be removed and properly disposed of rather than dried and saved. Any flood water that entered your home from outside should be treated as Category 3 regardless of how clean it appears.
Professional Restoration vs DIY: Making the Right Choice
Flood severity, water contamination level, and structural damage potential determine whether you need certified restoration professionals or can handle drying yourself. Category 2 or 3 water contamination requires professionals trained in microbial remediation and equipped with commercial extraction and drying equipment.
Scenarios requiring professional restoration services:
Sewage backup or Category 3 contaminated water contact anywhere in your home
Standing water deeper than 2 inches covering multiple rooms or entire basement
Visible structural damage including sagging ceilings, buckling floors, or cracked foundation walls
Water damage affecting electrical systems, HVAC equipment, or gas lines
Mold growth visible on walls, ceilings, or building materials before drying begins
Flooding affecting crawl spaces where structural joists and supports absorbed water
IICRC certified restoration professionals bring commercial dehumidifiers that pull 10 to 20 times more moisture from air than residential units. Their truck mounted extraction equipment removes water from carpets and padding faster than any shop vacuum. Air movers position precisely to dry wall cavities and under flooring systems. Thermal imaging cameras detect hidden moisture behind walls and ceilings that moisture meters miss. Certified technicians follow drying standards that prevent mold growth and structural damage, not guesswork. Professional structural assessment catches compromised walls and floors before someone gets hurt, and their expertise prevents expensive repairs that result from incomplete drying. Building Performance Institute certified contractors and HERS Raters can develop rehabilitation plans that address hidden moisture damage and prevent future mold growth.
DIY drying works for minor clean water incidents like a broken supply line that affected one room, small amounts of rainwater from a roof leak, or surface water that never exceeded half an inch deep. You need proper equipment including rental commercial fans and a residential dehumidifier, and the time to monitor progress for days or weeks. The affected area must be small, the contamination must be Category 1, and you must have no concerns about structural damage. Even minor flooding benefits from a professional moisture assessment after you complete drying, because hidden moisture in wall cavities and subflooring causes problems months later. Professionals prevent expensive mold remediation, structural repairs, and health issues that cost far more than initial restoration services.
Standing Water and Moisture Extraction Equipment
Pump standing water from basements and crawl spaces using a submersible pump designed for dirty water and debris. Position the pump at the lowest point where water collects. Discharge water away from your foundation at least 20 feet to prevent it flowing back. For basement flooding, pump water slowly over 24 to 48 hours rather than all at once. Rapid removal can cause hydrostatic pressure issues that crack foundation walls or cause them to bow inward. Professional water restoration companies are recommended for most situations involving standing water because they understand structural risks and have commercial pumping equipment.
After pumping, use a wet/dry shop vacuum to extract remaining water from carpets, hard surface floors, and crevices where puddles remain. Work methodically across the affected area, making multiple slow passes over carpets to pull water from padding and subflooring. Empty the vacuum tank frequently because water is heavy and reduces suction when the tank fills. On hard surfaces, use the floor attachment and squeegee water toward the vacuum nozzle. Change vacuum filters after cleanup because waterlogged filters lose efficiency and can grow mold. Before extraction, remove large debris, mud, and silt by hand using a shovel and heavy duty trash bags. Debris damages pump impellers and clogs vacuum hoses.
| Extraction Method | Best For | Limitations |
|---|---|---|
| Submersible pump | Standing water over 2 inches deep, basements, crawl spaces, large flooded areas | Can’t extract from carpets or porous materials; requires discharge location; slow pumping needed for structural safety |
| Wet/dry vacuum | Remaining water after pumping, carpet and padding extraction, hard surface moisture, corners and crevices | Small tank capacity requires frequent emptying; time intensive for large areas; limited suction power compared to commercial extractors |
| Mops and towels | Final surface moisture removal, small spills, cleaning residual mud after equipment extraction | Extremely time intensive; doesn’t extract moisture from porous materials; towels become contaminated and require disposal or sanitizing |
Air Circulation and Ventilation Systems for Flood Drying

Air movement accelerates evaporation by replacing humid air around wet surfaces with drier air. Without circulation, moisture saturated air sits against wet materials and slows drying to a crawl. Moving air creates evaporation that pulls moisture from building materials and belongings into the air, where it can be exhausted outside or captured by dehumidifiers.
Pedestal fans direct airflow at walls, ceilings, and upper portions of rooms where moisture migrates as it evaporates. Position floor blowers and circulator fans at carpet level, pointing along baseboards and into corners where air naturally stagnates. Window fans bring fresh outside air into the space and exhaust humid interior air. Place intake fans in windows on the cooler side of your home and exhaust fans in windows on the opposite side to create a draft that pulls air through the entire affected area. High velocity air movers create focused airflow that penetrates into wall cavities when you remove baseboards and drill weep holes. Avoid pointing fans directly at furniture or belongings that can be damaged by constant airflow.
Effective fan positioning strategies:
Create cross ventilation by opening windows on opposite sides of the room and positioning fans to push air from intake to exhaust
Point fans at 45 degree angles toward walls rather than straight on to create airflow patterns that move along the wall surface
Position floor fans 6 to 12 inches from baseboards to dry the critical wall to floor junction where moisture collects
Use one exhaust fan for every two intake fans to create positive pressure that pushes moisture outside rather than pulling humid air in
Rotate fan positions every 6 to 8 hours to dry different areas and prevent moisture pockets from forming in corners and behind furniture
Natural ventilation through open windows works when outside air is drier than inside air. Check outdoor humidity levels using a weather app or hygrometer before opening windows. When outdoor humidity exceeds 60 percent, close windows and rely entirely on dehumidifiers and mechanical air circulation. Opening windows during high humidity conditions brings more moisture into your home rather than removing it. Temperature also matters, because warmer air holds more moisture than cooler air.
Dehumidification Process for Structural Drying
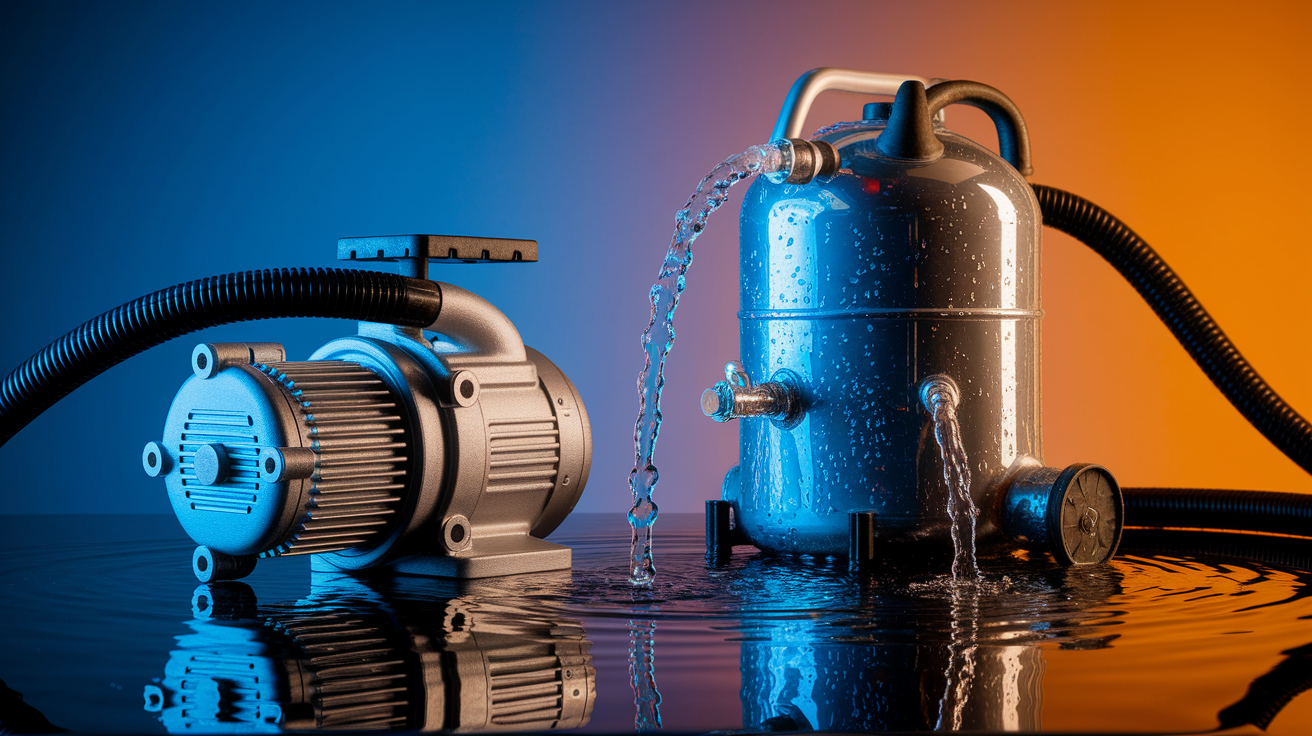
Dehumidifiers remove airborne moisture that fans can’t eliminate. Fans accelerate evaporation by moving air across wet surfaces, but that moisture stays in the air until something captures it. Dehumidifiers pull humid air across cold coils that condense moisture into water that drains into a collection bucket or pump discharge.
Residential dehumidifiers rated for 50 to 70 pints per day handle minor flooding affecting one or two rooms. These units work fine for surface water cleanup and small leaks. Severe flooding requires commercial dehumidifiers rated for 150 to 200 pints per day. Commercial units cost more to rent but dry structural materials in days rather than weeks. Professional restoration services bring multiple commercial dehumidifiers and calculate the exact capacity needed based on affected square footage and materials.
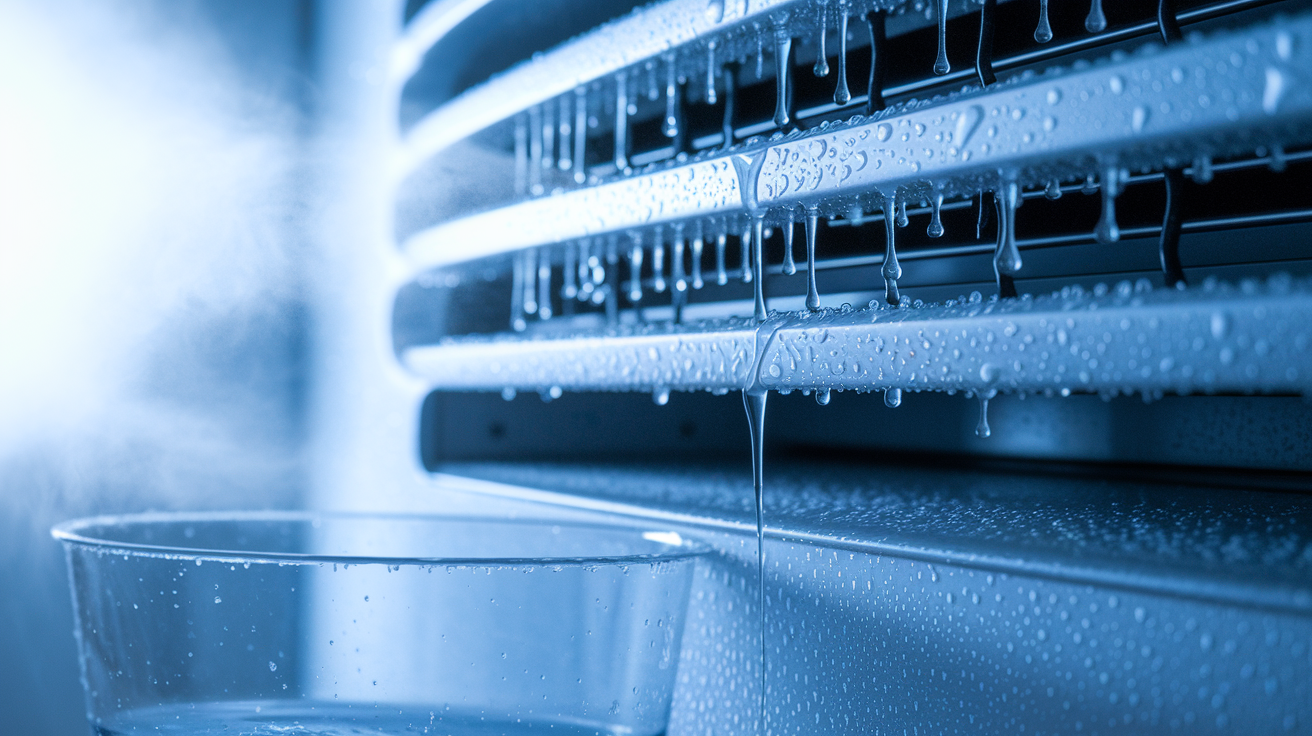
Run dehumidifiers in closed spaces with windows and doors shut to maximize efficiency. Open windows allow humid outdoor air to enter, overwhelming the dehumidifier’s capacity. Position units in the center of the affected area with at least 12 inches of clearance on all sides for proper airflow. Keep room temperature above 60°F because dehumidifier coils freeze and stop working in colder conditions. Empty collection buckets every 4 to 8 hours or connect a drain hose to a sink or sump pump. Dehumidifiers work continuously during structural drying, running 24 hours per day for the entire drying period.
Target indoor humidity below 50 percent throughout the drying process. Use an inexpensive hygrometer to monitor humidity levels in each affected room. When humidity stays below 50 percent for 48 consecutive hours and moisture meter readings return to normal ranges, structural drying is complete. Expect this process to take one to four weeks depending on materials affected and saturation levels. Dehumidification works together with air circulation, not as a replacement. Fans move moisture from materials into air. Dehumidifiers capture that moisture and remove it from your home.
Removing Wet Materials and Salvaging Flood-Damaged Items

Remove carpet padding, insulation, and saturated drywall within 24 hours because these porous materials can’t be effectively dried and will harbor mold. Carpet padding acts like a sponge that holds water against subflooring and prevents drying even with extraction equipment. Wet insulation loses R value, grows mold, and adds weight that can cause ceiling collapse. Drywall saturated more than halfway up the wall from floor level must be cut out because the gypsum core disintegrates and loses structural integrity.
Hardwood floors, subflooring, and wall cavities require professional assessment before removal decisions. Solid hardwood can often be dried and saved if water was clean (Category 1) and drying begins within 48 hours. Engineered wood flooring separates at the lamination layers and usually requires replacement. Subflooring may be salvageable depending on saturation level and water contamination category. Wall studs and framing generally survive flooding and dry successfully if insulation and drywall are removed promptly. Waterlogged furniture and upholstered items can be saved if they were contacted by Category 1 water, have sentimental value worth the drying effort, and you can completely dry them within 48 hours. Discard upholstered items contacted by Category 2 or 3 water because cleaning can’t remove bacteria and contaminants from padding and fabric. Document everything with photographs before disposal to support insurance claims. Keep damaged items in your garage or yard until the insurance adjuster completes inspection and approves disposal.
| Material Type | Salvageable | Must Remove | Drying Time |
|---|---|---|---|
| Carpet and padding | Carpet only if Category 1 water, professionally extracted and dried within 48 hours | All padding; carpet if Category 2 or 3 water or mold visible | Carpet 3 to 5 days; padding not salvageable |
| Drywall | If wet less than halfway up wall, Category 1 water, dried within 48 hours | Saturated more than halfway; any Category 2 or 3 contact; wet longer than 48 hours | Not applicable because too porous for reliable drying |
| Hardwood floors | Solid hardwood with Category 1 water; may cup but can be refinished after drying | Engineered wood; any Category 3 contact; buckling or separation visible | 2 to 4 weeks for stabilization |
| Insulation | Closed cell spray foam only if dried within 24 hours | Fiberglass batts, cellulose, open cell foam; all types if Category 2 or 3 water | Not salvageable because it holds moisture and grows mold |
| Furniture | Solid wood, metal, plastic if Category 1 water and dried within 48 hours | Upholstered items with Category 2 or 3 contact; particle board or MDF | 3 to 7 days depending on size and material |
| Personal items | Hard goods, plastics, metals, photos if dried quickly; washable clothing | Porous items with Category 3 contact; paper goods saturated beyond recognition | 1 to 3 days for most items |
Drying Hardwood Floors and Subflooring After Flooding
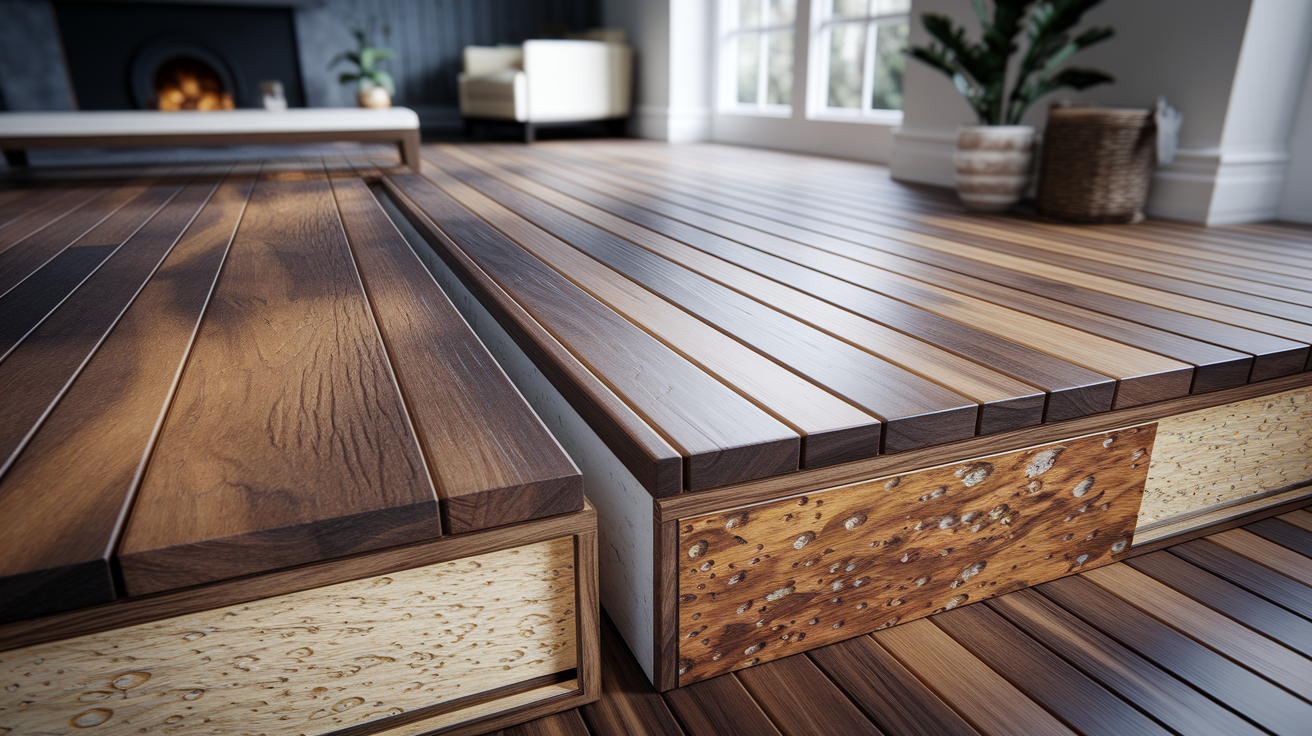
Water causes wood to swell as fibers absorb moisture. Hardwood flooring cups when edges absorb water faster than centers, creating boards that curl upward along the edges. Crowning happens when moisture enters from below through wet subflooring, causing board centers to rise higher than edges. Buckling occurs when boards absorb so much water they push against each other and lift from the subfloor. Subflooring absorbs water quickly because it sits directly against wet carpet padding and has no protective finish like hardwood floors.
Remove baseboards and shoe molding from all walls in affected rooms to allow air circulation at floor edges where moisture concentrates. Position floor fans at baseboard level pointing along the wall to create airflow in the gap between flooring and drywall. Drill small weep holes through hardwood into the subflooring at corners and every 6 feet along walls to inject air between flooring layers. Professional floor drying systems use mats placed over flooring that create suction to pull moisture from underneath, or inject warm dry air between layers. Use moisture meters with pin type probes that penetrate wood to track moisture content in both hardwood and subflooring. Check readings every 48 hours at multiple locations across the affected area.
Hardwood floors can be saved if water was clean (Category 1), flooding was discovered and dried within 48 hours, and moisture content returns to normal levels. Solid hardwood that cups during drying can be sanded and refinished after it stabilizes. Engineered hardwood separates at lamination layers and buckles permanently, requiring replacement. Replace subflooring if moisture readings stay elevated after two weeks of drying, or if the plywood has delaminated and feels soft or spongy when pressed. Any Category 2 or 3 water contact requires subflooring replacement regardless of drying success because contaminants penetrate wood grain. Expect hardwood to take two to four weeks to stabilize after moisture is removed. Wood continues adjusting as moisture redistributes and evaporates, so refinishing or board replacement should wait until readings stay stable for one week.
Wall Cavities and Ceiling Drying Techniques
Moisture trapped in wall cavities creates perfect conditions for mold growth on studs, insulation, and the back side of drywall where you can’t see it happening. Water wicks up drywall from saturated carpets and baseboards, traveling 12 to 24 inches above visible water lines. Wet insulation in walls and ceilings prevents airflow and keeps moisture against wood framing where rot develops slowly.
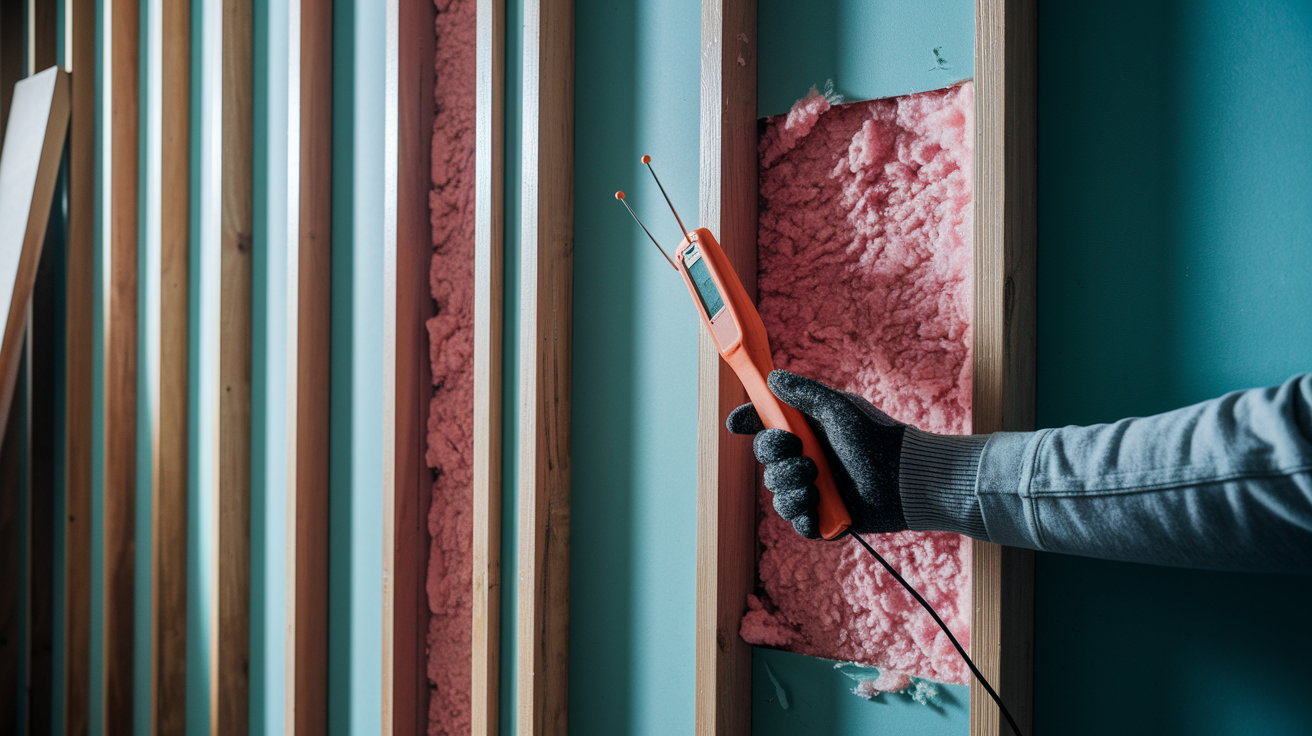
Detect hidden moisture using a pin type moisture meter that penetrates drywall and insulation to measure studs and cavities. Check walls at multiple heights starting at floor level and working upward in 12 inch increments until readings return to normal. Look for visual signs including water stains, paint bubbling, wallpaper peeling, or drywall that feels soft when pressed. Baseboards that separate from walls indicate moisture has been present long enough to break adhesive bonds. Thermal imaging cameras show temperature differences that reveal wet areas as darker spots because evaporating moisture cools surfaces.
Dry wall cavities by removing baseboards and drilling 3/4 inch weep holes through drywall at floor level every 16 to 24 inches along affected walls. Insert plastic nozzles or PVC tubes into holes and direct floor fans into the openings to inject air into the cavity. Air circulation inside the wall pushes moisture through the weep holes and drywall surface. For severe saturation or Category 2 or 3 water, remove drywall from floor level up to 6 inches above the visible water line or moisture readings. Exposed wall cavities dry faster and allow insulation removal and stud inspection. Replace any insulation that contacted floodwater because it can’t be effectively cleaned or dried. Full drywall removal becomes necessary when water reached halfway up walls, flooding involved Category 3 contamination, or moisture readings stay elevated after one week of drying with weep holes and air circulation. Remove drywall in horizontal cuts along studs so replacement panels attach properly to framing.
Crawl Space and Basement Flooding Recovery
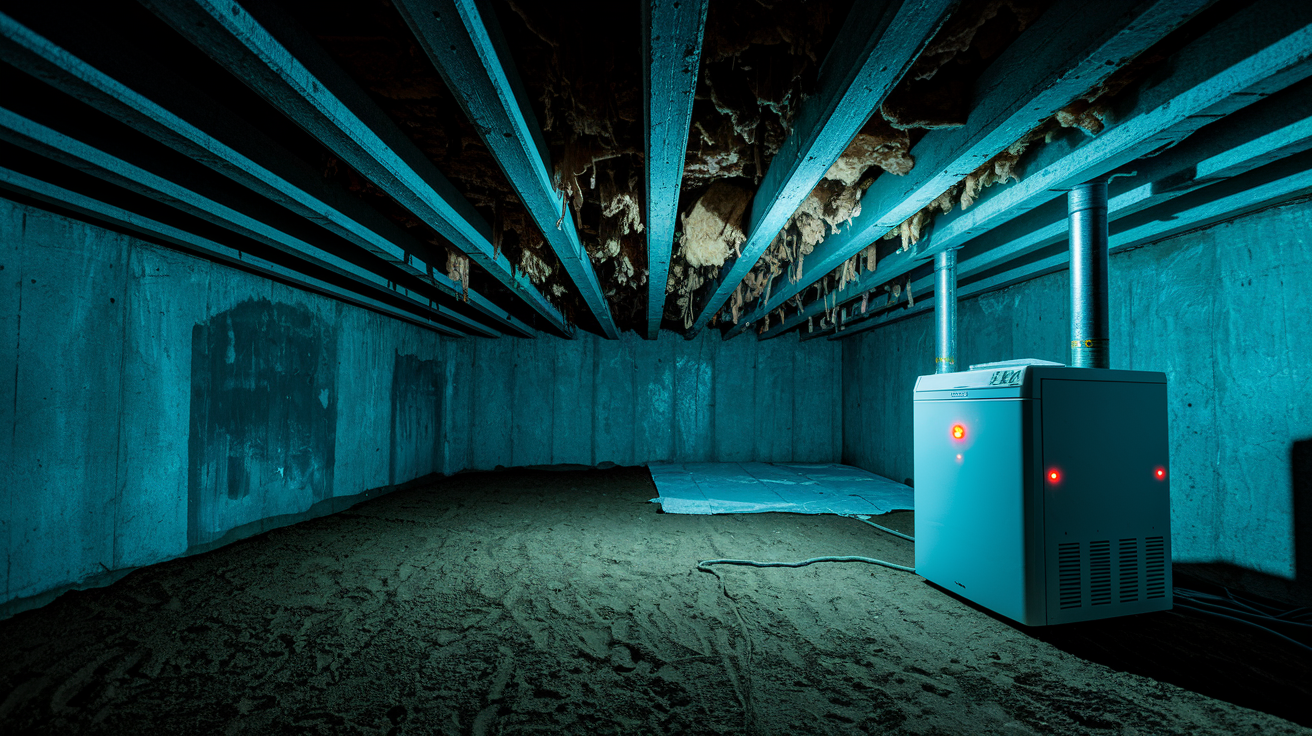
Basements and crawl spaces have naturally high humidity because they sit below grade with minimal ventilation and constant ground moisture contact through concrete. Flooding in these spaces creates problems that continue months after visible water disappears. Poor air circulation prevents natural drying, and cool temperatures slow evaporation rates.
Remove standing water from basements carefully by pumping no more than one third of the water volume per day. Rapid pumping reduces hydrostatic pressure supporting foundation walls from inside while soil outside remains saturated and pushes inward, causing walls to crack or bow. After pumping, extract moisture from carpet and remove all wet materials including carpet padding, boxes stored on floors, and drywall that wicked water. Clean mud and debris from floors, walls, and mechanical equipment before starting fans and dehumidifiers. Position commercial dehumidifiers to run continuously until humidity drops below 50 percent. Crawl space drying requires removing all wet fiberglass insulation from floor joists because it holds moisture against wood framing and creates rot. Pull down insulation batts carefully to avoid releasing fiberglass particles into air. Inspect floor joists for soft spots, dark staining, or crumbling that indicates rot has started. Position fans to blow air across joists and crawl space floor, but understand that natural drying in crawl spaces takes longer because of poor ventilation.
Long term moisture control in crawl spaces requires encapsulation with heavy duty vapor barriers covering soil floors and sealing foundation walls. Dehumidification systems designed for crawl spaces maintain humidity year round and prevent seasonal moisture that causes mold growth and structural damage from rotting floor joists. Mold exposure from crawl spaces and basements affects sleep patterns and cognitive function beyond causing allergy induced asthma, because mold spores travel through floor gaps and HVAC systems into living spaces. After flooding, consult Building Performance Institute certified contractors who can develop rehabilitation plans that address moisture sources and prevent future problems.
Mold Prevention and Disinfection During Home Drying
Mold spores need three things to activate and grow: moisture, organic material, and 24 to 48 hours of time. Flooding provides all three, which is why immediate action matters more than perfect technique. Spores that are always present in air land on wet drywall, wood, insulation, and carpet, then begin growing colonies that spread rapidly across surfaces and through materials.
Prevent mold during active drying by maintaining indoor humidity below 50 percent with dehumidifiers, removing all porous materials that can’t be dried within 48 hours, and running air circulation continuously to prevent moisture pockets. Rapid drying creates conditions where mold can’t establish colonies. Remove carpet padding, insulation, and saturated drywall within 24 hours because these materials provide ideal mold growth conditions and can’t be reliably dried before spores activate. Temperature control helps because mold grows fastest between 70 and 90 degrees, so cooler drying conditions slow growth, though cold air also slows evaporation and extends drying time.
Surfaces requiring disinfection after flood contact:
All hard surfaces including floors, walls, countertops, and cabinets contacted by Category 2 or 3 water
Building materials that will remain in place after drying, including wall studs, floor joists, and subflooring after wet drywall removal
Mechanical equipment including HVAC systems, water heaters, and electrical panels contacted by floodwater
Salvaged furniture, appliances, and belongings that contacted contaminated water
Professional antimicrobial treatment becomes necessary when Category 3 water contacted living spaces, when mold growth is visible on building materials before drying begins, or when occupants have health conditions including asthma or immune system issues that make mold exposure dangerous. Antimicrobial foggers and sprays applied by certified technicians create chemical barriers that prevent mold spore activation on treated surfaces. Medical grade air purification systems with HEPA filters remove mold spores from air for allergy and asthma sufferers during the drying process. Avoid UV or bipolar ionization products because they lack third party research showing effectiveness and may cause respiratory issues.
Drying Timeline and Monitoring Moisture Levels
Surface materials including tile, vinyl, and painted drywall that didn’t saturate dry in 3 to 5 days with proper air circulation and dehumidification. Structural materials including wall studs, floor joists, subflooring, and hardwood take 1 to 4 weeks depending on saturation level and wood thickness. Use the general rule of one month of drying time for every inch of wall thickness before moving back into the property, though moisture monitoring provides more accurate completion signals.
Monitor drying progress with a moisture meter that measures water content in different materials. Pin type meters with probes that penetrate surfaces work best for wood, drywall, and subflooring. Check moisture content every 48 hours at the same locations to track drying trends. Acceptable moisture content for framing lumber ranges from 8 to 12 percent depending on climate. Drywall should measure below 1 percent. Hardwood flooring target ranges from 6 to 9 percent. Take baseline readings in unaffected areas of your home to establish normal ranges for comparison. Monitor indoor humidity with an inexpensive hygrometer placed in the center of affected rooms away from dehumidifier discharge. Humidity should drop below 50 percent within the first week and stay there throughout the drying process.
Incomplete drying shows as condensation on windows and mirrors in affected rooms, cool spots on walls when touched, musty odors that develop or strengthen rather than fade, and visible moisture or dampness when pressing paper towels against surfaces. Walls and floors should feel dry to touch and match temperature of surrounding unaffected surfaces. Musty smells indicate mold growth has started somewhere in the drying area. When humidity stays below 50 percent for 48 consecutive hours and moisture meter readings return to normal baseline ranges, structural drying is complete. Wait one additional week with stable readings before beginning repairs and reconstruction to ensure moisture isn’t redistributing through materials. Rushing repairs traps residual moisture behind new drywall and creates guaranteed mold problems.
Documentation and Insurance Claims for Flood Damage
Photograph and video all damage before moving or removing anything from affected areas. Insurance adjusters need to see damage extent, water levels, and which belongings were contacted by floodwater. Walk through each affected room slowly with your phone camera, narrating what you see, including water marks on walls showing flood height, damaged furniture and belongings, saturated flooring, and ceiling damage.
Insurance documentation best practices during flood recovery:
Take wide shots showing entire rooms and close up photos of specific damage to walls, floors, furniture, and belongings
Photograph water line marks on walls with a measuring tape showing exact height from floor level
Document serial numbers and model numbers of damaged electronics, appliances, and HVAC equipment before disposal
Keep detailed written lists of all discarded items including purchase dates and estimated replacement costs
Save receipts for all emergency purchases including pumps, fans, dehumidifiers, cleaning supplies, hotel stays, and meals if displaced from home
Contact your insurance company within 24 hours of discovering flood damage to begin the claims process. Understand that flood insurance and homeowners insurance cover different damage types. Homeowners insurance typically covers water damage from burst pipes, roof leaks, and appliance failures, but excludes flooding from external water sources. Flood insurance through FEMA’s National Flood Insurance Program covers damage from rising water, storm surge, and heavy rain that overwhelms drainage systems. Get professional estimates for restoration services, equipment rental costs, and anticipated repairs before the adjuster visit. Restoration companies provide detailed estimates at no charge that help ensure adequate claim settlements. Keep all damaged items in your garage, yard, or storage location until the adjuster completes inspection and provides written approval for disposal. Discarding items before adjuster inspection can result in claim denial for those specific belongings. Document your mitigation steps including when you began water removal, equipment used, and timeline of drying efforts, because insurance policies require prompt action to prevent additional damage.
Final Words
You now know how to dry out your home after flood damage using the right sequence: remove standing water fast, set up air circulation, run dehumidifiers, and monitor moisture levels until everything tests dry.
The 24 to 48 hour window matters most. Act within that timeframe and you’ll prevent mold, save more belongings, and avoid expensive structural repairs down the road.
Document everything with photos before you start cleanup. Keep damaged items until your insurance adjuster sees them.
If water reached above a few inches, contamination is heavy, or you see structural damage, call a certified restoration pro. Some situations are too risky and too technical for DIY methods.
Your home can recover from flooding. Start now, stay safe, and take it one step at a time.
FAQ
How long does it take to dry out a house after a flood?
The time to dry out a house after a flood typically ranges from 3 days to 4 weeks depending on flood severity, affected materials, and drying methods used. Surface materials dry within 3 to 5 days, while structural components like walls and subflooring require 1 to 4 weeks of continuous drying.
In what order should you dry out a flooded home?
You should dry out a flooded home in this order: first remove standing water with pumps, then extract remaining moisture with wet/dry vacuums, position fans for air circulation, run dehumidifiers in closed spaces, and finally monitor humidity levels until complete drying occurs.
How do you dry things out after a flood?
You dry things out after a flood by removing standing water immediately, using fans to create airflow across wet surfaces, running dehumidifiers to pull moisture from the air, and removing porous materials like carpet padding within 24 hours to prevent mold growth and speed overall drying.
How much does it cost to dry a flooded house?
The cost to dry a flooded house ranges from $1,200 to $5,000 for professional restoration depending on flood extent and damage severity. DIY drying using rented equipment costs $200 to $800 but takes longer and may miss hidden moisture requiring future remediation.
What safety precautions should you take before drying a flooded home?
Before drying a flooded home, you should shut off power at the breaker box, check for gas leaks, wear rubber gloves and waterproof boots, use N-95 respirators for contaminated water, and assess structural stability before entering any flooded space to prevent electrical shock and injury.
What protective equipment do you need for flood cleanup?
For flood cleanup, you need rubber gloves, waterproof boots, N-95 or better respirator masks for contaminated water, eye protection, and protective clothing that covers skin. Equipment requirements increase with contamination level, with Category 3 sewage water requiring full protective gear.
What are the water contamination categories in flood damage?
Water contamination categories in flood damage include Category 1 clean water from pipes, Category 2 gray water from appliances and washing machines, and Category 3 black water from sewage backups or river flooding requiring professional cleanup and disinfection protocols.
When should you hire a professional for flood drying instead of DIY?
You should hire a professional for flood drying when facing sewage backup, standing water over 2 inches in multiple rooms, Category 2 or 3 contaminated water, structural damage concerns, or visible mold growth requiring specialized equipment and certified expertise.
What equipment removes standing water from a flooded house?
Equipment that removes standing water from a flooded house includes submersible pumps for water over 2 inches deep, wet/dry shop vacuums for remaining surface water, and extraction tools for carpets. Pumps handle basements and crawl spaces while vacuums target hard surfaces.
How do you position fans to dry a flooded room effectively?
You position fans to dry a flooded room by directing airflow toward open windows and doors, placing floor blowers on wet carpets and baseboards, using pedestal fans for walls and ceilings, and creating cross-ventilation patterns that push moisture outside the home.
What humidity level should you maintain when drying a flooded home?
When drying a flooded home, you should maintain humidity levels below 50 percent using dehumidifiers in closed spaces. Monitor progress with moisture meters and hygrometers, running dehumidifiers continuously until structural materials reach acceptable moisture content for your climate zone.
Which wet materials must be removed after flooding?
Wet materials that must be removed after flooding include carpet padding, drywall that stayed wet over 24 hours, saturated insulation, and any porous materials that cannot dry within 48 hours. These materials harbor mold and cannot be effectively dried in place.
Can hardwood floors be saved after flooding?
Hardwood floors can be saved after flooding if dried within 48 hours using fans, dehumidifiers, and removing baseboards for air circulation. Floors with minor cupping may flatten as they dry, but severe buckling, Category 3 water contact, or prolonged saturation typically requires replacement.
How do you dry hidden moisture in wall cavities?
You dry hidden moisture in wall cavities by removing baseboards for airflow, drilling small weep holes near the floor, using moisture meters to detect saturation levels, and removing drywall sections when readings show moisture above 20 percent or thermal imaging reveals trapped water.
What makes basement flooding different from main floor flooding?
Basement flooding differs from main floor flooding because below-grade spaces have poor natural ventilation, higher humidity from soil contact, structural pressure concerns during water removal, and increased mold risk requiring careful pumping, commercial dehumidifiers, and potential crawl space encapsulation.
How do you prevent mold growth while drying a flooded home?
You prevent mold growth while drying a flooded home by removing standing water within 24 hours, discarding porous materials immediately, maintaining humidity below 50 percent, running fans and dehumidifiers continuously, and applying antimicrobial treatments to surfaces contacted by Category 2 or 3 water.
How do you know when a flooded house is completely dry?
A flooded house is completely dry when moisture meter readings show wood below 15 percent, drywall below 12 percent, humidity stays below 50 percent for 3 consecutive days, surfaces feel warm and dry to touch, and no musty odors or condensation remain.
What should you document for flood insurance claims?
For flood insurance claims, you should document all damage with photos and videos before cleanup, keep damaged items until adjuster inspection, photograph water level marks, record mitigation steps taken with timestamps, and collect professional estimates for restoration services and equipment rental costs.